Yesterday was really hard. Our little puke machine is now two weeks old, and for whatever reason decided to spend 48 hours being inconsolably fussy and not sleeping at all. Was it gas? Was it something I ate? Is she getting too much or too little to eat? Maybe a UTI? Who knows. I was on the verge of taking her to the doctor, fully expecting to be told “yeah that’s how babies are,” when she finally settled down and slept.
Yeah, that's pretty much how I feel too.
Even with help – I had no less than three people come by at various points yesterday – dealing with a screaming newborn when you yourself haven’t slept at all is hard. RD was away on business and gone from 6am to midnight, by far the longest stretch I’ve had to manage without him. Not that he had it much better, going on a business trip on no sleep isn’t much fun either. I spent most of the day curled up on the couch, desperately wishing I could sleep while Bitmap’s great-grandmother took care of her. By the time my mother-in-law came over to keep me company in the evening I was pretty well cracked.
But today is a new day, and thanks to getting four whole consecutive hours of sleep I’m back to merely “exhausted” instead of “delirious.” Which may not be a ringing endorsement of my mood, but it’s enough to keep me going. Today was more like the fable of motherhood: great-grandma came over and helped with the cleaning while I did some work and caught up on email. Then we loaded my happy baby girl into the carrier and walked to the coffee shop where I listened to Granny complain about politics and the Catholic church, with a dash of neighborhood gossip for good measure.
Most days aren’t like today, but most of them aren’t like yesterday either. At two weeks old we don’t really have a “normal” yet. I celebrate the small victories, like going a whole day without being puked on, and every now and then find an opportunity to squeeze a part of my old life into my new one (like tending to my plants, most of which are dying from neglect). Every day I get a little better at it, and every day my daughter has something new to challenge me with.
If I could use only one word to describe becoming a parent, it would be “disarming.” I am someone who, until this week, possessed no maternal instinct and quite frankly does not find babies to be cute. And yet one look at my wrinkly little blob of a daughter drains me of all my jaded, snarky comebacks.
I think she's adorable, but my objectivity is questionable.
Our little Bitmap (a nickname which I only barely convinced RevolvingDork not to use as her middle name) is settling into her first week. RD and I are overwhelmed, but thrilled.
We delivered in a hospital downtown under the care of a large midwifery practice. We hired a doula, a support person who helps both the mother and father stay calm during what is likely to be an intense experience. Bitmap’s entry into the world wasn’t all what we expected, but we knew that we’d get a curve ball no matter what we planned for. This is her birth story.
Welcome, Bitmap
24 hours after my water broke I still wasn’t in labor. We went to the hospital, and decided the best option would be to induce. Induction was pretty much last on the list of things I wanted, I think I feared it even more than a c-section, but with absolutely no labor signs it seemed like the best option. I was admitted and given an IV of pitocin.
Bitmap's foot in her grandmother's hand
The plan was to labor without pain medication, and only get an epidural if I really felt I needed it. Early labor was tough, but my husband was amazing. The doula suggested different positions for managing the pain. I was free to get out of bed, so we moved all around the room with each contraction. The peak of them sucked, but I could rest between them. Pitocin often makes contractions much more painful than unmedicated labor, and because my water had been broken for so long I was on a pretty aggressive schedule. By 4 hours in the pitocin was cranked up to 14mu/min, and I could no longer rest at all between contractions. I started feeling delirious from pain and exhaustion, but wasn’t anywhere near fully dilated so I got an epidural. The anesthesiologist was great and within minutes of him placing the line I was feeling lucid again. I could still feel every contraction (and had to breathe through some of the bigger ones), but I no longer felt like I was going insane.
As the contractions got more intense, the baby wasn’t handling them well and I was put on oxygen. It actually helped that I had to breathe through the contractions, because inhaling the oxygen deeply kept the baby’s heart rate rock solid.
For one reason or another, my temperature started spiking and because my fluid had been ruptured for so long they had to assume it could be due to infection. I was started on antibiotics and given a fever reducer. An infection in the mother during labor is likely to affect the baby as well, so the baby would need to be given a course of antibiotics immediately after delivery. This was a pretty huge bummer, because it meant that the baby would have to go to the NICU for observation rather than come up to room with us.
Pulse monitor
As that information sunk in, I started to lose it. I was having the exact experience I dreaded – strapped to a bed covered in tubes getting every medical intervention on the planet. I started feeling like we were circling towards inevitable c-section, and really started fearing for the health of our baby. It seemed like every time the nurse came in, something new was going wrong. High temperature, high blood pressure, baby wasn’t handling contractions well again. There was a shift change and the new midwife wasn’t very communicative, which left me feeling frustrated and scared. Thankfully our nurse was AMAZING and was on top of everything, and did a really good job of explaining the things the midwife didn’t bother to. She and our doula managed to get me to a point of feeling at least OK, if not great.
After that low, things started turning around. My temperature dropped, and we found a position where the baby tolerated the contractions just fine. They even managed to get me into a sit-squat position where gravity could bring the baby down, which I thought was pretty impressive given the epidural. I got to 10 cm, and they said I could start pushing whenever I felt the urge, but I had this really intense back pain and I wanted to rest a bit before the Big Push, which I figured might take a while.
Unfortunately the back pain just got worse and worse, no matter what. It was strong enough that I had to use a lot of natural labor techniques during contractions, and my husband’s poor arms were shaking with exhaustion from doing so much counter pressure. I was mashing the button to increase the epidural (which was of course on a timer). After about an hour which was not at all restful, they suggested I just try pushing.
The second I started pushing, the back pain was GONE. It wasn’t muscle fatigue, it was the baby pressing on down on her way out the door. Pushing felt GREAT, which is to say it was still really hard work, but oh my god not having that back pain was AMAZING. They told me the baby was almost out, and I didn’t believe them. I started grinning like a madman and said all sorts of stupid things like “I’m having a baby!” over and over. In four contractions she was born. She was 6 pounds, 14 oz and 21.25 inches long.
Babies come with hats.
I got to spend a little time with her before she was whisked away to the NICU. Once I was cleaned up we went to visit her – compared to the rest of the NICU babies she was gigantic. She was covered in monitor leads and had an IV in her right arm, but her vital signs were good and she was sleeping peacefully.
Thanks to an amazing husband, doula, and the hospital nursing staff, I was able to have a really positive experience despite despite nothing going to plan. It was really hard, emotionally moreso than physically, but I feel like every decision we made was the right one. I wouldn’t change a single thing about it, and I’d definitely be willing to do it again. In a few years.
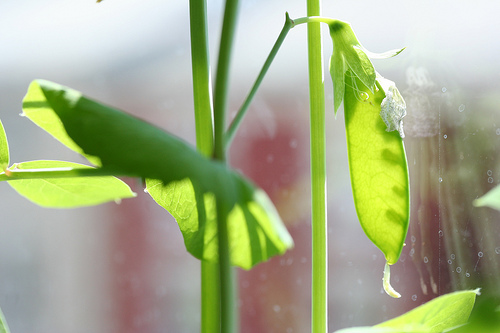
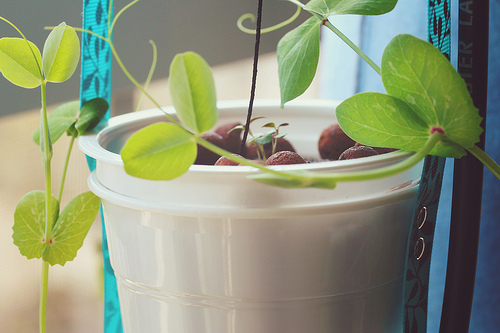
I almost didn’t see them, but this morning I noticed there are two peas hanging from my dwarf sugar pea plant in the windowfarm. Soon I’ll have delicious peas to eat!
I’ve made a little headway on my yellowing leaves issue, with the help of my giant hydroponics textbook. It may actually be a nutrient deficiency, specifically nitrogen. I’ve been running a rather dilute nutrient solution because so many of my plants were young, but the peas took off quickly and I think they needed more sooner than I gave it to them. The nice thing about having totally separate reservoirs for each column is that I can give the sugar peas a different mix than what I’m putting on my herbs, though they’re starting to look like mature plants now too.
I peek at the Craigslist listings for knitting machines from time to time, but don’t usually see much that strikes my fancy. Most of what’s available consists of overpriced Ultimate Sweater Machines (which are junk at any price). For buying and selling machines, the Ravelry sales group is much better.
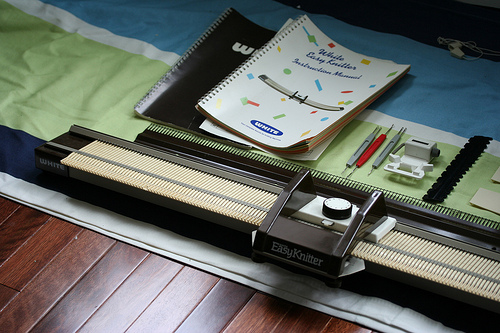
Last week I came across a White Easy Knitter for $25. The White Easy Knitter is made by the same company that made my beloved 1602, and is the same pitch (5mm). The Easy Knitter is a low-end hobby machine, and considerably simpler than the 1602, but the parts and accessories are interchangable. For $25 I wasn’t expecting it to be in great shape, but since replacement needles are about $1 each on ebay I figured it would be a good source for spare needles.
You may remember that my 1602 did not come with a full bed cast-on-comb, and I’ve attempted to make my own. My homemade comb works OK, but not great, and I’ve been keeping my eye out for an affordable replacement without much luck. I have yet to see one for less than $100 once shipping is factored in.
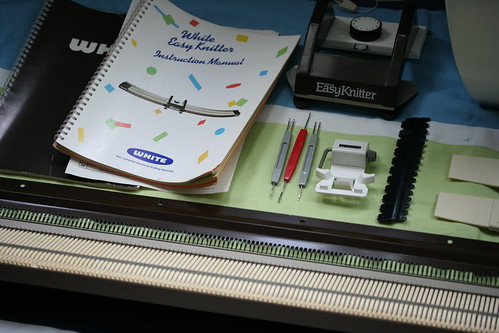
I’m happy to say that the $25 Easy Knitter came with both a full bed of 160 needles (all of which look to be in good shape) AND a full bed cast-on-comb. So that’s $260 in parts right there. The carriage for the Easy Knitter is sold as the intarsia carriage for the 1602, another $50+ part. It also came with some weights and transfer tools which will work with the 1602. Most curiously and surprisingly, it came with an original copy of the 1602 manual. Most mysterious, since the 1602 manual really doesn’t apply to the Easy Knitter at all.
The condition of the Easy Knitter bed itself is OK. A few of the flow combs are broken, but that doesn’t really prevent it from being used. It’s a very simple machine compared to the 1602. I plan on stealing a few needles from it to replace some bent ones on the 1602, but will otherwise leave the Easy Knitter in tact. It’s considerably lighter and smaller than the 1602, and will come in handy if I ever get around to teaching another knitting machine class.
Overall I feel like I’ve won the knitting machine lottery, with a solid $300+ worth of parts and tools compatible with my 1602 for only $25.
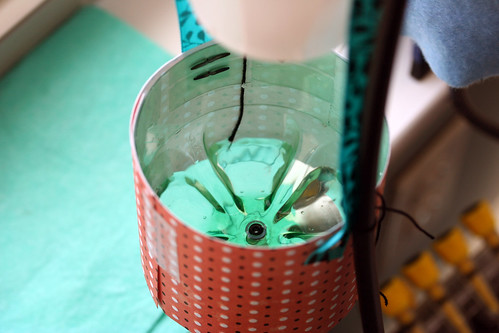
I noticed one of my windowfarm columns was going through a lot more water than the others, and realized that it had a slow leak. I’ve been using Deer Park 1.5 liter water bottles, upside down with a hose mounted in the cap, but the plastic is so thin that every time I touch them they get more deformed and “crunched” looking. So today I set out to build a better reservoir.
I used 1 liter soda bottles, which are considerably thicker plastic than the Deer Park bottles and will hopefully stand up a little longer. They’re also shorter, so they fit into the orchid pot (essential for keeping leaks off my floor) much better. I’ve had a few questions about how everything is set up, so here’s a more detailed build.
Drill a hole in the bottle cap slightly smaller than the outer diameter of your water-line tubing”
Push the end of the tubing through and secure with a barb (I cut mine from a t-joint connector I wasn’t using).
Drill two holes in the bottom of the bottle: one the same size as the cap hole, to serve as the water return, and a smaller one to allow air in/out of the bottle. Without the smaller hole, water won’t be able to flow into the bottle due to the air pressure build-up.
To make it easier to connect / disconnect the water return lines, I made a coupling using a short piece of flexible tubing (pushed through the hole in the bottle) and some smaller diameter rigid tubing (from the aquarium store). To connect the water return line, I just slide it over the piece of rigid tubing.
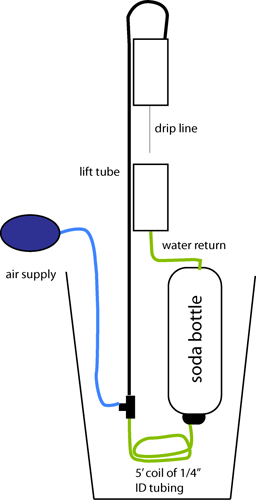
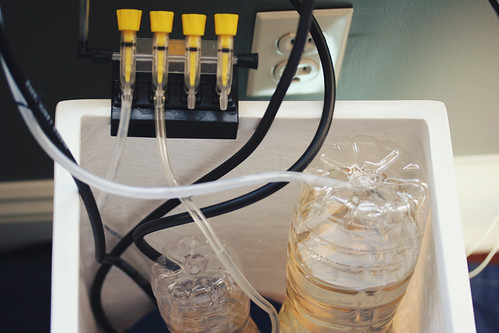
I’ve tried to get a good photograph of the set-up in action that explains the placement of the reservoirs and t-joints, but I think a diagram would be better. I’ve got 3 1L soda bottle reservoirs, one aquarium pump (Tetra Whisper 40), a 4-way gang valve, and each reservoir is connected to a T-joint via 5′ of 1/4″ diameter flexible tubing. The lift tube for each column is 5 feet of black landscaping tubing, which claims to be 1/4″ but is considerably thicker than the water supply tubing. The water return line is the same clear 1/4″ tubing I used for the water supply. The whole setup is contained in a tall orchid pot I got from Target. A Rubbermaid bin would work just as well, but the orchid pot looks better.
Black vs clear tubing is a personal preference thing. The clear is considerably easier to debug, but you need to be fairly vigilant about cleaning it or you’ll get algae build-up.
For the sake of my crude illustration skills, I’ve only drawn one reservoir and left out the gang valve.
So far nothing is leaking, but we’ll see how things look in the morning. If nothing else, the water tubes have gotten a thorough cleaning over the last two days.
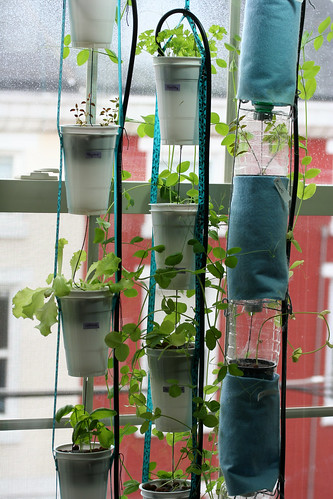
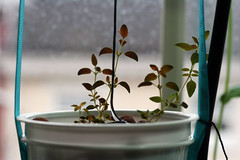
I haven’t had a lot of time to dedicate to the windowfarm, between finishing up work projects and getting ready for the baby’s imminent arrival. But I did manage to do some basic upkeep today, and take a few photos.
As you can see, I need to clean the windows
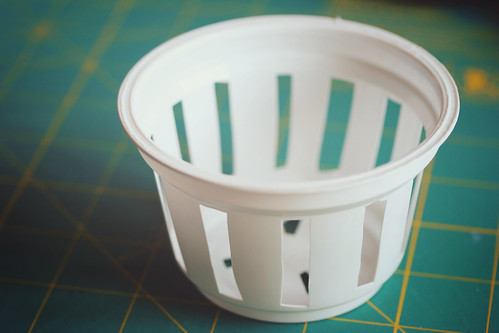
I added a third column, using the same design as column #2. I vastly prefer it to the water bottle columns, as it’s easy to lift up the net cups (yogurt containers) and clean the cups if need be. It also makes it easy to move plants between columns.
Tiny Thyme Plants
So far in column number 3 I have thyme, lettuce, basil, and some cherry tomatoes. The cherry tomatoes were started earlier this week, so they’re just tiny seedlings right now.
One of my reservoir bottles needed to be replaced, it was crunchy and sad looking, so I took the opportunity to disassemble the reservoirs and give them and the water lines a good cleaning. I refilled the system with plain water (no nutrients) to give everything a good flushing out, just for good measure.
Droopy, sad lettuce
The pump system is still working well. Occasionally air backflows into the reservoirs, but the problem is self-correcting. After a few noisy minutes the water in the lift tube drains and then everything starts working smoothly again.
The lettuce isn’t doing very well, but I’m actually surprised it germinated at all. The seeds were really old, and I didn’t have very high expectations. It’s growing, but the leaves are kind of rubbery rather than crisp and lettuce-like.
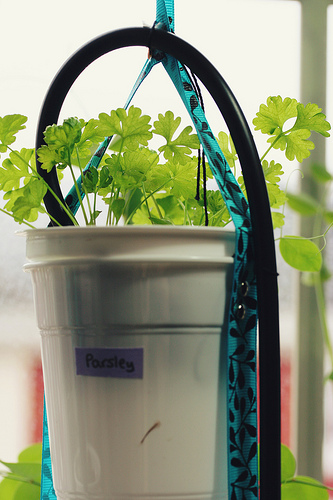
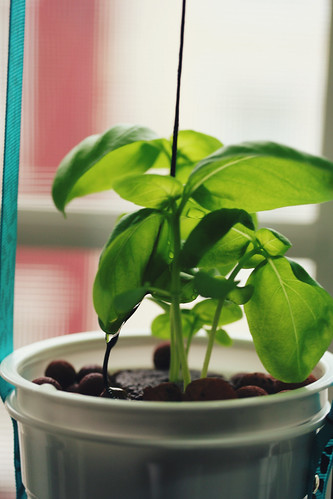
Parsley and basil are both doing well, though the basil isn’t growing as quickly as it did when I tried the aeroponic / deep water culture system a few years ago. I’m not sure if that means it wants more water, more nutrients, more light, or it’s just because I’m using a different strain of basil this time. Next time I do this, I’ll be sure to be a little more scientific about things.
Parsley, with the black lift tube visible
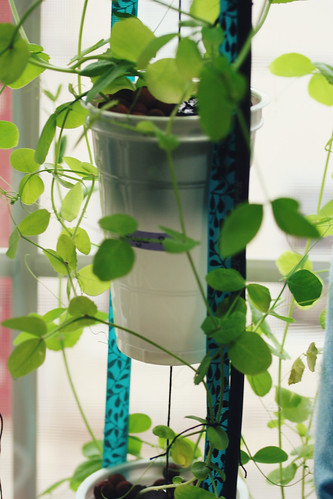
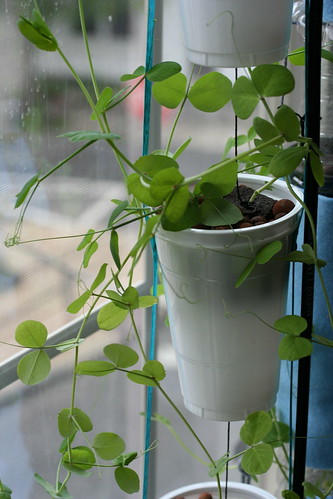
By far the most prolific grower is the dwarf sugar peas. They’ve climbed up the window and are now taller than the top of the windowfarm column. Unfortunately one of the plants is still experiencing yellowing leaves, and I think another one (on a different column) is starting to go the same route. I got some really good suggestions and information for debugging things (thanks!) but unfortunately haven’t had the time to really sit down with it and figure out what’s going on.
Dwarf Sugar Peas are taking over my window
I’m not really sure at which point I should switch from “vegetation” nutrients to “flowering” nutrients. So far the peas seem quite content to climb up the window. How do you know when your plants are ready to start flowering?
Obviously there’s a lot of variables to consider, and when I set up column #4 I’ll be better about tracking them all. In the mean time I think it’s going pretty well for a somewhat haphazard project, and I’m happy with it.
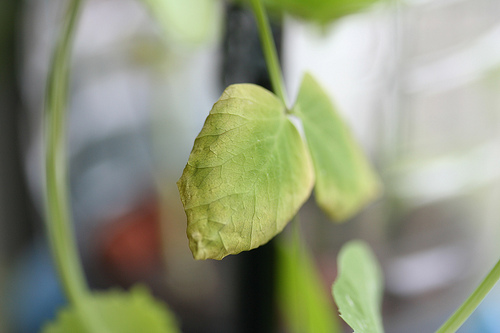
Things are generally going well for my windowfarm. The herbs are starting to look like real plants, and the dwarf sugar peas are going nuts taking over the window. Unfortuantely, one plant isn’t doing so well and I haven’t yet figured out why.
Sick wiltling leaves
The lower leaves have turned yellow and withered. At first I thought it was simply because they were stuck under the felt and not getting enough light, but now the outer edges of some of the other leaves are joining them.
Cursory research suggests that the plant may not be getting enough water, but if that were the case I would expect other plants in the system to have problems too since they’re all on the same watering schedule. The roots of the sick plant look healthy and have access to plenty of oxygen.
I did notice some suspicious build-up on the clay pellets near the sick plant. It’s possible that some sort of bacterial or fungal infection has managed to get a hold of the plant. If I can find a local source for food-grade hydrogen peroxide I may try flushing the system with a dilute solution of it. In retrospect, I should have sterilized my seeds before placing them in the root plugs for germination. Sterilizing the root plugs in the pressure cooker would have been smart as well.
Is the white crusty stuff simply dried nutrient build-up, or something more sinister?
I’m also trying to decide if it makes more sense to simply remove the troubled pot from the system to prevent the others from becoming contaminated. To do so would mean losing those two plants but I’d rather lose two than the whole column.
Yesterday my windowfarm got a second column of plants. Once I understood the basic mechanics of how a windowfarm works, I set out to make column #2 more attractive. Honestly, I’m not sure I succeeded. The second column looks different though, that much is true.
Perhaps one of these days I'll learn to photograph this better.
Instead of plastic water bottles I used white plastic cups, and instead of string I used ribbon to hang it. Unfortunately the plastic cups are too wide to work well with the 3″ net cups I have. Conveniently, Chobani greek yogurt cups fit almost perfectly. More conveniently, I eat a fair amount of Chobani yogurt (unlike bottled water, which I try to avoid).
Cutting the holes is tedious, but not too bad with a fresh, sharp blade.
Like the other column, each cup was given a cotton wick to help discourage splashing. The cups are attached to the ribbon with small metal brads. I confess I’m a little dubious as to how well they’ll hold up once the plants start getting heavier, so each cup got two on each side. The black lift tube was sewn into place along the ribbon.
You can see the two silver brads on the right, connecting the cup to the ribbon.
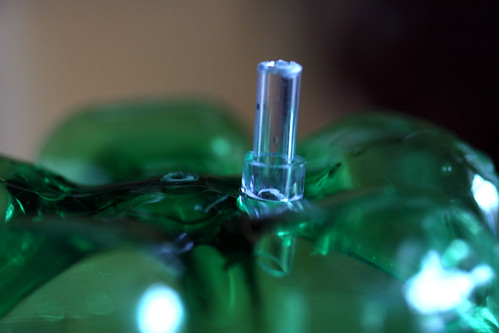
I realized much too late that the thinner cup plastic won’t allow me to easily attach a hose to the bottom, so I grabbed the bottom of a soda bottle that was lying around and improvised a water collector to sit at the bottom of the stack. The soda bottle bottom is considerably thicker than the rest of the bottle, and I actually had to use a 1/4″ drill bit to get a hole into it.
The cup is covered in paper to discourage algae growth.
Each column has its own reservoir, which makes water pressure debugging easier. It also may help cut down on contamination if one of the plants gets a fungal or bacterial infection.
The reservoir bin is still incredibly ugly.
I’m feeling sort of “meh” about the new column. It’s got some pros and cons, and I think it’s sort of a wash versus the first one.
Advantages:
Doesn’t look like water bottles hanging in your window
Much easier to remove net cups for cleaning
Fairly easy to remove cups from ribbon, should one become damaged or need changing
Shorter height means shorter lift tube, making it easier to get water up
Inexpensive compared to purchasing water bottles. 50 plastic cups came to under $10.
Vaguely better looking
Disadvantages:
Looks like disposable cups hanging in your window
Not nearly as rigid as the water bottle set up, making it feel more flimsy
Cups are made of thinner plastic and more prone to splitting than water bottles
Shape of cups makes them more percussive, so dripping water sounds considerably louder
Because the bottom is flat, some water collects around the edges which may lead to contamination / algae problems down the line
The cup’s brittle plastic means a separate water collector must be used on the bottom to funnel water back into the reservoir
Lack of a “top” on each cup means water evaporates more quickly, so the pump may need to run more frequently
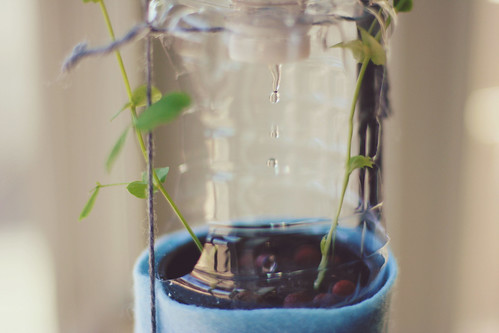
In terms of looks, I actually rather like the water collector cup (covered in paper). If it doesn’t look totally soggy and sad in a few weeks, I may make column #3 out of 1 liter soda bottles and scrapbooking paper.
I’ve also noticed that column #2 has a considerably higher water flow rate than column #1. I think this is due to a combination of a shorter lift tube, larger reservoir bottle, and minor differences in the airflow from the pump.
My hydroponic window farm has been humming along nicely, but I noticed the windows were starting to look a bit gross from all the water splashing from each bottle. It cleans off easily, but is not ideal.
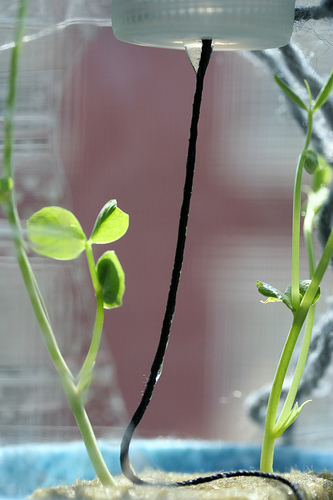
Water droplets drip down and splash out
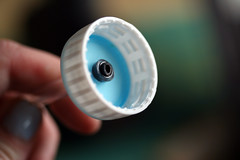
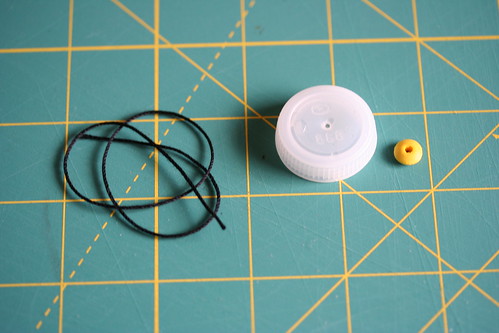
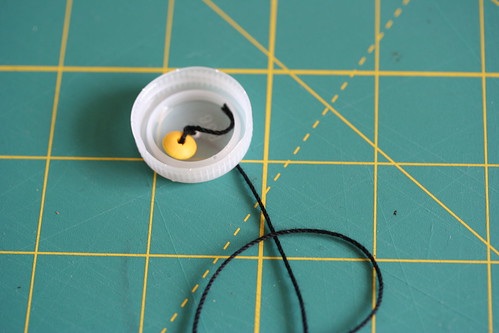
I’ve seen other windowfarms which use a short piece of tubing to direct the water, but it seems like overkill to me. I added a cotton wick to each bottle cap, hoping the water would follow the wick down instead of free-falling and splashing.
String, cap, and a beadThe bead keeps the string from pulling through the hole
Then I screwed the cap back onto the bottom of the bottle. I found that it works better if the hole is a little larger, so I snuck in with an xacto knife and cut a few small slits in the cap to make the hole wider.
Water now follows the cap string nicely. Hopefully this will save me from having to wash the windows daily.
We knew it was only a matter of time before we would need a car. Sure, there’s a zipcar lot near our place, but as my baby bump gets bigger I realize that installing/removing a car seat from a car on a regular basis would pretty much suck. After procrastinating as long as possible, we broke down and started looking at cars for real.
The new vs preowned and buy vs lease discussions are covered extensively elsewhere, so I’ll cut to the chase: after crunching numbers we determined that buying a car new would be the best option for us.
I like small cars. However, we ferry large objects on a regular basis, and no one makes a Tardis yet, so we focused our search on hatchbacks. To start, we armed ourselves with a Consumer Reports car buying guide and a handful of relevant articles from Car and Driver.
Our priorities included size (we live in the city, smaller is better), fuel economy, cargo / backseat space, and enough of an engine to safely get us up the incredibly short highway on-ramp near our house. Neither of us commutes via car, so a lot of the creature comforts that commuters crave are lost on us.
The models on our list included the Toyota Prius, Toyota Yaris, Scion xD, Hyundai Accent, and Honda Fit. We also contemplated some other manufacturers, but there’s only so many cars you can test drive before you start going insane.
We shopped for cars over two days, about a week apart. Test driving cars takes about 3 times longer than it seems like it ought to. Compared to my husband, I’m a little more critical of how a car drives (particularly acceleration and handling), so RevolvingDork drove on day 1 as a coarse filter, and then the cars that passed his liking got scrutinized by me on day 2. Heading into test drives, the Prius was our top pick.
Toyota Yaris
Does anyone else find it concerning that Toyota needs to tell us it's a car?
The Yaris is cute! The Yaris is peppy! The Yaris is tiny. It didn’t take long to realize that the Yaris was just too small for us. If it was just the two of us it would be adorable. But with a kid on the way it didn’t seem like it could possibly fit the gargantuan car seats children apparently require, let alone the mountains of accessories everyone says we will soon carry with us everywhere.
Verdict: We took it for a quick spin, said “meh,” and moved on to the next one.
Toyota Prius
Only a douchebag would use disposable bags for transporting things in their Prius.
With gas prices around $4, hybrid cars look pretty attractive. A friend of ours has an older Prius and it’s served him well. There are a few different models of Prius, including the new Prius C (which has a body very close to the Yaris). We looked at the Prius “Two.”
The Prius is the most expensive of the cars we looked at by a long shot, but it’s a small price to pay for earth-saving street cred, right? I’ll keep the comments about the earth-hostile battery packs to myself. Unfortunately, the newer Prius’s incredible fuel economy seems to come at the expense of acceleration. The car didn’t feel like it drove as well as our friend’s older one. RD was unimpressed when we took it on the highway, and compared to the other Toyotas I thought the interior looked cheesy. You have to go up to the Three to get something nice looking, which I might not mind except the car starts a good $5,000 more expensive than the others.
Verdict: “The lack of acceleration on this car would drive you nuts unless you put it into ‘power mode’ every time you merged on to the highway,” said RD. Out.
Scion xD
xD looks like an emoticon laughing so hard it's crying. Cannot unsee.
First off, every time I see the xD I think it’s a laughing emoticon. It makes it impossible to take the car seriously.
We liked this car a lot more than we thought we would, but the engine still felt underpowered (which we realize is a theme with small cars), and RD wasn’t into the overall feel. It does have a nice tall cargo area, but the back seat felt a little shorter on car seat leg room than some of the other cars we looked at.
The taller height makes it feel kind of SUV-ish, but it still handles well and gets good gas mileage. Unfortunately for the xD, both my husband and I actually dislike being higher off the ground.
Verdict: Not a bad car by any means, but nothing to get excited about
Hyundai Accent Hatchback
The Accent has kind of a Tron thing going on with the interior. This makes it incredibly desirable.
I came into the test drive prejudiced against the Accent; we’d just rented a 2011 Accent the previous weekend and it was one of the most pathetic cars I’ve ever had the misfortune of driving. Part of this was because it didn’t have power locks, but in terms of handling and drive it really was a miserable little beast. Thankfully, the Accent has been completely redesigned for 2012. It looks almost sexy! For a compact hatchback, that is.
The Accent has an impressive amount of cargo space and rear leg room for such a tiny car. The engine is still under powered, but it felt punchier than the Scion, Prius, and Yaris. Hyundai has really improved their dashboards, it feels like a much classier car than previous model years. At 30 MPG city / 40 highway, the fuel economy is excellent.
Verdict: Oh hey, we actually like this car a lot!
Hyundai Elantra
Wait, Elantra? That’s not a hatchback! No, but since everyone and their mom has been talking about how awesome the new Elantra is, we decided to test drive it anyway.
It sure is nice driving a car with a real engine. Don’t get me wrong, the smaller cars are totally adequate for the type of driving we generally do, but you can really tell that the Elantra’s engine is better matched for the size. The sedan-shape was kind of a bummer (though there are rumors of an Elantra hatchback this summer), but the trunk is pretty cavernous.
Verdict: At the end of day 1, it looked like we were going to have to stage a death match between the Elantra and Accent. Which would win, the nicer drive on the Elantra, or adorably festive and considerably cheaper Accent hatchback?
Honda Fit
What a great car for transporting potted plants! That's a thing, right?
After the first day’s 5 car marathon, I didn’t really feel like looking at the Fit when we came back on Day 2. But in the interest of due diligence, and because the Honda dealership was all of 200 feet from the Hyundai dealership where I assumed we’d make our final purchase, we stopped in.
Holy cargo space batman! Though the exterior dimensions aren’t much different that the Accent, the cargo space is huge thanks to some Transformers-like contortions of both the rear and front passenger seats. In addition to folding down, the rear seats can fold up into “tall mode” which would be handy for transporting tall things that need to stay vertical, like ficus trees (?).
The drive was on par with the 2012 Accent. It wasn’t super exciting, but not bad and certainly better than the 2011 Accent we rented (the 2011 Accent is my new benchmark for suck). Visibility felt considerably better on the Fit than on the Accent, which is important when you live on a busy city street. The dashboard was uninspiring, but still not as blah as the Prius. At 27 city/33 highway, fuel economy was the worst of the ones we looked at (though still decent).
Verdict: Just think of all the oddly shaped things we can transport in this car!
Final Decision
The Fit and Accent were both close to what we were looking for, but for us the visibility and cargo space pushed the Fit ever so slightly ahead. With the Accent out of the arena we came to the final battle: the Honda Fit’s cavernous maw of holding versus the Hyundai Elantra, which has an actual engine instead of a wind-up toy. The Fit felt more utilitarian, the Elantra felt classier and more fun to drive.
Priced with the options we cared about, the Fit came in considerably cheaper than the Elantra. Additionally, Hondas retain their value slightly better than Hyundais, so if we need to trade in for a minivan when our kid is president of the Mathletes it may be a better option. After some hemming and hawing over the numbers, we decided to go with the Fit. What it lacks in sex appeal it makes up for in practicality, and that’s why we’re getting a car in the first place: to haul stuff around.