Hacking, Software

Weird problems: wordpress truncating captions

I woke up this morning to a fresh new problem at work: Wordpres was truncating image captions. Specifically, we have a lot of old content (dating back to 2007!) and therefore old shortcodes, and the old style caption codes (which use caption as an attribute) were getting truncated. They were also showing their opening quote. It was ugly, and it was confusing because I hadn’t touched the server at all in about a week.

I initially suspected an errant plugin, because that’s the cause of 90% of my pain in WordPress. Last night I’d spun up a staging server from a backup, so I had a <24 hour old copy of the server. Our databases are on a separate machine so I refreshed the dev database too.

Irritatingly, everything worked fine on dev. To figure out what was different between the two servers I use rsync (from within the web directory on the dev box)

rsync -avun -e ssh kellbot@production:/path/to/public_html/ .

The -n flag is key because it does a dry run rather than actually copying the files

Among other things, wp-includes/version.php was different. Turns out a security update had been applied automatically (taking us from 3.9.2 to 3.9.3). I updated us to 4.0.1 (uh, yeah been meaning to do that …) and everything was fixed.


Software

Integrating Github Issues with Pivotal Tracker

Over on offbeatempire.com we’re using GitHub’s issue tracking as a means for the staff to submit bugs and feature requests. But after years of using Pivotal Tracker, I found GitHub’s issue management to be a little wanting.

Thanks to rich APIs from both GitHub and Pivotal there are many third party integrations written between the two. So many that picking one to use became a task by itself.

After reviewing 5 or so I went with Pivothub, on account of the fact that it was a) recently updated and b) would run in an environment I could set up easily (heroku). I also really like that when a Github-linked story is accepted in Pivotal it’s link on GitHub is closed too.

Since Heroku is a read-only filesystem and I didn’t want to commit my config file to the repository, I forked Pivothub and changed it around to use Heroku’s environmental config variables.

It works pretty well, though some tighter integration wouldn’t be amiss. Right now if a closed issue is repoened via github, it doesn’t come back into Pivotal. The original author isn’t really using Pivotal much these days so any additional features are ones I’ll have to add myself.

Crafting, Software

Computational Art with Processing

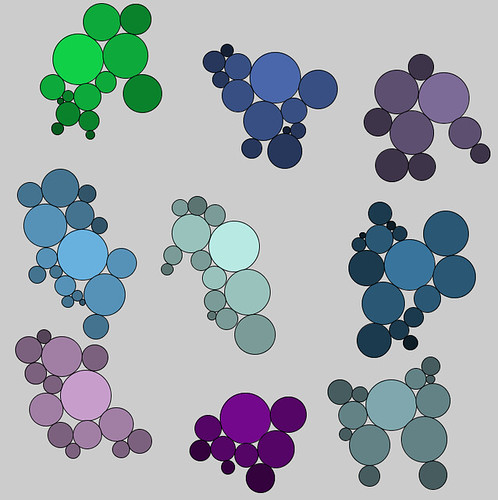
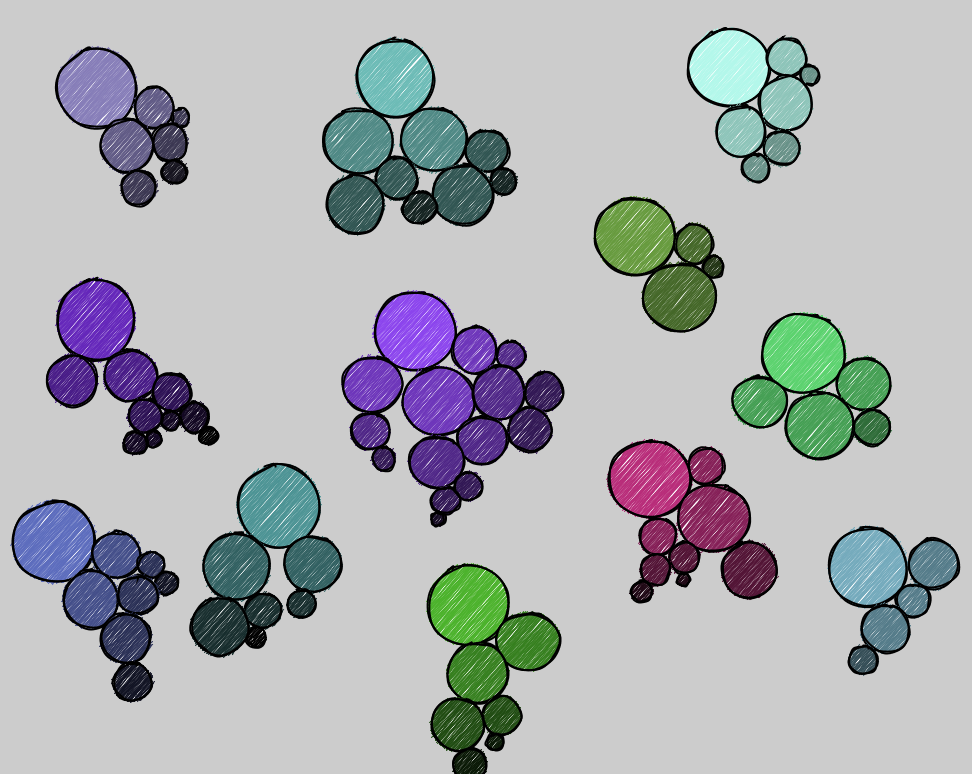
Snapshots of a project I’m working on currently in Processing. I wanted to create drooping clusters of non overlapping circles, kind of like a grape bunch.

circles1
Non overlapping circles generated in a tree-like hierarchy

A random number of smaller child circles are spawned from the parent circle, at random angles from the parent. The spawning function is run recursively until the circles are 20 pixels or less in diameter.

circles2
Colorful clusters of circles

Each circle cluster or bunch is randomly assigned a color. The colorspace is in HSV and the hues are limited to greens, blues, and purples. The value (brightness) of the color is dimmed 10% each for generation of circles.

Each time a circle is generated, it’s spawned somewhere on the lower half of it’s parent, and then rotated around the circle until it no longer overlaps with any other circles. If it makes it all the way around without founding a valid place to be, it’s deleted.

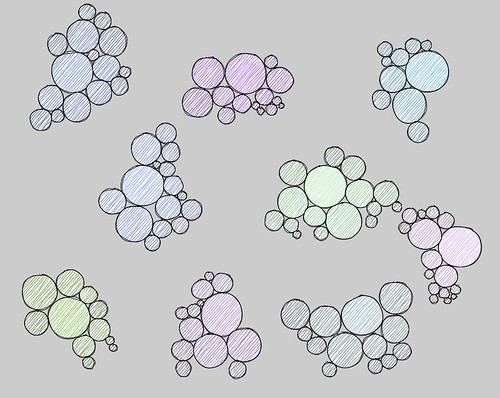
circles3
Sketchy clusters of circles

A Processing library called HandyRenderer gives everything a more sketchy look. But the clusters weren’t droopy enough. So I modified the script to send the circle rotating back the other way if it rises above the center point of its parent. If it reaches the other side without finding a spot, it’s deleted.

Now more droopy!

Now to start working on the “tree” that supports them.
tree2

I put together a slimmed down version (no sketchy rendering) for the web. You can play with it here if you’re so inclined.

Software

Domestic Adventures: Cat 6 Ethernet and Daily Calendars

Things have been quieter over here lately, but busy on Kellbot’s Domestic Adventures, the part of my blog dedicated to home and personal posts. It’s a little tricky to balance what goes where, so for overlap posts I’ll provide a summary. If you’re not reading it, here’s some of what you’ve missed:

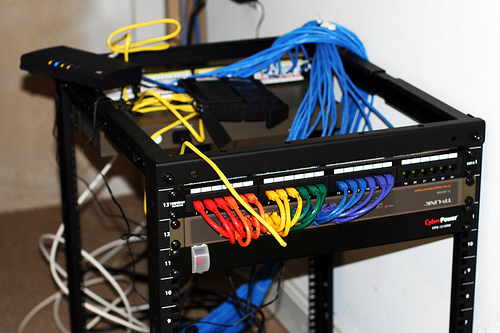
Wiring for Cat 6 Ethernet

It’s been a little  tricky to balance what posts go where, especially when they’re home improvement hacks. The second post in the series about our home network is now up!

A script to generate a daily chore calendar

Cleaning Calendar

Because I’m a slob, I have to have a daily check list every day to tell me to clean up. I converted an old page-a-day calendar into a daily chore checklist, with help from Ruby and ImageMagick.


New Construction Townhome, Software

Interior Design Planning

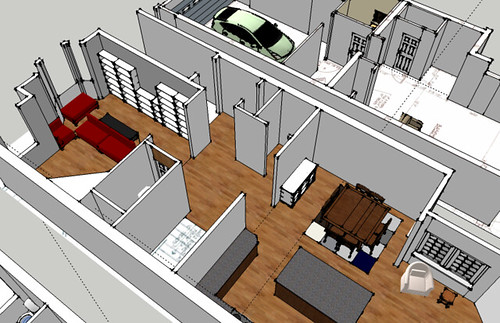
One of the nice things about buying a home that had been built recently is that the original builder’s plans were still available, leftover from when they were trying to sell the development. We got them from the seller and I immediately started modeling the house in Google SketchUp.

I followed the technique in this video to build the house from the plans. Things won’t match inch for inch, but it gives me a pretty good idea of the layout and I can always correct the measurements later after checking them with a tape measure.

For the time being my house has no ceilings, and each floor is laid out side by side. Google SketchUp has a wide variety of furniture in their 3D Warehouse, and with a little practice I’ve started to be able to model my own furniture.

Sketchup

Ever since seeing this Billy bookcase hack on Pinterest, I’ve been kind of obsessed with creating a built-in shelving wall. Ikea has some pretty good planning tools, so I was able to design something I thought would work in the space.

BillyPlan

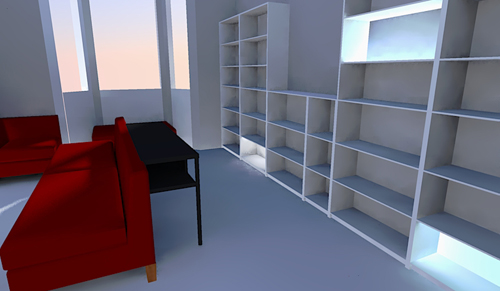
Then I grabbed the Billy set from the SketchUp 3D Warehouse and started modeling it in the room. SketchUp’s rendering tools leave a lot to be desired so I started playing around with a demo of Twilight, a rendering plugin. Aside from some odd lighting issues, I think it gives you a better feel for a space than SketchUp’s line drawings.

billyRender

One other SketchUp plugin that has been invaluable is Fredo6’s Round Corners. I used it when modeling the couches to make them look more couch like.

CornerChairComparison

Clearly my 3D modeling skills still leave a little to be desired, but you get the general idea of the piece. It’s a Makenzie corner chair from Target, part of a sectional we’re considering getting for our TV room.

Thankfully we have some time before we have to start seriously thinking about furniture, since the carpets need to be replaced and we’ll want to put up a fresh coat of paint. The next few weeks will be spent coordinating various contractors (long distance), trying to get the house in shape for move-in well before the baby decides to show up.

Gaming, Software

Getting XBMC to work with our Xbox 360 Wireless Controller

This is part two of our home theater PC adventure. If you’ve just arrived you may want to start with part 1, Hello Xbox 360 Wireless Gaming Receiver.

Hooray, Windows can finally see the controller. We fire up the control panel tool for gaming devices and confirm that all buttons and axes work. We’re just about there! XBMC even helpfully includes keymappings for the xbox controller by default! We should be pretty much plug-and-play from here! I open up XBMC and…. nothing. The controller does nothing. I smash all the buttons, and still nothing.

The first step in debugging is to open up the log file and see what’s going on. The log file starts fresh every time you boot XBMC, and if you’re lucky you’ll see a line like this shoved in there:

19:00:17 T:2904 M:876916736 NOTICE: Enabled Joystick: Controller (XBOX 360 For Windows)

This means that XBMC can see the controller. It also tells us that it thinks the controller is named “Controller (XBOX 360 For Windows)” and depending on your OS and a few other seemingly random factors, it may be named something different.

This name is critically important, because it’s how XBMC knows which keymapping profile to pick up. When I went into the XBMC system/keymappings folder and looked at the existing 360 controller profiles, none of them was an exact name match. So I copied one of them and pasted it into the user keymappings folder.

The next step is to go into our copy and replace with or whatever your system thinks it’s called. That node pops up a bunch so you’ll probably want to use find+replace rather than manually copying and pasting all the time.

I’m not sure exactly what happened, at some point while I was messing around with all of this I managed to un-pair the controller from the PC without realizing it. After much cursing and whining, “why doesn’t it woooooork,” I realized what had happened and rebooted things.
Once I had renamed the joystick and it was actually communicating with the PC, I fired up XBMC and something magical happened: both the A and B buttons were functioning as Select and Back, respectively. Hooray! And the right analog stick was working as a volume control (though the axis was inverted). Not much else seemed to do anything, but IT WAS WORKING. Hooray!

The next task was getting the D-pad to work for navigating menus. Let me take this time to say that like most people who grew up with Nintendo controllers, the d-pad on the Xbox 360 controller is a source of scorn and hatred. But I wasn’t quite ready to tackle the analog stick, so the d-pad would have to do.

At this point I turned on debugging in XBMC and then proceeded to methodically press every button on the controller (and swivel each stick axis) exactly once. This worked great for the buttons but none of the axis data showed up in the debugger at all. Great. The keymap xml file I copied incorrectly identified the d-pad as “buttons” when it is in fact a “hat” according to Windows, so once I replaced the “button” nodes with “hat” nodes I was able to map the directions on the d-pad to Up/Down/Left/Right commands.

I should mention that I spent a lot of time googling about my problem, and mostly found forum threads where one person said “my xbox controller doesn’t work” and another person said “use xpadder,” or someone says “the d-pad doesn’t seem to work” and again the reply is “use xpadder.” After reading that response in about 20 threads, I was really starting to think the whole system was just too bugged to be viable. But in reality, people on the xbmc forums just aren’t willing to get their hands dirty.

Only in the process of writing up this post did I find someone who had actually taken the time to map out which buttons, hats, and axes where which. I wish I had found that post last night, it would have saved me about two hours.

I’m still deciding what the analog sticks should do, and trying to figure out how to get the controller to turn off when I’m done, but we got things to the point where it was good enough to navigate around to Dexter, and that was enough for one night. And I will say, navigating with the Xbox controller feels nice, much nicer than breaking out the clunky keyboard.

Software

Got a new pen. Installed Zork on it.

This past week, I picked up a Livescribe pen. I think it’s the most impressive gadget I’ve seen in a long while, though every now and then I have to stop to consider the fact that I carry around a 1 gigahertz computer complete with keyboard and touch interface in my pocket. I remember long ago seeing an ad for a machine for a 400 hz machine and thinking it was a typo – nothing could possibly be that fast.

Anyway, so, pen. The nickel tour is that it records whatever you write* and can also record voice. I had a microcassette recorder in college. I used it to tape a handful of lectures, and never listened to the tapes ever again. So the voice recording capabilities weren’t really a huge selling point.

What’s cool about the Livescribe is that it indexes the audio to your writing. So I can tap on a bulleted list, and hear the full conversation from thath point. Which is much more useful than having to search an entire conversation for the 10 second clip I care about.

It syncs with Evertnote, though not particularly elegantly. With a paid evernote account, you can search your notes (using OCR), and since I didn’t feel like paying for the Livescribe OCR add-on, that’s a win. Evernote’s OCR does an OK job of translating my half-cursive-half-print writing.

Evernote tries to find the word "game" in my writing


But, let’s get to the most important thing about this pen: it plays Zork.

Zork is a free application for the pen. It’s a direct port of the Zork we all know and love, and it uses the pen’s LCD window to scroll text (e.g. “You are west of a house”). You write your actions on the page, it reads them in, and then spits out the appropriate snarky Zork response.

The handwriting recognition is generally very good, but I had some odd trouble getting it to read the phrase “open mailbox.” If you look at the command list, you can see where I forgot to save and had to start over after turning off the pen. Modern autosave has spoiled me.

Saving/restoring is pretty cool, you draw a little picture (the circled 1 and 2) and tap it twice. Then you tap the one you want to restore when you go to load a game. Neat trick.

Overall the pen is a neat bit of technology. Maybe not a critical one, but definitely neat.


*provided you write it on special paper. You can print your own special paper if you have a nice enough printer, and even design your own special paper if you really want to hack around with their SDK.

Programming, Software

Bit Depth Problems with RMagick / ImageMagick

I just spent the entire afternoon debugging a problem I couldn’t find elsewhere, so I’m documenting it in the off chance someone else runs into the evil thing.

I’m composing some images on the fly using ImageMagick via RMagic. It grabs one file, floods the image with a given color, and layers another on top of it. Locally, it works great, and gives me “body parts” like this one:

Unfortunately, when I push the code to Heroku, it starts going through a goth phase and filling everything in with BLACK LIKE SOUL:
I spent a very, very long time trying to suss this one out, checking out everything from opacity to gem versions. Finally, I checked the ImageMagick version (Magick::Magick_version).
Local: “ImageMagick 6.6.7-1 2011-02-08 Q8 http://www.imagemagick.org”
Heroku: “ImageMagick 6.6.0-4 2010-06-01 Q16 http://www.imagemagick.org”

Ok, so Heroku’s is a bit older. But that’s not the critical issue. The bigger problem is the Q16, which is reporting the quantum depth. I don’t understand nearly enough about image processing to talk about what that really means. But long story short, it means my images had different default bit depths and it was causing everything to blow up. Or something.

I was able to fix it by changing how I instantiated the Pixel for the fill. Before, I was using

fill_image.colorize(1,1,1,Magick::Pixel.new(r,g,b))

where r, g, and b are integers between 0 and 255.

Conveniently, RMagick has added a from_color method to Pixel, which lets you define a pixel based on a color name. I passed in a hex value, and everything magic(k)ally works normally again:

color = '#ababab'
fill_color = Magick::Pixel.from_color(color.upcase)
fill_image = fill_image.colorize(1,1,1,fill_color)

I wish I understood a few more of the particulars about what is really going on here. But for the time being I need to move on to finishing this up. Any insight is welcome in the comments.

Programming, Software

LEGO plans, now with better rendering

You may remember the “Legoizer” script I’ve been working on for Blender. It uses an existing script and one I’ve created to generate “layers” of LEGO patterns for building.

I got a lot of great suggestions on my last entry for how to automate the process of taking a screenshot, but sadly when it came down to implementing them things didn’t go so well. Luckily Angelo from Abandon Hope Games was kind enough to take the time to help me get the environmentals in Blender set up just right for rendering a “pattern slice.”

Step 0: Start with an object made of objects
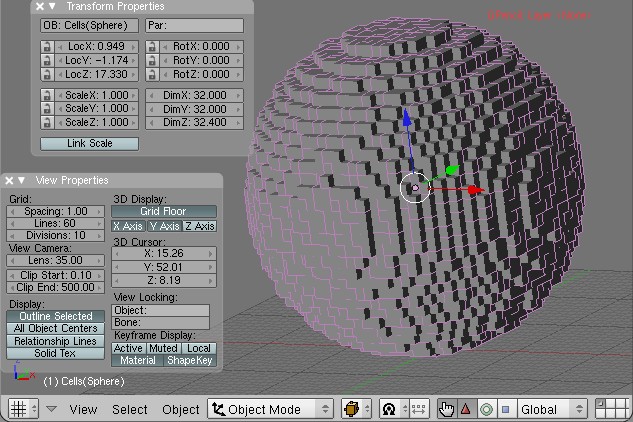
The AddCells script uses DupliVerts to create an object made of references to another object. We’ll get to that in a minute, but first, let’s assume you have an object:

Step 1: Set up the camera
We want the camera to be facing down and rendering orthographic(all lines parallel) rather than perspective.

Make sure you’re in Object Mode and select the camera.
Press Alt+G and then Alt+R (confirming the dialogs) to return it to the origin.
Hit F9 to get into the Editing panel
Click the button labeled Orthographic in the Camera tab

Press 1 on your number pad to get a side view of the scene. Click the blue transform handle of your camera and move it up along the Z axis so it is well above your object.
Press 0 on your number pad and you should see a rectangular bounding box around your object (or perhaps around nothing) which represents the are which the camera sees.
Scroll the “lens” option right above the Orthographic button to zoom in/out so your

If you do a test render now with F12, you’ll probably see a badly lit (perhaps almost all black) render of your object from the top down.

Step 2: Set up the lighting

Select the existing light in your scene and press x on your keyboard to delete it.
Press space bar to bring up a dialog, and go to Add > Lamp > Sun
It doesn’t matter where the lamp is, as long as it’s facing down (which it is by default).

Step 3: Configure your materials

I mentioned earlier that our object was made up of DupliVerts.
These aren’t “real” objects, which is why I had such trouble applying materials to them. You need to apply the material to the reference object, which is generally somewhere in the middle of it. I usually do this by switching to the Outliner menu and finding the source cube manually.

Once we have our source object selected, hit F5 to bring up the Shading panel and click Add New under Links and Pipeline.
Pick a new color for your object. This will be the color of the lines in your final rendered image, so pick something that contrasts with your background color (which defaults to blue).
Click the Wire button under Links and Pipeline

Your object in the viewport should take on the color you’ve selected. If if doesn’t, you probably didn’t select the correct source object.

Hit F12 to render. Viola!

Now that we have our environment set up the way we want, rendering via script is easy. I’ve updated the script source (now on gist) to call Render when it’s done slicing and save the file to my hard drive.

This all works great, but of course there’s a new problem. Since we want to iterate over the entire object, I need to “reset” it back to being whole again. While I’ve saved an undo point I don’t think you can call that point via the API. In the current iteration of the script I save the vectors of each vertex before deleting it and then call verts.extend to add them back. This works great except…

The vectors for the verticies are transformed to be in the selected object’s local space, which is necessary for “layer 1” to be the first layer of the object and so forth. Unfortunately I haven’t yet figured out how to transform those verticies back. So when I run the script it dutifully reassembles my sphere originating from the center of the object. So there’s still some work to be done there.

Yaaaay... oh.

Programming, Software

Faking Blog Integration With XMLRPC and Ruby

I’m rebuilding indiecraftshows.com in RoR, but the blog will stay on WordPress. The rails app will be hosted on Heroku, and the blog will stay where it is at NearlyFreeSpeech.net. There’s one catch: I want the latest blog post to appear on the home page, which is part of the rails app.

To do this I’m using ruby’s included XMLRPC library to grab the latest post from WordPress and shove it into a YAML file named with the date and post ID. This happens in a cron job run daily. Since I only care about showing the most recent post, I don’t bother to check to see if there are other posts I don’t have.

I created a really simple object called (creatively) BlogPost, and chucked it in with the rest of my models in app/models. Note that BlogPost doesn’t inherit from ActiveRecord.

require 'xmlrpc/client'

class BlogPost
  def self.latest
    Dir.chdir(Rails.root.join('blog'))
    post_files = Dir["*.yaml"]
    most_recent_file = post_files.sort.last
    YAML::load(File.open(most_recent_file))
  end

  def self.fetch
    server = XMLRPC::Client.new2('http://www.kellbot.com/xmlrpc.php')

    blog_post = result = server.call("metaWeblog.getRecentPosts",1,YOUR USERNAME HERE,YOUR PASSWORD HERE,1)
    File.open(Rails.root.join('blog',"#{blog_post[0]["dateCreated"].to_time.to_i}-#{blog_post[0]["postid"]}.yaml"),'w') do |io|
      #we only want the published ones
      YAML.dump(blog_post[0], io) if blog_post[0]["post_status"] == "publish"
    end
  end
end

When the home page is called, the controller grabs the most recent yaml file (by name, not by time of creation, since WordPress allows you to lie about time). I just use the XMLRPC object as-is, but if I wanted to I could get fancy and do some post-processing to make it a little more friendly.