DIY Aeroponics

Gardening at 1 Month

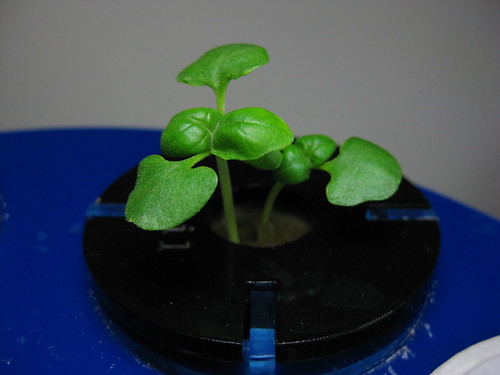
My home aeroponics project continues to grow. The basil is really taking off, the rest of it… hopefully it’ll get there?

IMG_0292

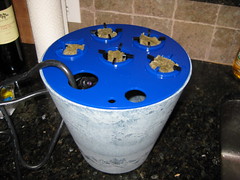
Setup #2, the one with the water pump and tubing, is way over watered. Everything is soggy, even cutting back the hours from before. I think it really wants more like 5 minutes every hour, not 10 hours a day. I could set up a relay with an Ardunio… but then there are all sorts of power supply and housing issues I don’t really feel like dealing with. So instead I think I’ll just get separate AC timer for the pump. Overall setup #2 is more expensive, more fiddly, and generally not doing well. Its only advantage over setup #1 is that it is substantially quieter.

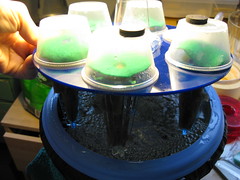
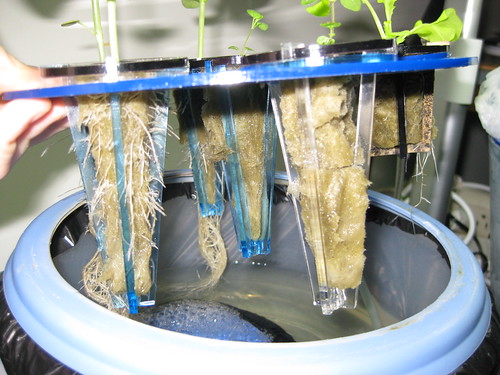
The most impressive thing about setup #1 is the root systems. They’re crazy:
Roots!

Notice the one short pod, a lettuce pod I swapped over to see if it would be happier in this setup. At this point I don’t think there’s any real need for the long pods at all. With the pump running all day you don’t really need the wicking action they provide, and at this point all the big plants have roots touching the water anyway (they don’t seem to mind).

DIY Aeroponics

Garden at Two Weeks

IMG_0248

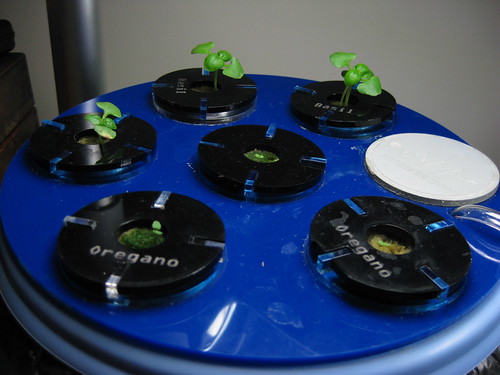
It’s been two weeks since I planted my garden, and the basil is starting to have actual leaves!
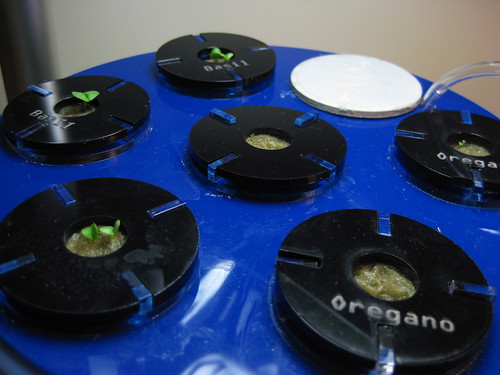
The oregano is… well, it died. And so I planted more. It’s sprouted, and these sprouts look more lively than the previous ones. I strongly suspect that the culprit was over watering. Why do I suspect this?

IMG_0249Oh I don’t know, maybe it’s the algae that’s growing on a few of the pots. That’s right, algae. On top of my growing medium (rockwool). I’m gonna take that as a sure sign that the whole thing is just a bit too soggy. So I’ve moved the pump onto the same timer strip as the lights, meaning it will now be on for about 16 hours a day instead of 24. Hopefully this will give things enough time to dry out.

Three of the 5 lettuce pods have popped up, but they aren’t doing much, so I think they may be suffering from overwatering as well. We’ll see if a little less saturation helps them perk up.
IMG_0245

DIY Aeroponics

Garden #1 Hits Day 7

Garden #1 Day 7 My first garden, the airstone powered one, is now a week old! The basil seems to be pretty happy, all three pods sprouted (and 5 of the 6 seeds came up). I’ll thin them to one plant per pod once they get a little taller.

The oregano on the other hand is not happy. I think things are too soggy. The bottom of the rockwool is touching the water, and I think that plus the airstone is just saturating things too much. I turned the pump off for the day, and man that thing is noisy.

Garden #2 hasn’t sprouted yet, but it’s only been a few days. I figured out that a lot of the dripping water sound was coming from a loose connection to one of the spray heads, and now that it’s fixed garden #2 is actually pretty quiet. Especially compared to the air setup. I still don’t like how tall the whole thing has to be though, it looks a little silly.

The light I ordered came in on Monday. After looking around at DIY options I decided it would cost me about the same to build a much uglier adjustable height lamp, so I got this one off Amazon for $25 (free shipping!). It takes standard bulbs, unlike the other grow lights I could find, and isn’t hideously unattractive. The side flaps are a little under engineered, I had to stick something in the hinge to get them to stay up.

It casts a nice unappealing blueish tint, which is supposedly what plants like for promoting vegetable growth. I like the lamp enough that I ordered a second one for garden #2.

New Lamp

DIY Aeroponics

Sowing Garden #2

Today I sowed the seeds in garden #2, which is the first one I started on. It uses an aquarium water pump, 1/2″ tubing, and spray nozzels.

I’m not really happy with it. I managed to order the wrong spray nozzels (again), and the ones I got spray a fine mist, but straight out instead of in a 360 degree circle. This would be great if I had a big outdoor garden, but doesn’t really work for my little planter. I also don’t like how tall the whole thing has to be for the plants to clear the spray nozzles, since the tubing sits about an inch taller than the pump, which itself is an inch and a half tall. And it’s noisy. You can hear the sound of trickling water when it’s on, although I’m hoping that will be resolved by eventually getting the correct nozzles.

Garden #2

I also realized I had a design flaw. The power cord, which is supposed to go through the small hole in the front, won’t fit. Because unlike airline tubing, which can be detached and reattached easily, the water pump power cord doesn’t come off. So it has to go through a hole big enough for the 3 prong plug to fit in. Unfortunately the only hole big enough was one of the plant holes, so until I order more acrylic to cut a new top it’s just a 5 plant unit.

Overall I’m feeling a little cranky about this planter. I think this design would be well suited for something larger. Home Depot had some fun looking 12″ diameter plastic planters, and if I had anything resembling a basement I’d build something nice and big and grow tomatos in it. But I don’t, and this design just isn’t working so great on a smaller scale.
Garden #2
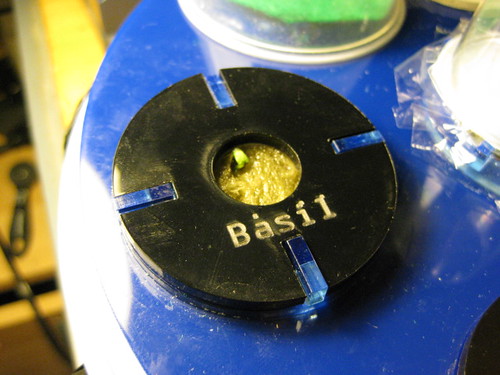
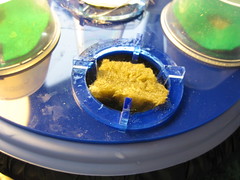
On the plus side I cut black caps to replace the felt ones I was using before and etched the plant names into them. And they look pretty sweet. They give the whole thing a sweet sci-fi look. I stuffed a plastic bag into the open holes (one for adding water, one which is the failed power cord hole, and one which is a plant hole with a power cord sticking out). It’s very technical.

It’ll probably be a week or two before I get more acrylic in, so this one will have do until then. I’m holding off on ordering different spray heads until I get a better feel for exactly what I need, because it’s annoying to spend more on shipping then you do the actual item.

Over at planter #1, things are starting to grow. One very eager basil seed is starting to sprout, and another one looks like it may come up tomorrow. The oregano is still in hiding, probably won’t see that until next week.
A sprout is sprouting!

DIY Aeroponics

First Planting!

I’m still waiting for some parts to come in for the garden I was working on in my last post. But in my research I found another, much simpler way to set up an aeroponic garden. Since I already had most of the necessary parts, I decided to try it out.

caps!

Rather than use a water pump and sprayers to mist water around, this setup uses an air pump (outside the water chamber) and an airstone in shallow water. Airstones and pumps can be found at any aquarium store.  I got a $10 pump (anything suitable for 10 gallons will be fine) and I had this airstone lying around. They’re about $5 new.

Lid out I’m using a tupperware container for a vessel, with a laser cut top and seed pods. I wish I hadn’t been totally sleep deprived and forgotten to photograph them, the seed pods are pretty neat. They’re made from 3 pieces of acrylic plastic, held together by gravity, and hold a plug of rockwool nicely. I’ll need to make some for the water pump version of the garden, and will be sure to get a good shot then. You can sort of see the bottoms of them, hanging from the blue top. Plans for the top and seed pods are both up on Thingiverse.

A quick note about working with rockwoool – it’s kind of like fiberglass, so you need to wear a mask when you’re working with it dry. Depending on how sensitive your skin is you may also want to wear latex gloves. It needs to be soaked for 24 hours before use, for pH reasons I only vaguely understand. I did not soak mine, because I did not read that until after I had already painstakingly embedded seeds into the plugs. By the way, oregano seeds are very hard to pick up one at a time with tweezers.

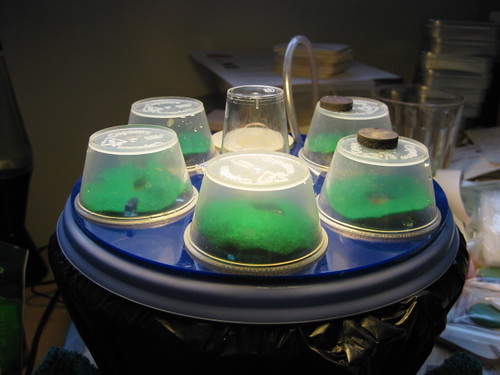
Rockwool soakingHere’s a shot of a seed pod, it rests in the hole in the top. Each seed pod needs some sort of opaque collar to keep excess light from getting into the root chamber. I used felt because it’s easy to cut and I had some on hand, but I plan on making acrylic plastic collars for them with the name of the herb engraved. The collars stay on even after the plant has sprouted. The plastic domes on the other hand are temporary, and just there to keep all the water from escaping before the seeds germinate. Once things pop up I’ll take them off.

The total cost for this setup, not including lighting, was about $30, although if you don’t have access to a laser cutter it would be a little more to have them cut by a service like Ponoko. You could also just buy the AeroGarden seed kits, which are about $20 and include 6 plastic pods, and use your tupperware container’s original lid by just drilling a bunch of holes in it. But I have a laser cutter, so I wanted to get fancy.

We’ll see in a few things whether this thing actually grows anything. I’m slightly dubious. It’s also hella ugly. Partly because of the little domes (which will hopefully be off in a few days)  and partly because of the black plastic bag I’m using to keep light out of my otherwise clear tupperware bin. I’m debating between making a nice fabric enclosure for it and just grabbing a can of rustoleum and spraying the outside. Maybe I’ll do both.

DIY Aeroponics

Gardening Gets Underway

Today I started collecting things for my DIY Aerogarden, and testing out spray set ups. Here’s what I found:

Aquarium Pump106 GPH pump

I started my search at a local aquarium store, New World Aquarium at 38th and 3rd. It cost a little more than it would have online, but the salesperson actually knew things about it and could answer questions, so it was worth it.  It’s about two inches tall and has variable output between around 45 and 106 GPH. It seems to push water through the tubing/misters nicely.

Bits of tubing Various hose bits

I stopped at the local hydroponics store to get some T joints for my hosing, and some sprayers as well. The sprayers attach to 1/2 hose pretty easily, just cut a small hole in the hose and push the sprayers in.

Food! I also picked up some rockwool and plant nutrients, so make my own “seed pods.” The bag of nutrients was $18 for more than 2 pounds of dry mix, which gets mixed with water at about 1 tsp per gallon. My garden will probably hold about a quart. So it should last me quite a while. The rockwool is $7.50/48 cubes, and I’d need a max of 1 cube per planting (tho I plan on using half, they’re big cubes).

Hosing with misters

Hosing with spray barbs I ended up using a circle of 1/2″ hosing about 6″ in diameter. The four misters are placed relatively evenly around it. The bottom of the T joint goes to the pump.

The misters I got are a little more like sprayers than misters, the water coming out isn’t very fine. I’m not sure if this is a function of water pressure or the type of misters I got, I think the latter.

I ordered some different misters from Drip Depot which are supposed to produce a “very fine mist” so we’ll see what difference that makes. Luckily all this stuff is really cheap, the hosing I can get at the pet store down the street, and the misters/connectors are all under a dollar each.
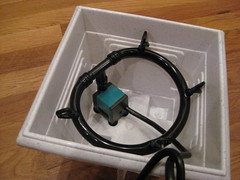
Pump in vase Here’s my pump/hose setup in the planter I got from the dollar store. There are two problems. One, it’s not tall enough. The planter has these “feet” which make it look taller than it actually is. I want at least 2″ from the top of the sprayers to the top of the bucket. The hose connectors add a substantial amount of height to the whole thing.

I ordered some L connectors which would allow me to put the pump on its side, but I think that would give me an extra 1/2″ at best.

But the real problem with this planter is that it leaks. Sure, it *looks* sturdy and without holes, but there are thin spots in the plastic near the bottom where water started eeking out. No good.

So tomorrow I’ll go in search of a more appropriately sized leak proof bucket. Once I have that I can start working on the top part to hold the plants and deal with lighting.
DIY Aeroponics

New Project: DIY Aero Garden

I’ve always been amused by / interested in Aero Gardens, an aeroponic tabletop indoor growing system for herbs and small plants. But $200 seems like a lot to spend on a wannabe space-age novelty item. So I started looking into what exactly they’re doing. And decided I want to attempt to make my own.

Aeroponics is the science behind growing plants in air (very very damp air). Like Hydroponics it uses no soil, and apparently this makes things grow faster. There’s a fair amout of chatter about it on the internet, mostly pertaining to the growing of illicit substances.

The plants sit in a nice sterile looking tray and the roots of the plant are suspended over a vat of water, which is either constantly or occasionally (I couldn’t tell which) spraying mist on them. Some sort of UV light gives the plants what they need to photosynthesize, and everyone lives happily ever after.

There are only a handful of basic things I need:

  • Some sort of base container for the water, preferably plastic so I can put holes in it as needed. Roughly the dimensions of this Rubbermaid container.
  • A water pump. I found a Micro Jet 450 for $16 on Amazon which is tiny and 120 GPH (gallons per hour) which *might* be enough.
  • Tubing and spray nozzles to hook up to said pump. Tubing I’ve got. Not sure where I’m going to find tiny spray nozzles to poke into it. These are apparently rated for 3 GPH.
  • Something to hold the plants. I plan on laser cutting this.
  • A light fixture and a light which plants will grow under

Looking at my parts list, this thing will probably be quite ugly, which is probably why Aero Garden gets away with being so expensive. Because it looks space age, and not like something you’d use to grow illicit plants. I’m starting my hunt for components, and will update as I find things and do more research.