DIY Ikea Kitchen
1970s Shore Home, DIY and Decor

My DIY Ikea Kitchen 1 Year Later

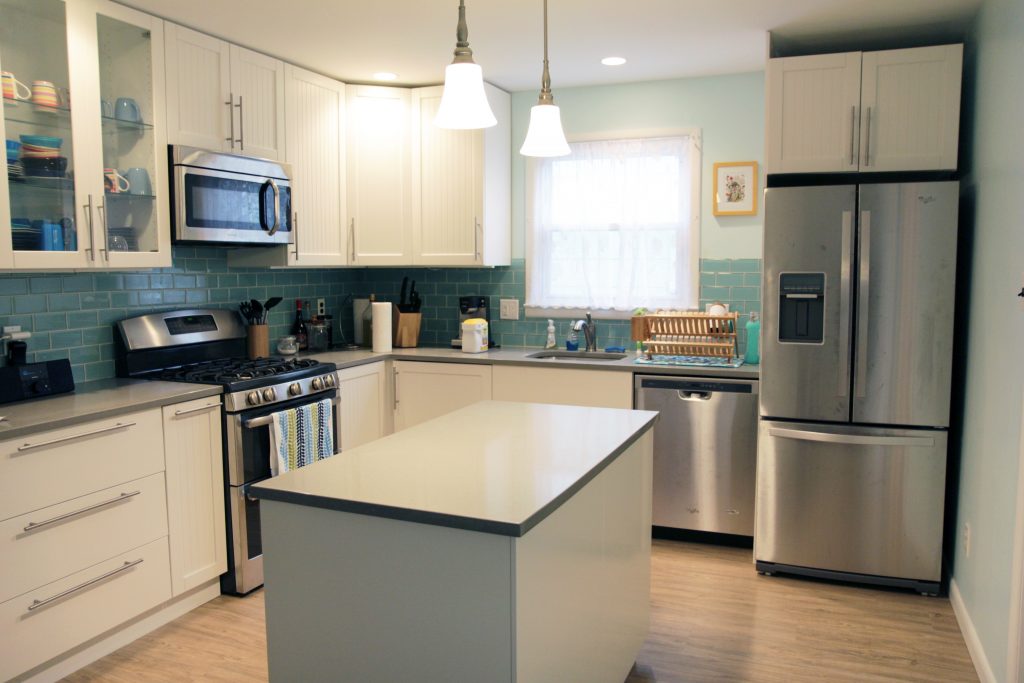
It’s been a year since our “kitchenwarming” down the shore, and it’s finally starting to feel like a functional place to cook and not just a showroom. It took a while to stock it; to collect all the spices we use regularly, to amass odds and ends like cupcake liners and cutting boards. We’ve gotten used to how it functions, and started agreeing on where we keep things. I’ve had some time to think about what I’d change if I were to do it all again (I’m not).
DIY Ikea Kitchen

The custom-made cabinet doors

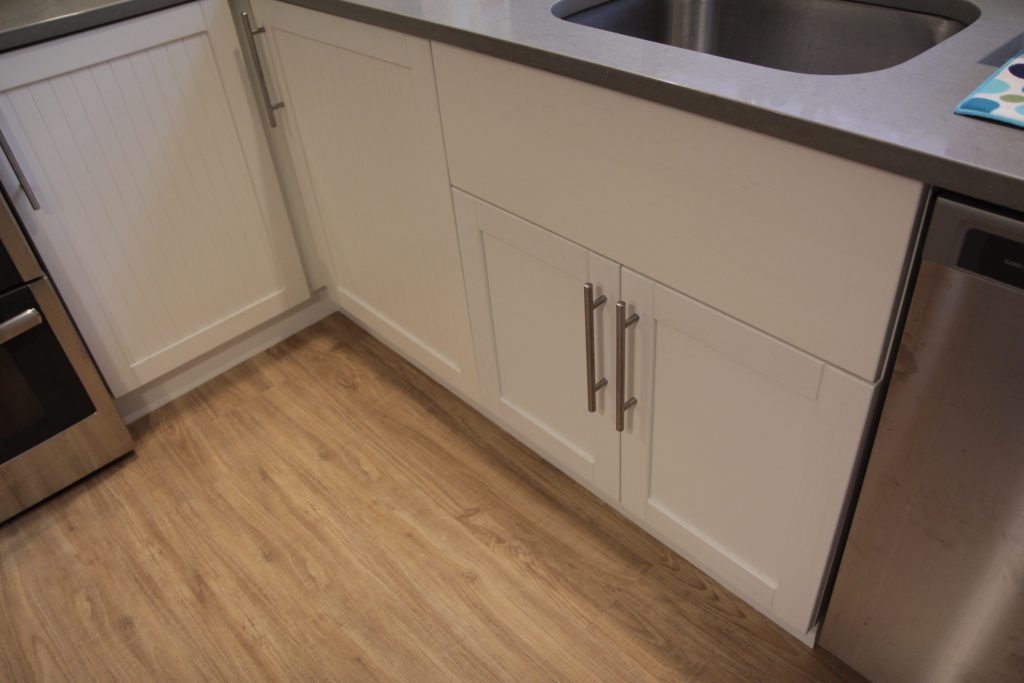
I didn’t like the available Ikea doors so we got custom made doors and I painted them myself. They look great, and didn’t cost much more than the Ikea doors, but it was a ton of work and honestly not worth it for a kitchen I only see on weekends and the occasional vacation week. Even with a sprayer, priming and painting the doors was a pain. I still think the custom doors are a good way to get a high end look in an otherwise budget kitchen, but I think I could have skipped it for this particular project.

The only really frustrating thing about the custom doors is that you’ve got no room to change your mind later. On our sink cabinet I had originally planned for a pull out trash drawer. Once everything was in it was very obvious that wouldn’t fit under the garbage disposal. I needed to switch from a drawer front to hinged doors, and ended up going with some that don’t quite match (and I still haven’t gotten around to painting). Granted I could have ordered more doors from the cabinetry company, but that would have taken another few weeks and I wanted to be done.
Custom doors on Ikea cabinet


The island

Our kitchen is about 10 foot square and I really didn’t think we had room for an island. I taped it out on the floor and took a while to pace around the room trying to get a feel for it. I’m really glad we put it in, the island makes it much easier for two people to work in the kitchen at once.

I think if I did it again though I’d get a freestanding island rather than a built in one. It would be nice to be able to move it out of the way for parties, and we really don’t need the massive amount of storage space it provides. Half the drawers in it are still empty.
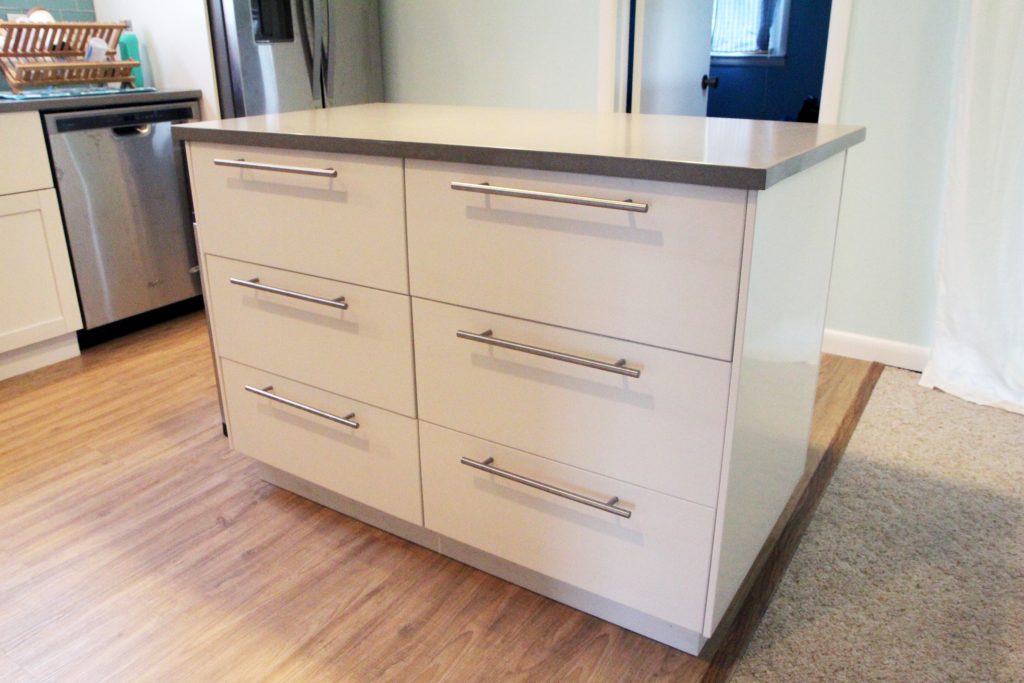
Ikea kitchen island

The flooring

We went with luxury vinyl tile and it looks great. It’s waterproof, durable, and most people haven’t noticed it isn’t wood. To be fair, most people are also not looking because they are busy being on vacation. We’ve gotten many compliments on it. The transition molding I picked up from Lowes isn’t a perfect match, but it’s enough to make the room feel finished and put together.
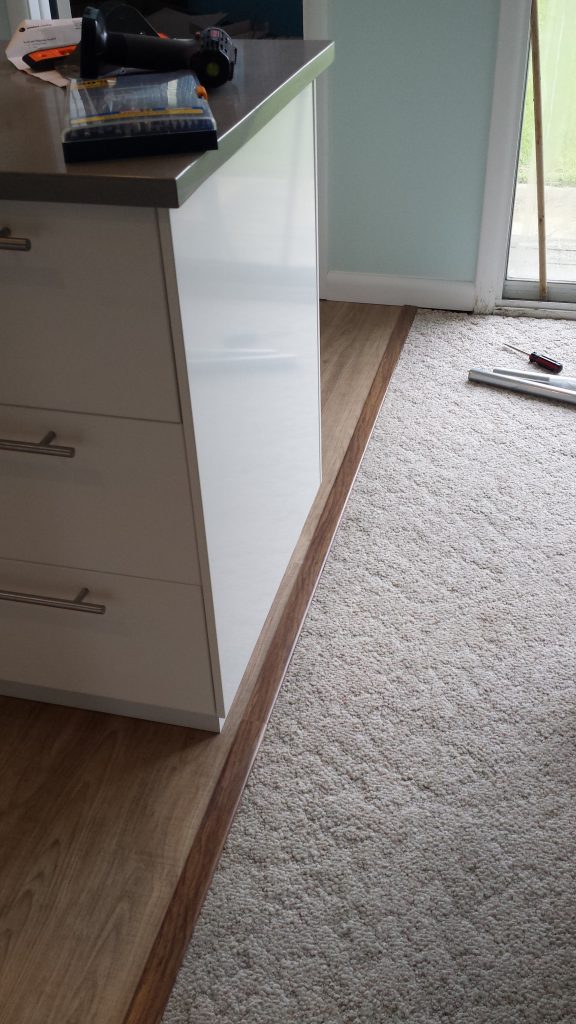
Carpet to Vinyl transition

The drawers within drawers

Ikea has this feature where you can put drawers inside of doors or other drawers. We actually have this in our non-Ikea kitchen at home, and inside cabinets with doors it’s pretty great. It functions kind of like a pull out shelf for your pot lids or other doodads.

Ikea cabinets function on the idea of elements being a certain number of “units” high. Drawers can take up 1, 2, or 3 units. Our configuration has 2-high exterior drawers with a smaller 1-high drawer inside it.
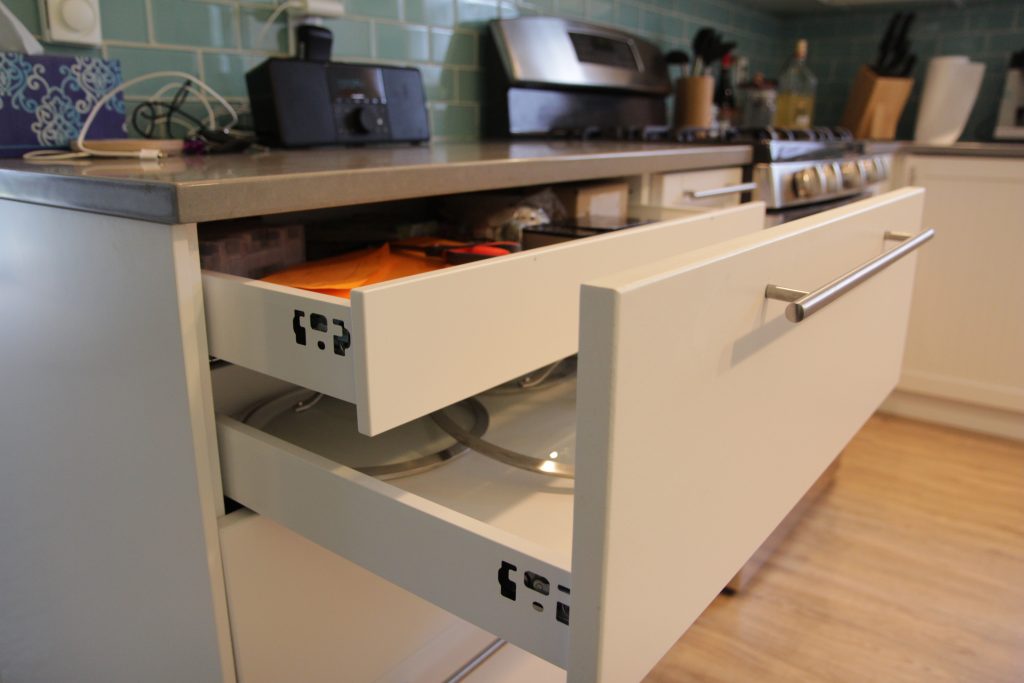
Ikea drawer-within-a-drawer

It sounds great in theory but in practice the smaller drawer is practically invisible if it’s closed. We’ve started calling them the ‘secret drawers’ because guests can’t find them.
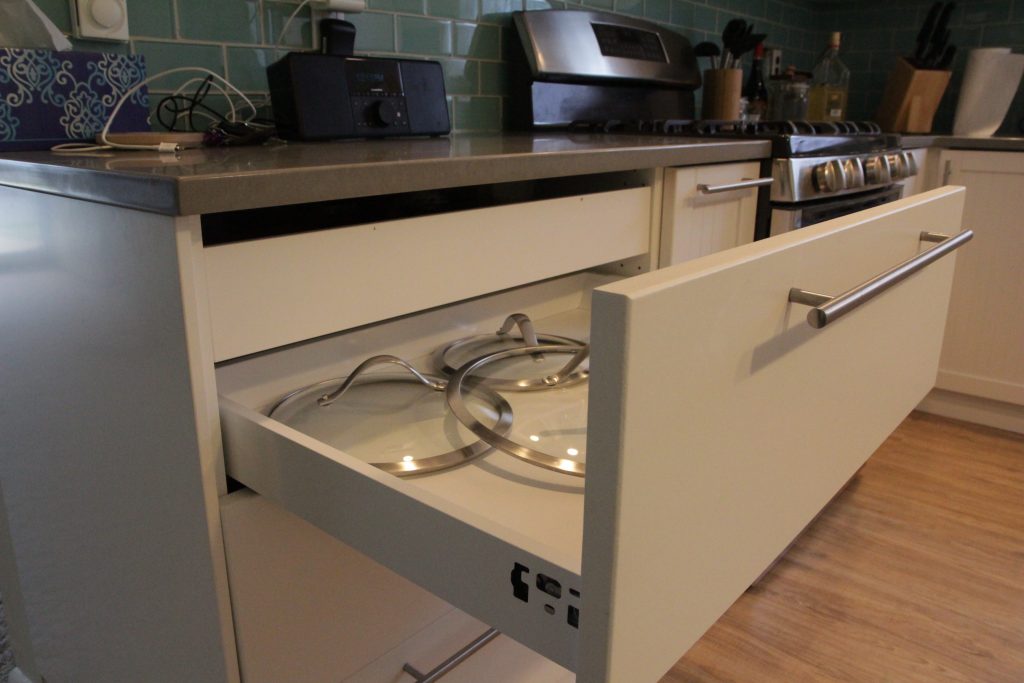
Hidden Ikea drawer

Additionally there are two small spots where the paint has worn away due to the hardware we used to mount the handles. I’m not sure if we were supposed to countersink the screw holes on the back, but we didn’t so they stick out a bit and rub against the smaller drawer.
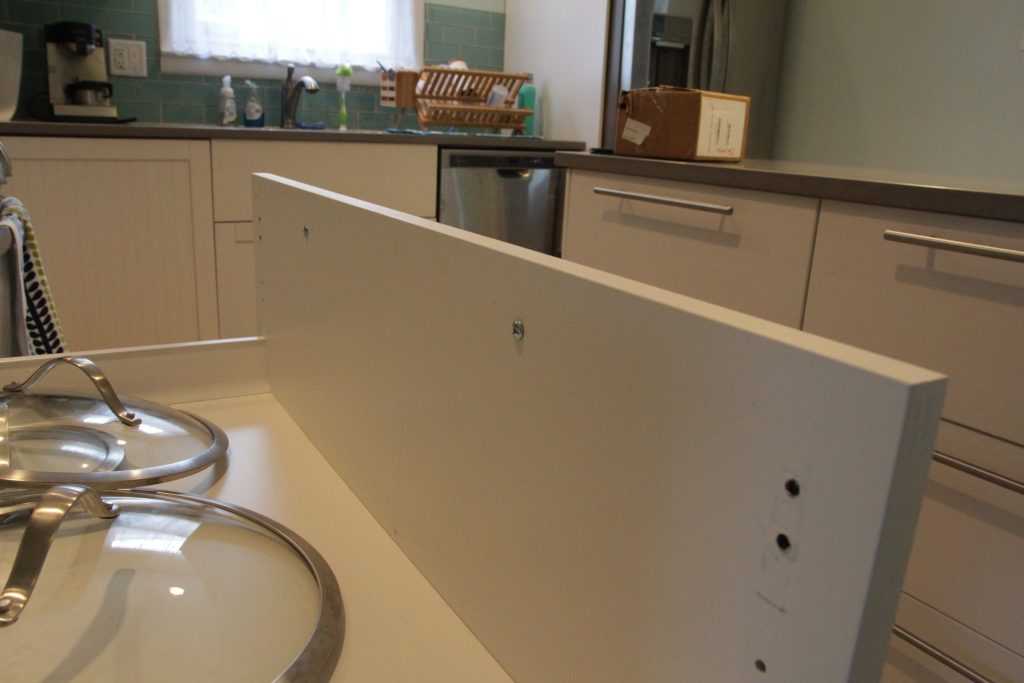
Screws sticking out back

The lighting

For the most part I am very happy with the lighting choices we made in the kitchen, especially having the recessed lighting put in over the counter area. Having a well lit work area is essential. The only thing I don’t love is the Ikea ANSULT undercabinet lighting, which is pretty poorly made. If I were to do it again I’d get my cabinet lighting from someone else.

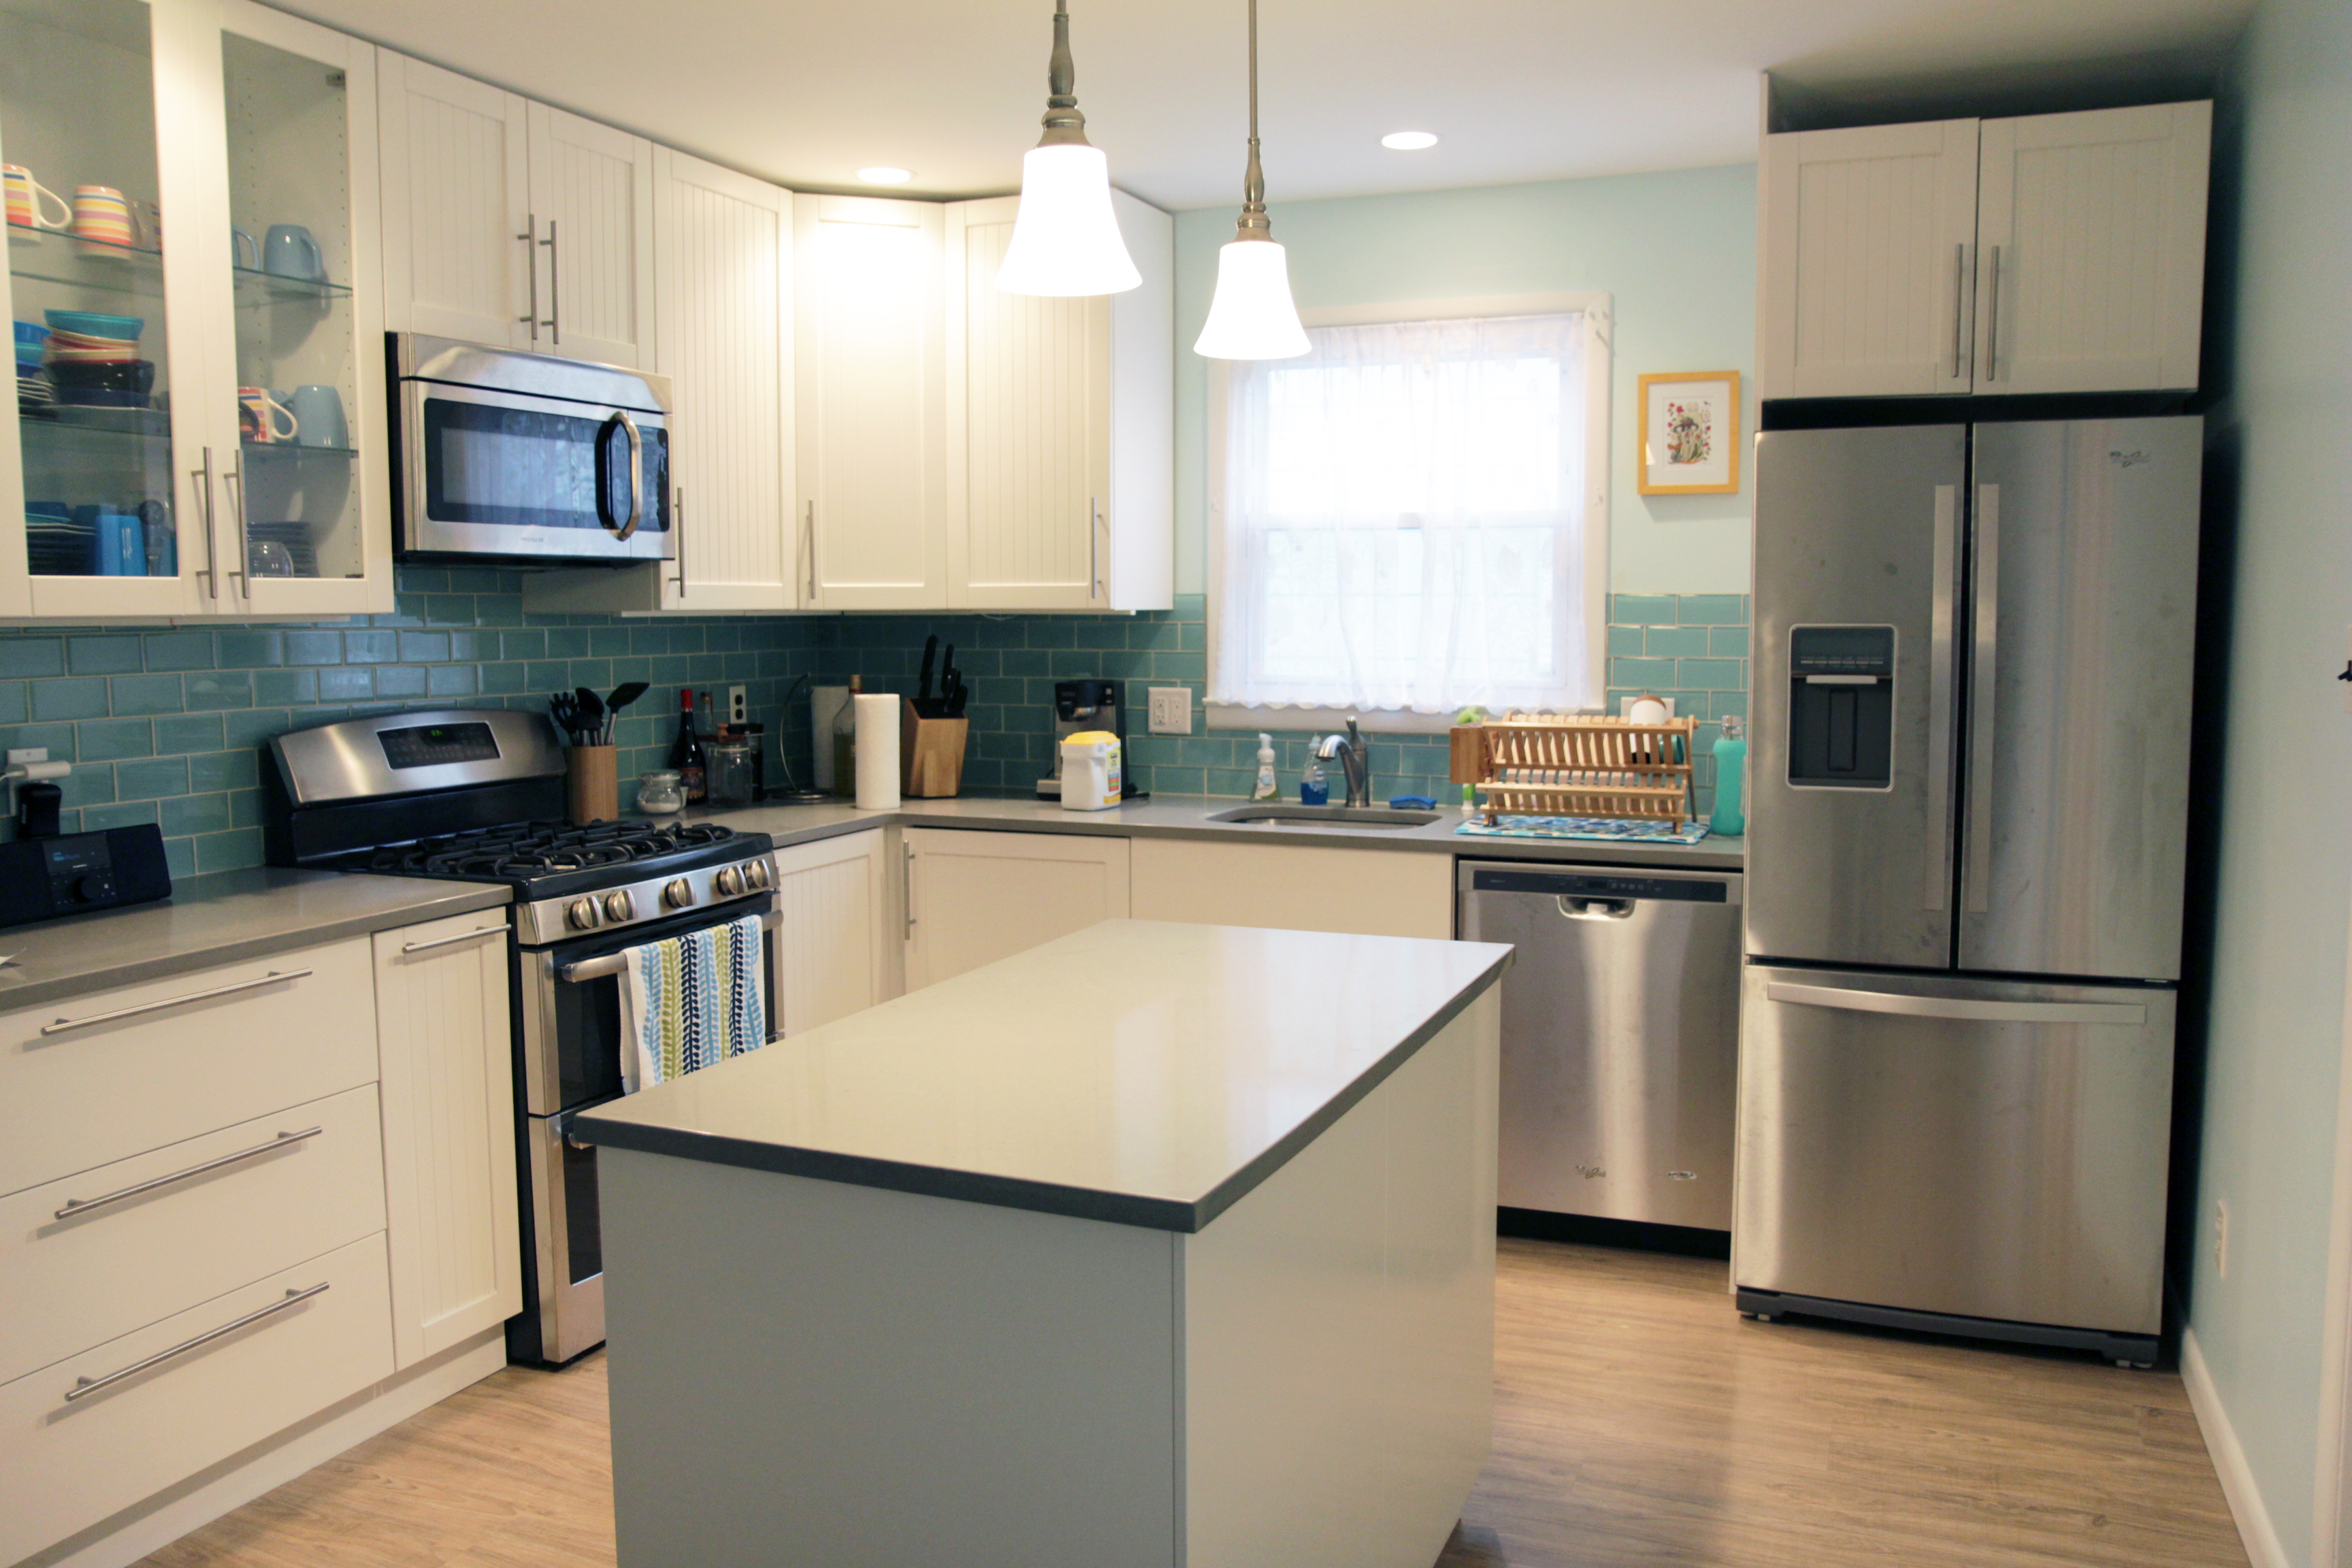
Overall we’re still really happy with the kitchen, and I’d use Ikea again. In fact I am using Ikea again in our rental remodel.

The glass subway tile backsplash looks amazing, but it was a huge pain to install and they were expensive. I’m not sure whether I’d do it again, I’d have to really love the project.

I still absolutely love the quartz countertops and while they were out of budget for the rental, I would use them again in a heartbeat.
 

Bare original floor
1916 Row Home

Preparing the Kitchen

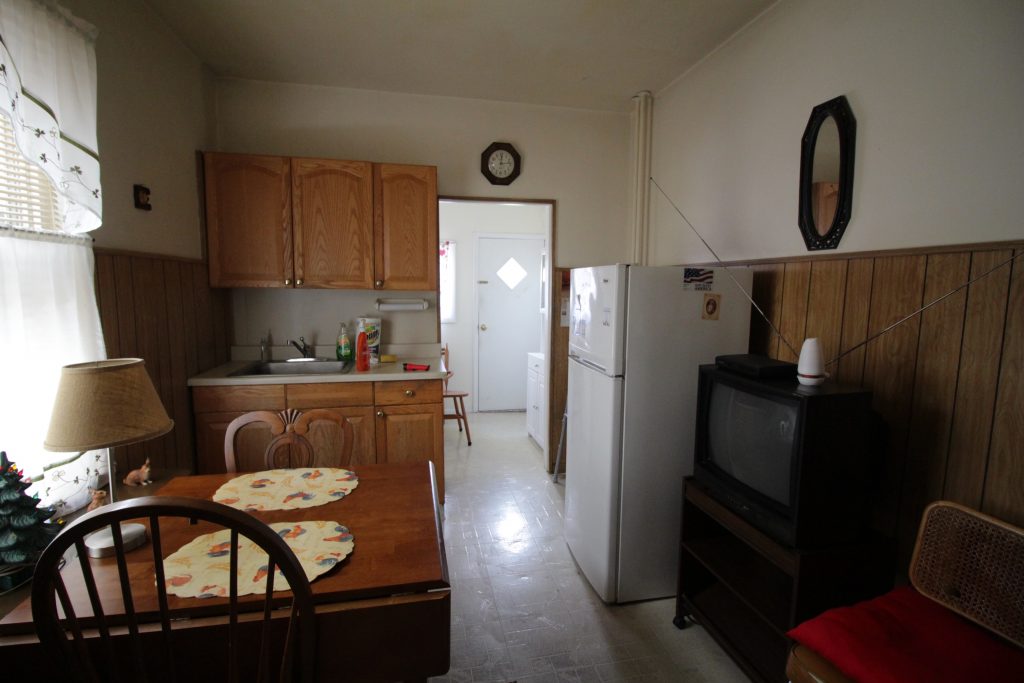
The photo below shows the old kitchen in the house I’m remodeling. It was taken from the doorway and shows pretty much the whole room. Notice anything missing?

Small, cramped kitchen

That’s right, this kitchen lacks a stove. There actually is a stove, it’s in the room behind the kitchen on the same wall as the sink. This means that if you have a pot of hot something on the stove you have to carry it around the corner into another room. There’s no counter space next to the stove, so you’ve got nowhere to set things besides the stove itself. The paneling, flooring, and cabinets are all things I could live with; having the stove another room was not.

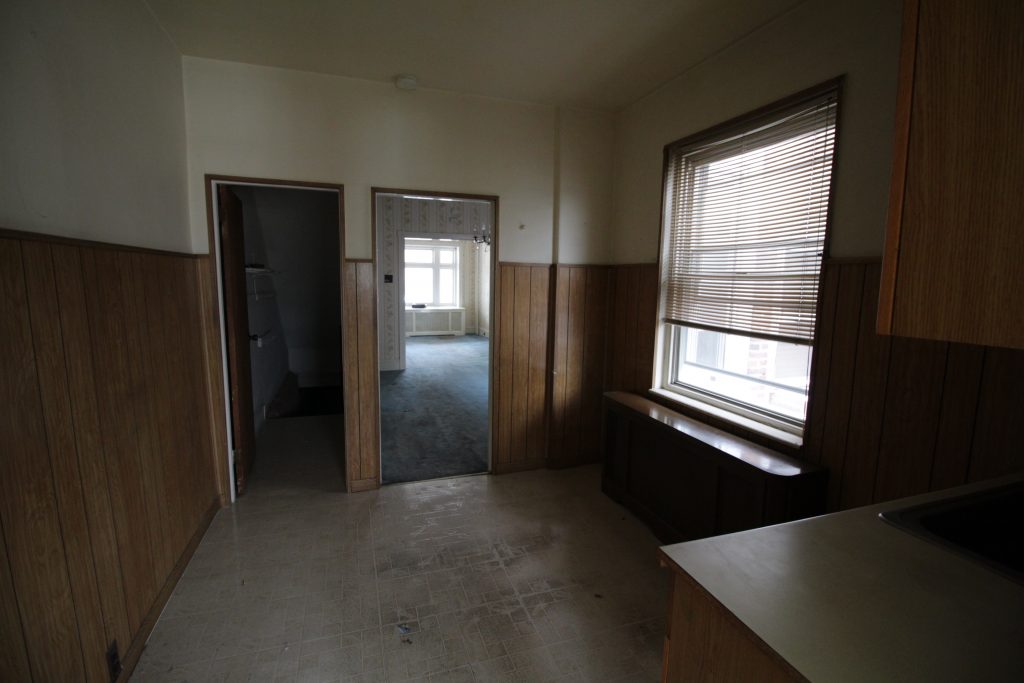
On one wall we’ve got a giant window and giant radiator taking up nearly all the space. On the other (next to where I’m standing taking the above photo) we’ve got a door to the basement, significantly cutting into where we can put things. The previous owners put the fridge in the middle of the room which I guess makes sort of a work triangle with the back room stove but… ugh.

Empty kitchen

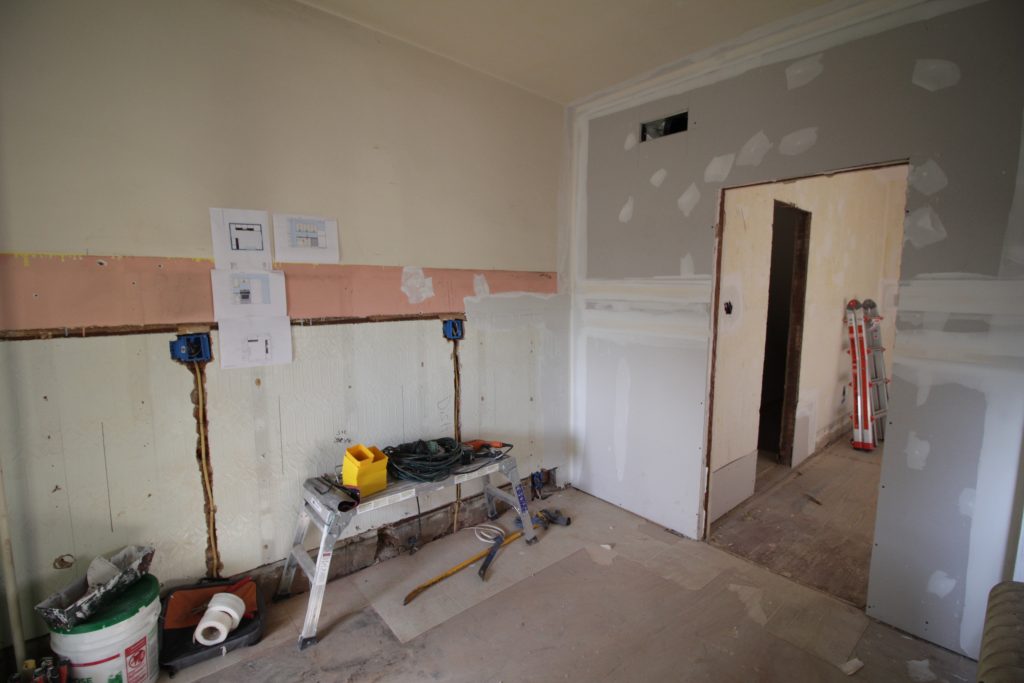
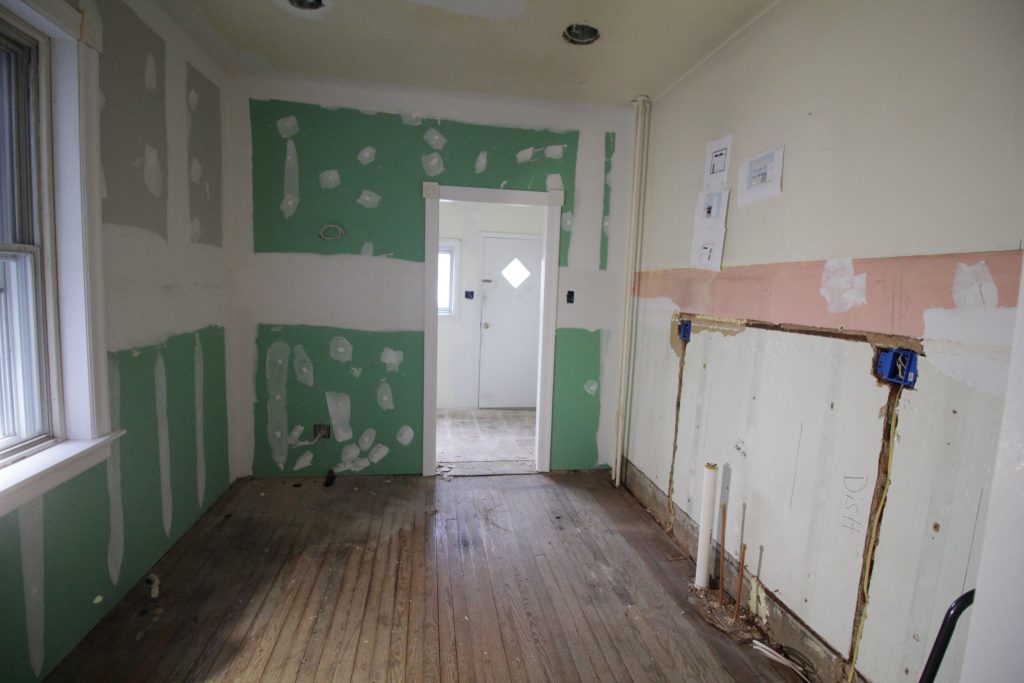
The first major step was to move that doorway. I put it around the corner, in the dining room. This gives us more space in the kitchen as well as a small storage area behind the door at the top of the basement stairs.

Doorway moved

That hole above the new drywall is for the central air! We ended up hanging new sheetrock over this wall. Underneath the wood paneling it was in pretty rough shape. Before the wood paneling, which tore up the plaster with a million nails, someone had glued a faux tin textured… thing… and it wanted to take the plaster with it when it came down. Sheet rock over plaster isn’t my favorite thing in the world, but in this instance it was our best option.

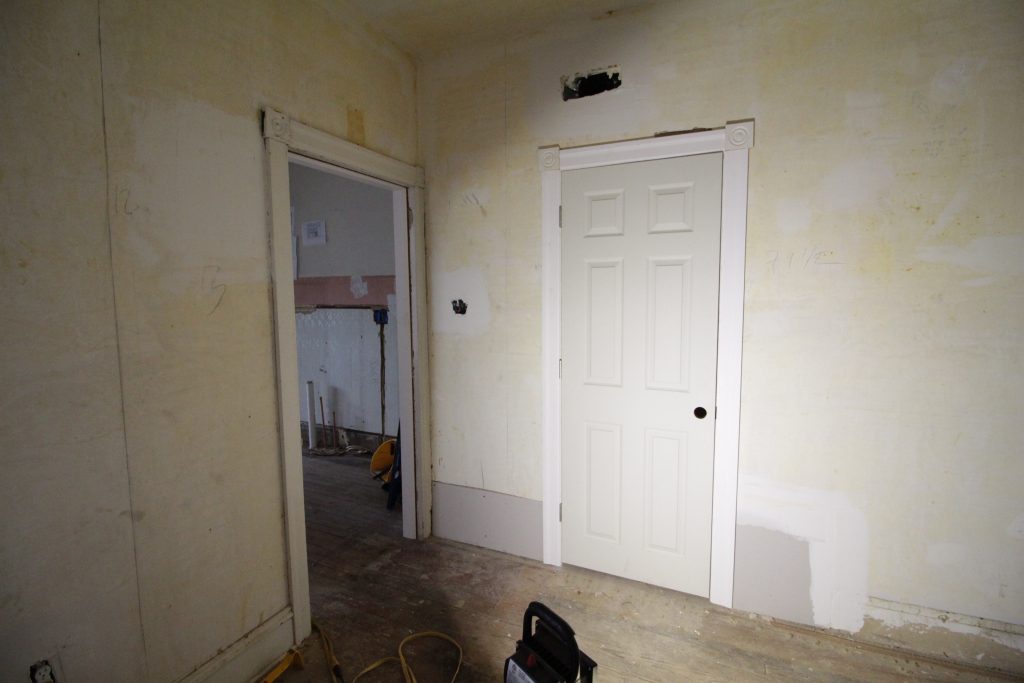
Old and new doorways

With the doorway moved we installed a new prehung door and fit it with trim to match the rest of the house. On the left is the existing doorway to the kitchen with original trim, and on the right is the new door with new trim. The wide angle camera lens I used is doing some funny things with the perspective, the door looks much wider than it really is. In reality the space between the door and doorway is wider than the door itself.

The contractors removed the cabinets and moved the utilities. I was all excited to start putting it back together. And then I started looking at the flooring, which I was going to just floor over with click-lock vinyl. Specifically I looked at the spot where the cabinets had been to figure out what I was going to do about it.

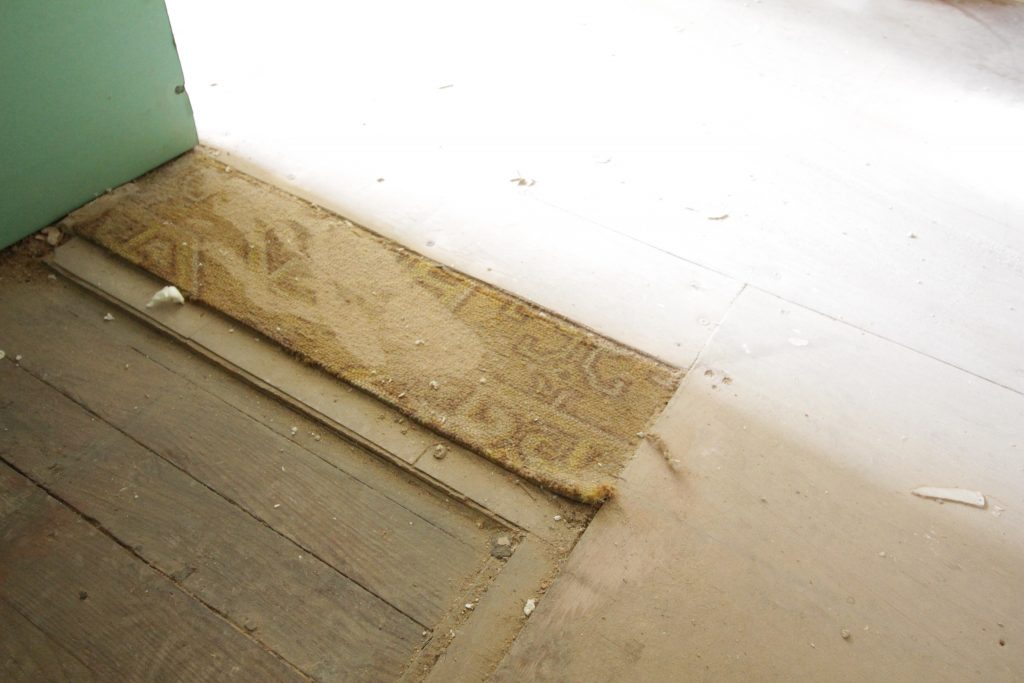
Old kitchen carpet

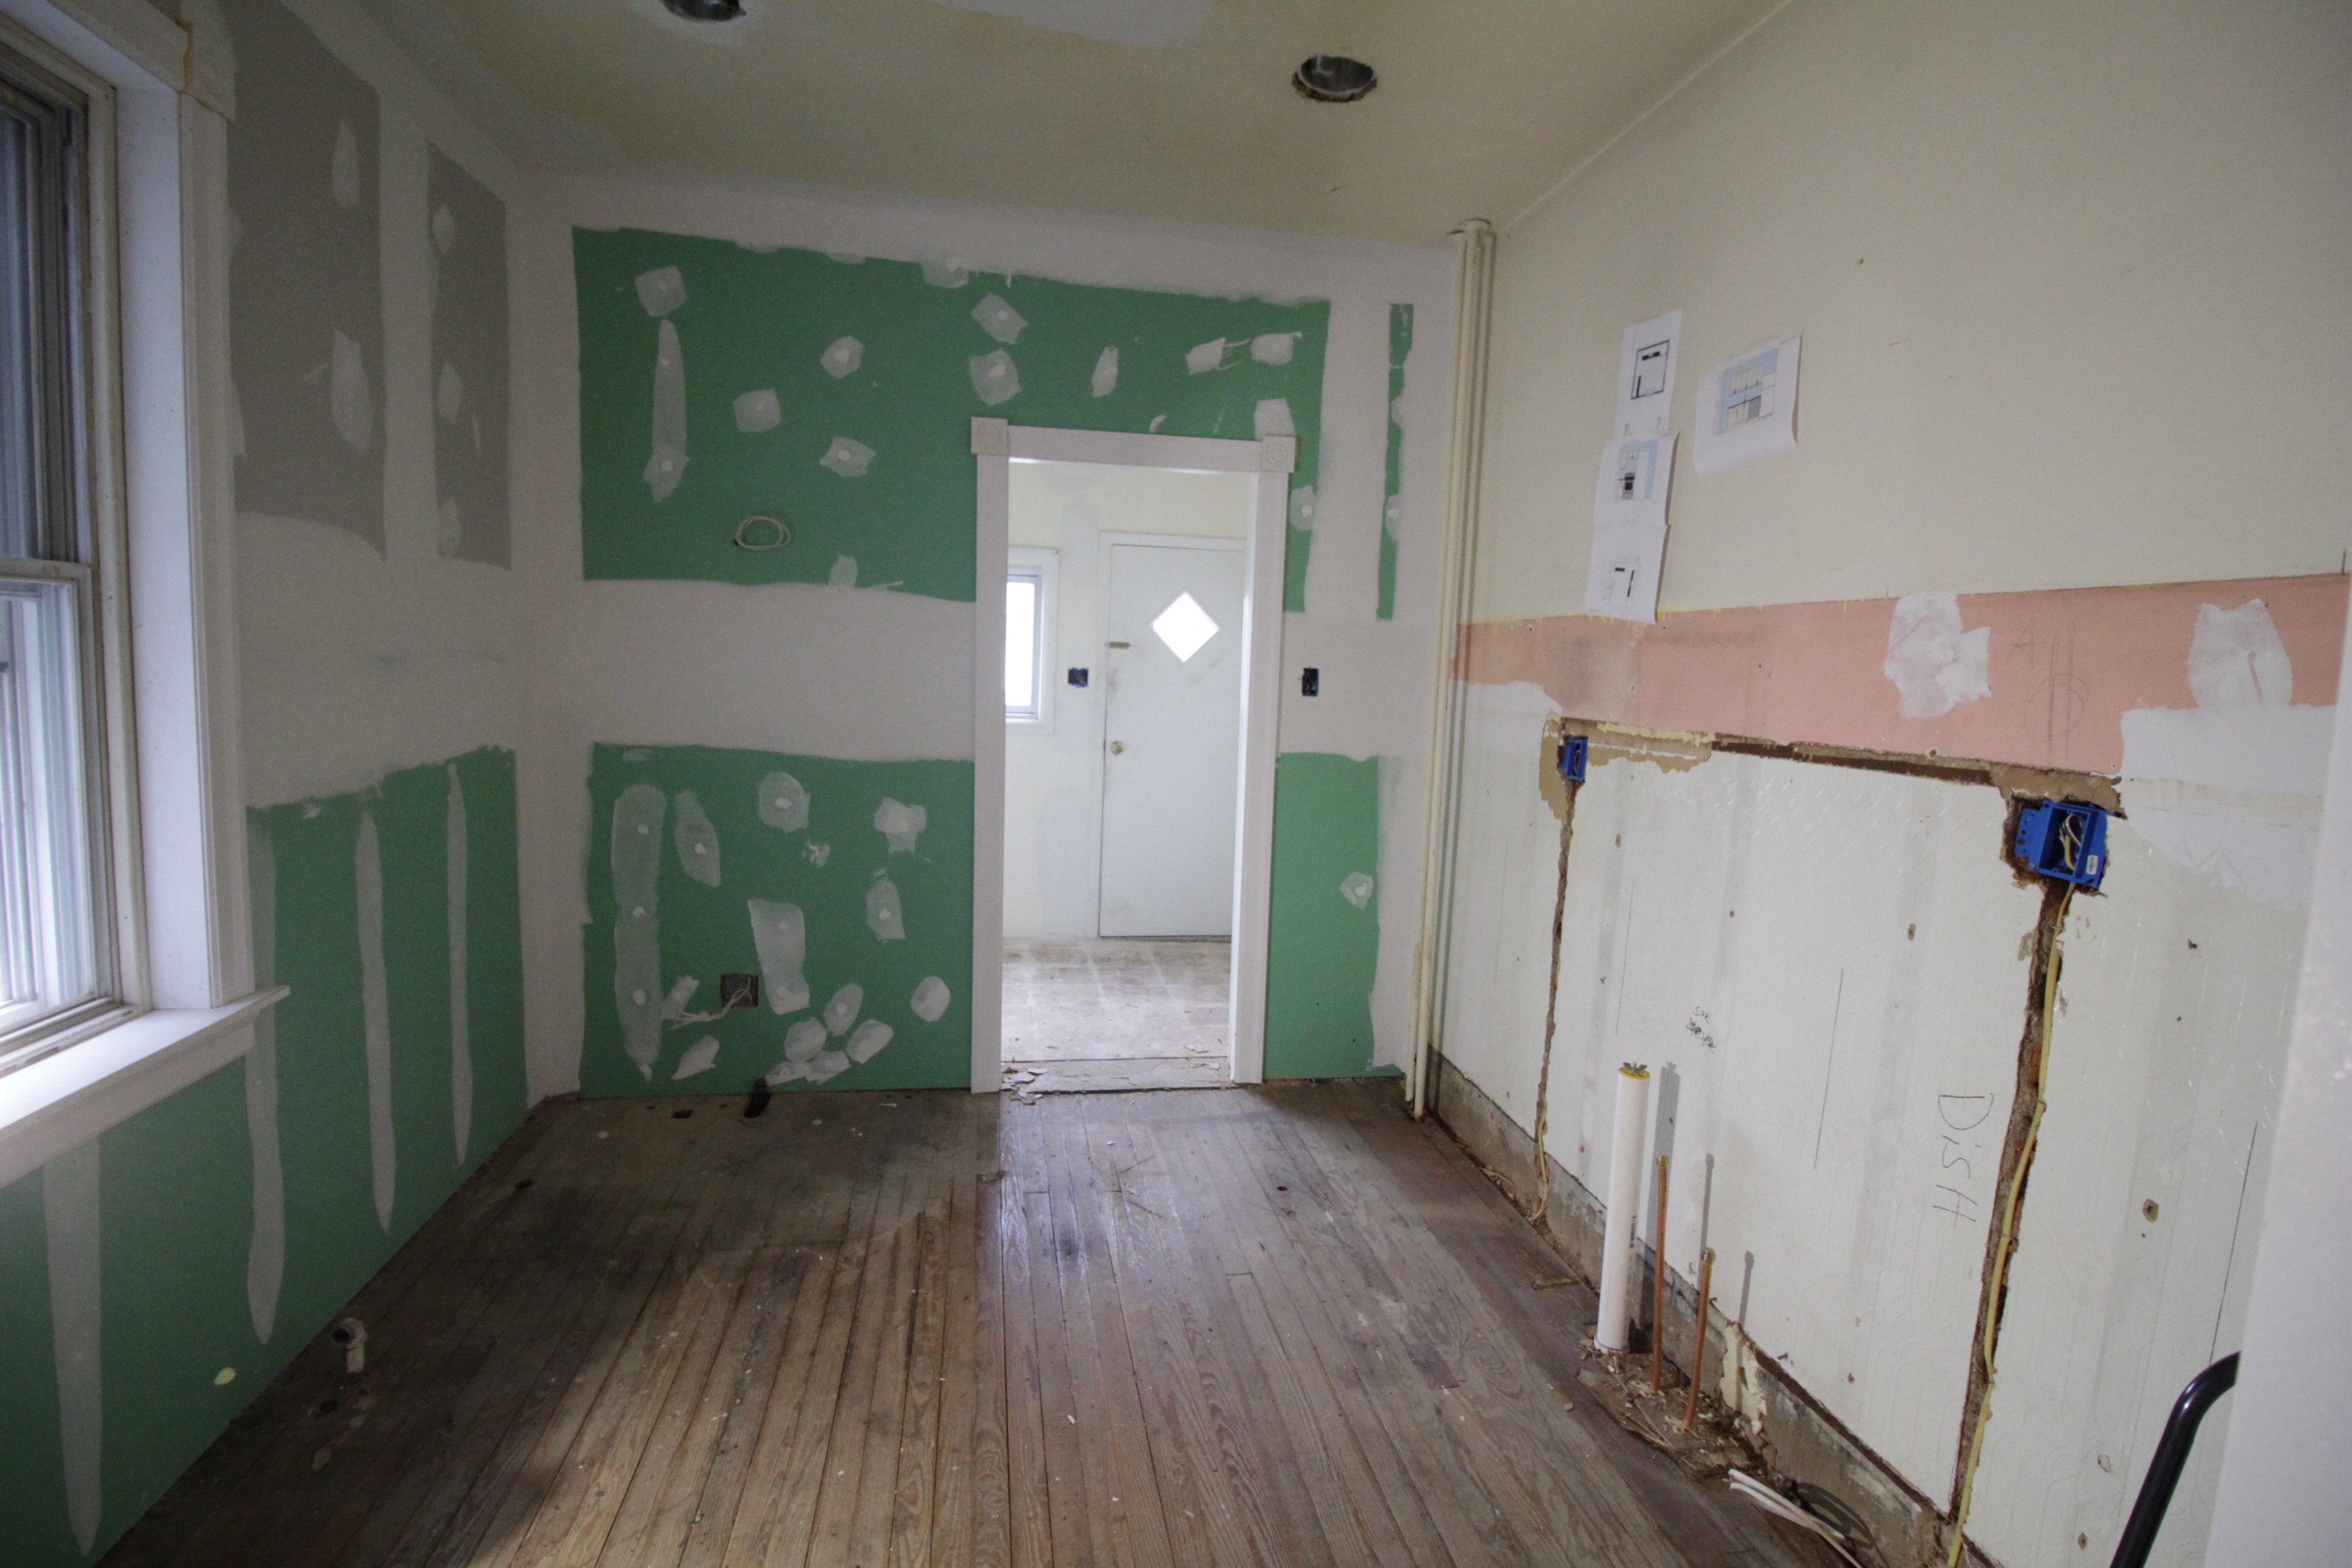
Why yes, that IS carpet. The flooring here is more than half an inch thick, and that’s after I’d peeled up the first layer. There are at least 3 layers of flooring here and they’re all rotted / falling apart. The thought of putting even more thick flooring on top of that made me a bit ill. I made a somewhat hasty decision to take it all out.

Bare original floor

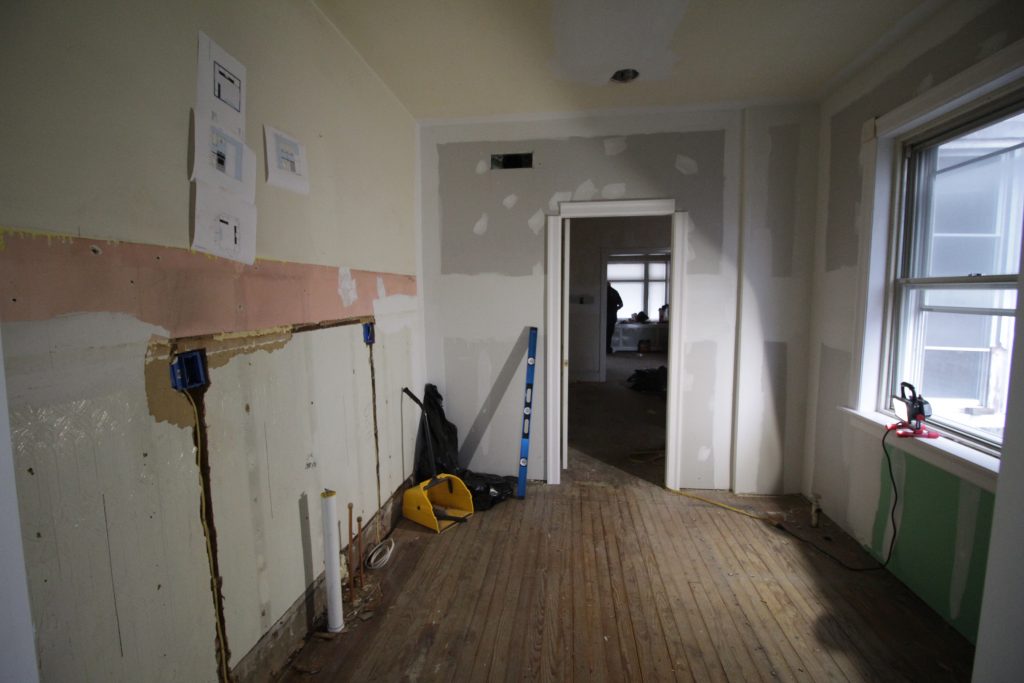
All things considered this part wasn’t too bad. It took my dad and I about 3 hours, the last of which was just removing all the *&@$# nails from the floor. The hardest part was that it’s just really dark in there. The recessed lighting isn’t working yet, and with all the rain we’ve had there wasn’t much natural light coming in. My dad brought a small work light (sitting on the window sill) which helped… unless one of us was standing in front of it. “Hey where’d the light go?” “I’m a human eclipse!”

Kitchen rear

With the flooring out I think we officially have a blank slate with this kitchen. The next step is to finish and sand the walls. Then we put in the flooring and replace all the trim. Once the trim is in we can paint. Of course by “we” I really mean my contractor. I’m also having my contractor hang the mounting rails for the cabinets because the wall they’re going on is masonry and I don’t have any of the equipment needed. Then I can build and hang the cabinets myself.

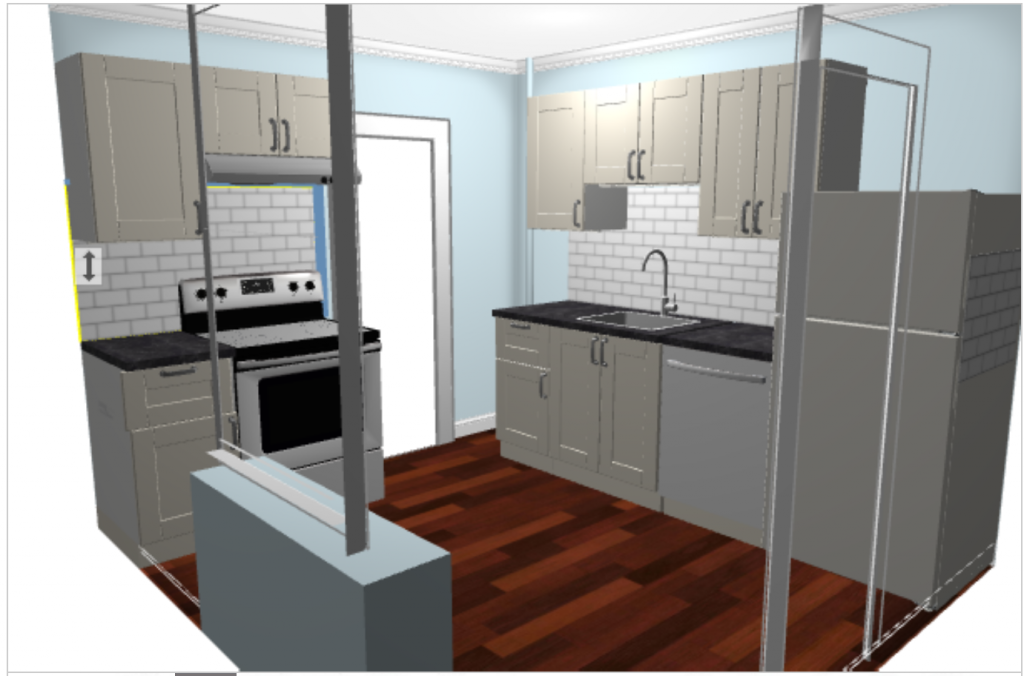
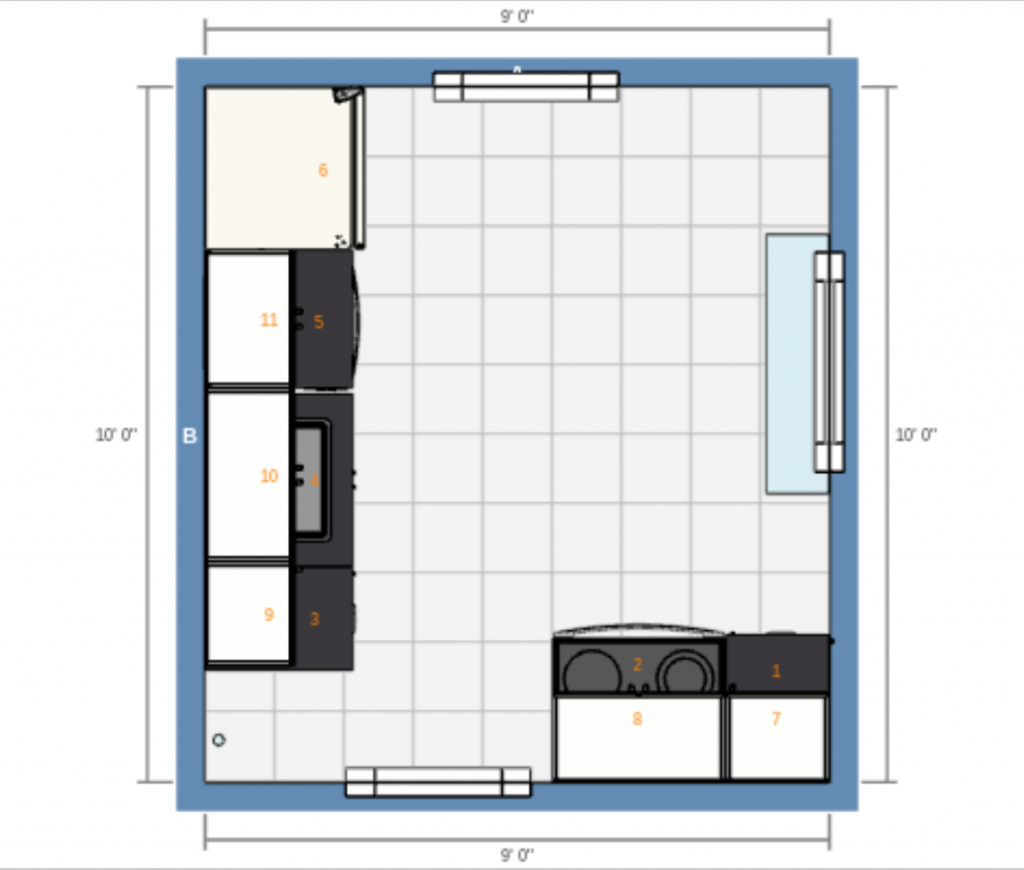
Ikea kitchen design

I’m using Ikea SEKTION again, because it’s affordable and since I’ve used it before it’s a known quantity. I also like that it’s modular, meaning if a tenant destroys one of the doors I can pick up a replacement locally and install it with minimal hassle.

kitchenoverhead

The layout isn’t perfect but I think it’s the best we’re going to do on the budget I have. Moving the radiator and resizing the window wasn’t an option for this project. The radiator pipes in the southwest corner keep me from taking the cabinets all the way into it. It’s a bit of an awkward space, but still not nearly as bad as having the range in a totally different room!

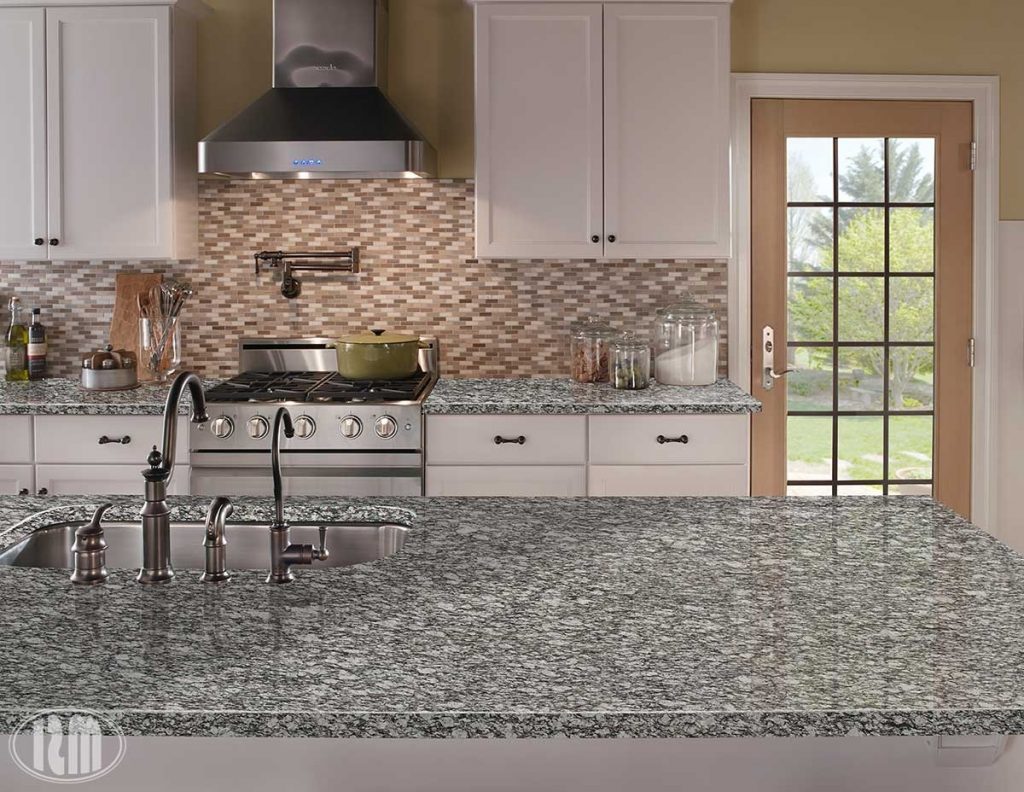
I still need to decide what I’m doing for the backsplash. The cabinets will be white and the counters I’m going with are a black and white textured granite called ‘white mist,’ which I’m hoping will be forgiving when it comes to hiding minor tenant damage. The floors will be a warm wood look vinyl plank.

White Mist Granite Slab

I’m trying to find an affordable tile backsplash with some color in it but I don’t want it to feel completely dated in a few years. If anyone has suggestions I’m all ears!

DIY and Decor, Exercise, Home Improvement

Cheap Ikea cycling desk

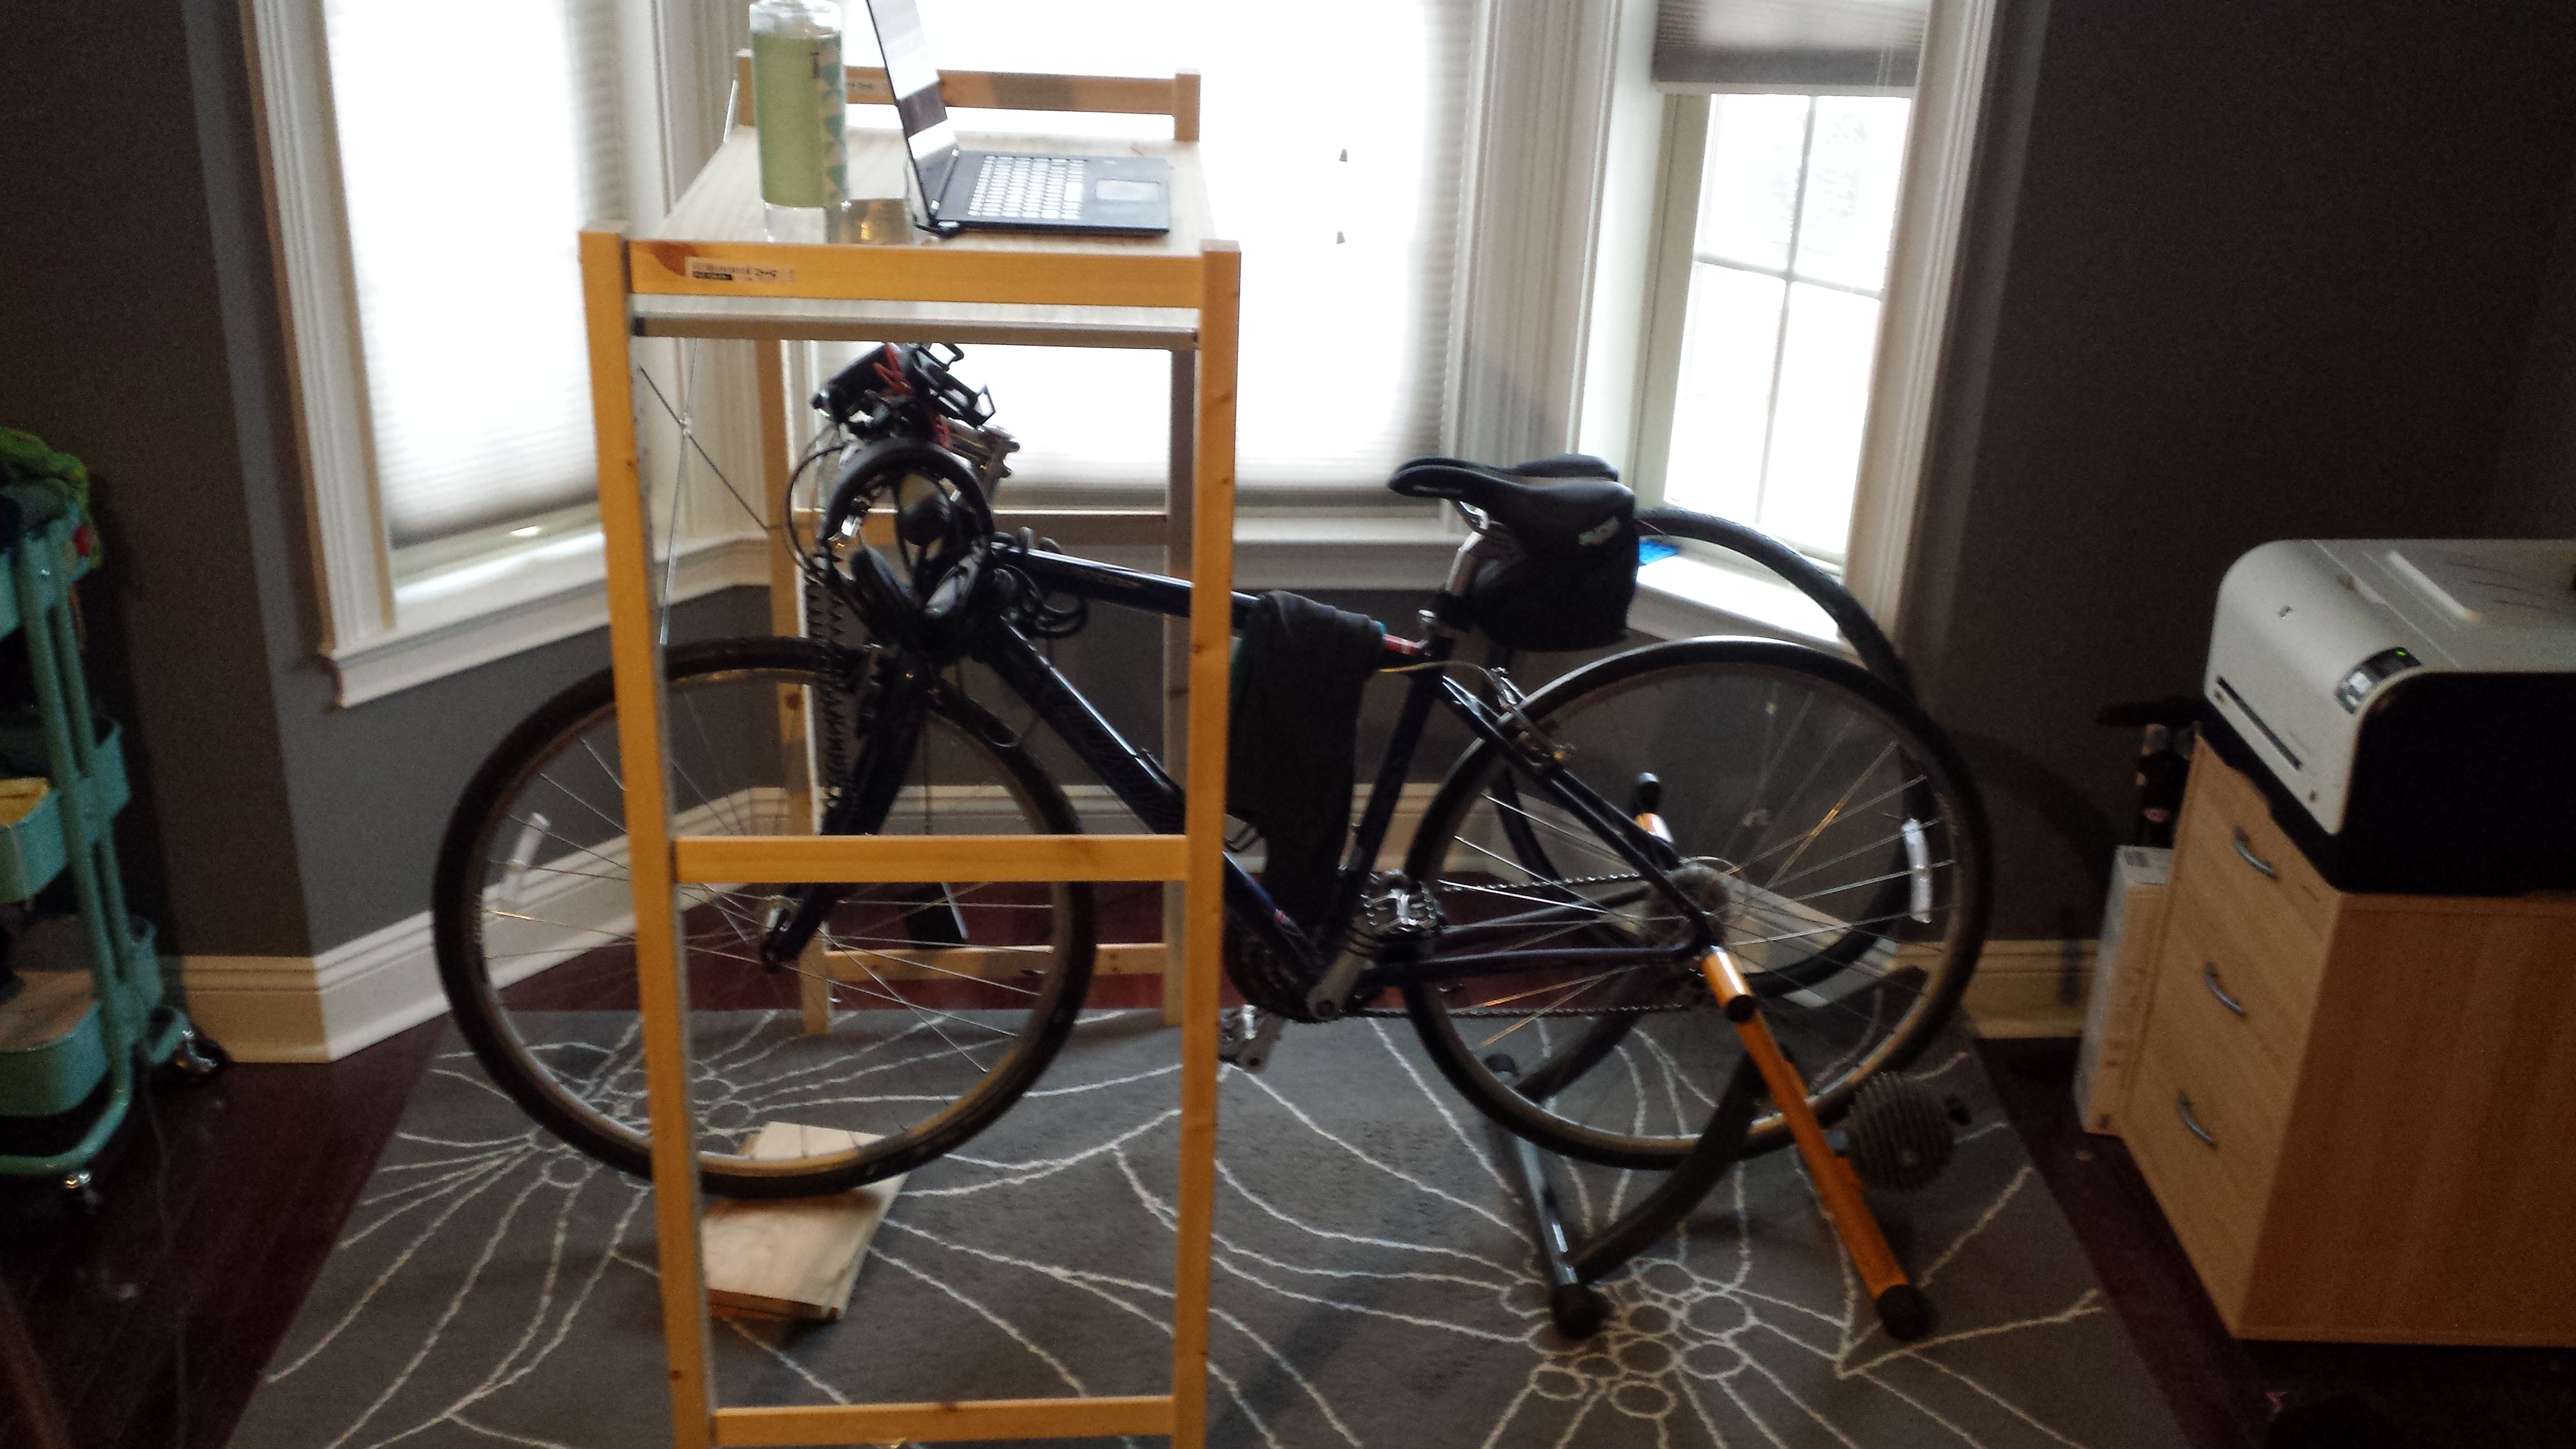
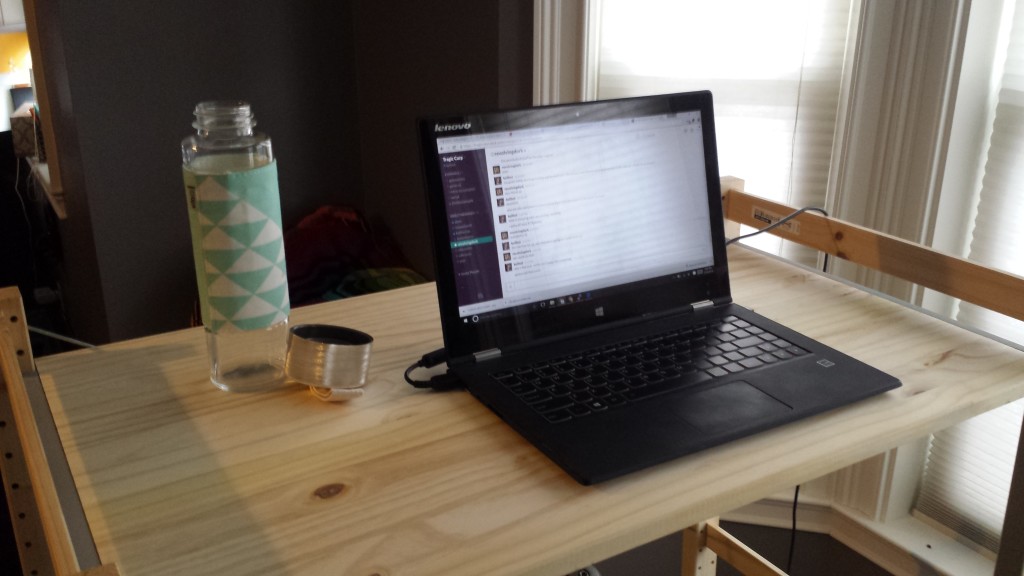
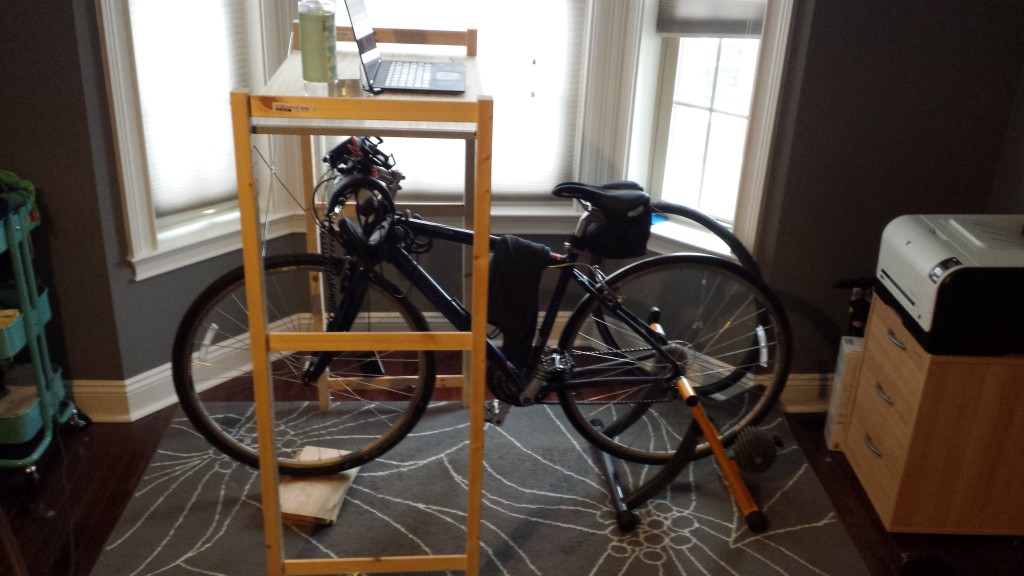
I picked up a bicycle trainer off Craigslist, a Century Fluid trainer someone else was offloading, and have been enjoying using it for workouts post-baby. It does get boring though, so I built a table that fits over it to hold my laptop.

2016-02-16 14.01.23

The table had a few non-negotiable requirements:

  • It needed to be sturdy enough to hold my laptop (easy)
  • It needed to be adjustable vertically so I could either lower it for a real workout or raise it and type on my laptop for some pedaling-while-working
  • It needed to be easily removable
  • It needed to be cheap

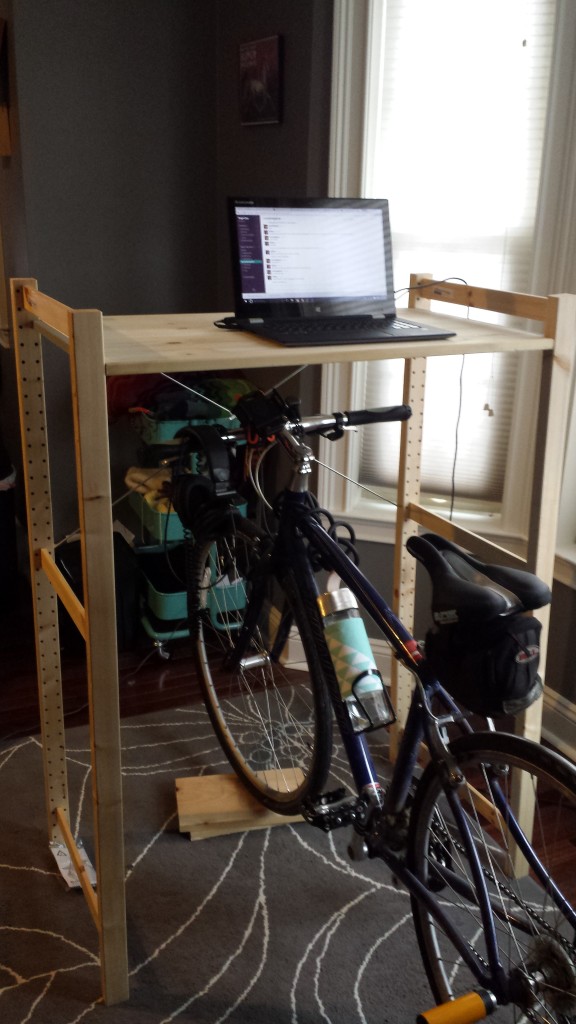
I ended up finding the parts I needed in the Ikea IVAR system. I used two 20″ wide by 48″ high sides, one 20″x35″ shelf, and an X bracket to give the whole thing stability.

Bike in "typing" mode
Bike in “typing” mode

The total including tax was under $45.

I pull the table up over the handle bars if I want to type on my laptop, and push it back so it’s more over the front wheel if I want to get an actual workout in. My only complaint is that the seat I have isn’t very comfortable when sitting upright and typing. I may pick up a gel cover to give my butt a break.

2016-02-16 14.00.11


RevolvingDork loads the bookshelves
New Construction Townhome

Built-in Bookcases by Ikea

RevolvingDork loads the bookshelves

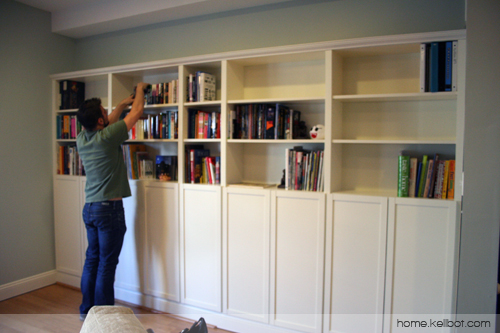
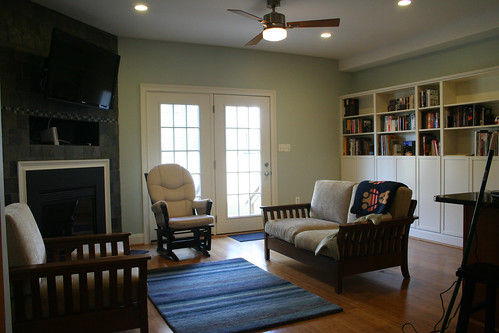
RevolvingDork and I have completed our first DIY home improvement project together: built in bookcases for our living room. It was only a little nerve wracking to coordinate on a project where neither of us really knew what we were doing.

We used Billy Bookcases, closely following the example from Centsational Girl’s blog. After trying a few different combinations we went with four full-width and one half-width bookcase. In between each bookcase is a strip of 1 11/16th inch moulding. We were able to pull up and reuse the floor moulding from the back wall (though as you can see in the photo above we need to get new quarter-round shoe moulding).

IMG_5923

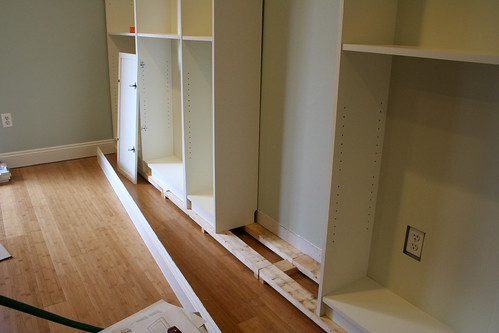
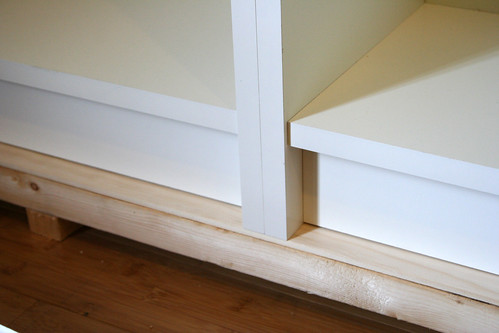
Our base moulding is pretty tall, and because we planned to install doors we needed to make sure the bottom edge of the lowest shelf was above the moulding. All together we needed to raise the bookshelves by 2 and a half inches. We built a frame out of two by fours, and nailed little wooden “feet” to the bottom to get things to the right height.

IMG_5927

Like most houses, our walls and floor are not perfectly square so we had to fudge things a little bit to get them to line up. We used some scraps of the flat moulding as shims to convince the bookshelves to line up correctly. Conveniently, the crown moulding at the top hides any uneven edges between the bookcases. Once everything was in place we painted all the moulding to match the trim.

IMG_5933

I’ve seen a lot of Billy build-ins, but none with doors. The doors weren’t quite as much of a problem as we’d expected; you can get away with up to 1/4″ thick moulding before you have to re-drill and reposition the mounting holes for the door hinges.

IMG_5935

The bookcases themselves came in at $500 (more than half of which was the doors), and we spent about another $150 on wood, moulding, nails, etc. Despite being very crafty / hackery, neither of us is very handy so don’t have much in the way of spare lumber or hardware lying around. Thankfully we were able to borrow a compound miter saw from RD’s dad. We started the project on Wednesday and finished it Saturday morning, though it took longer than it needed to because we don’t have a car to easily get large things from the hardware store.

It may not be the most technically perfect bookshelf in the world (don’t look too closely at the mitered base moulding…) but we’re pretty proud of our first home improvement project. As a bonus, the living room is finally a livable space instead of a box maze.

Living Room Unpacked