DIY Ikea Kitchen
1970s Shore Home, DIY and Decor

My DIY Ikea Kitchen 1 Year Later

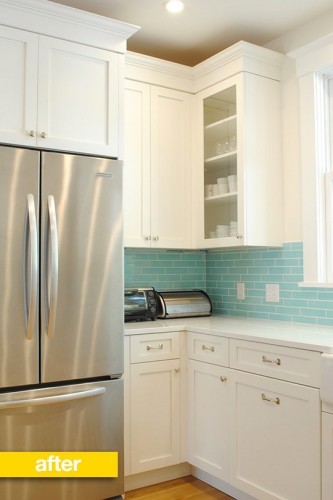
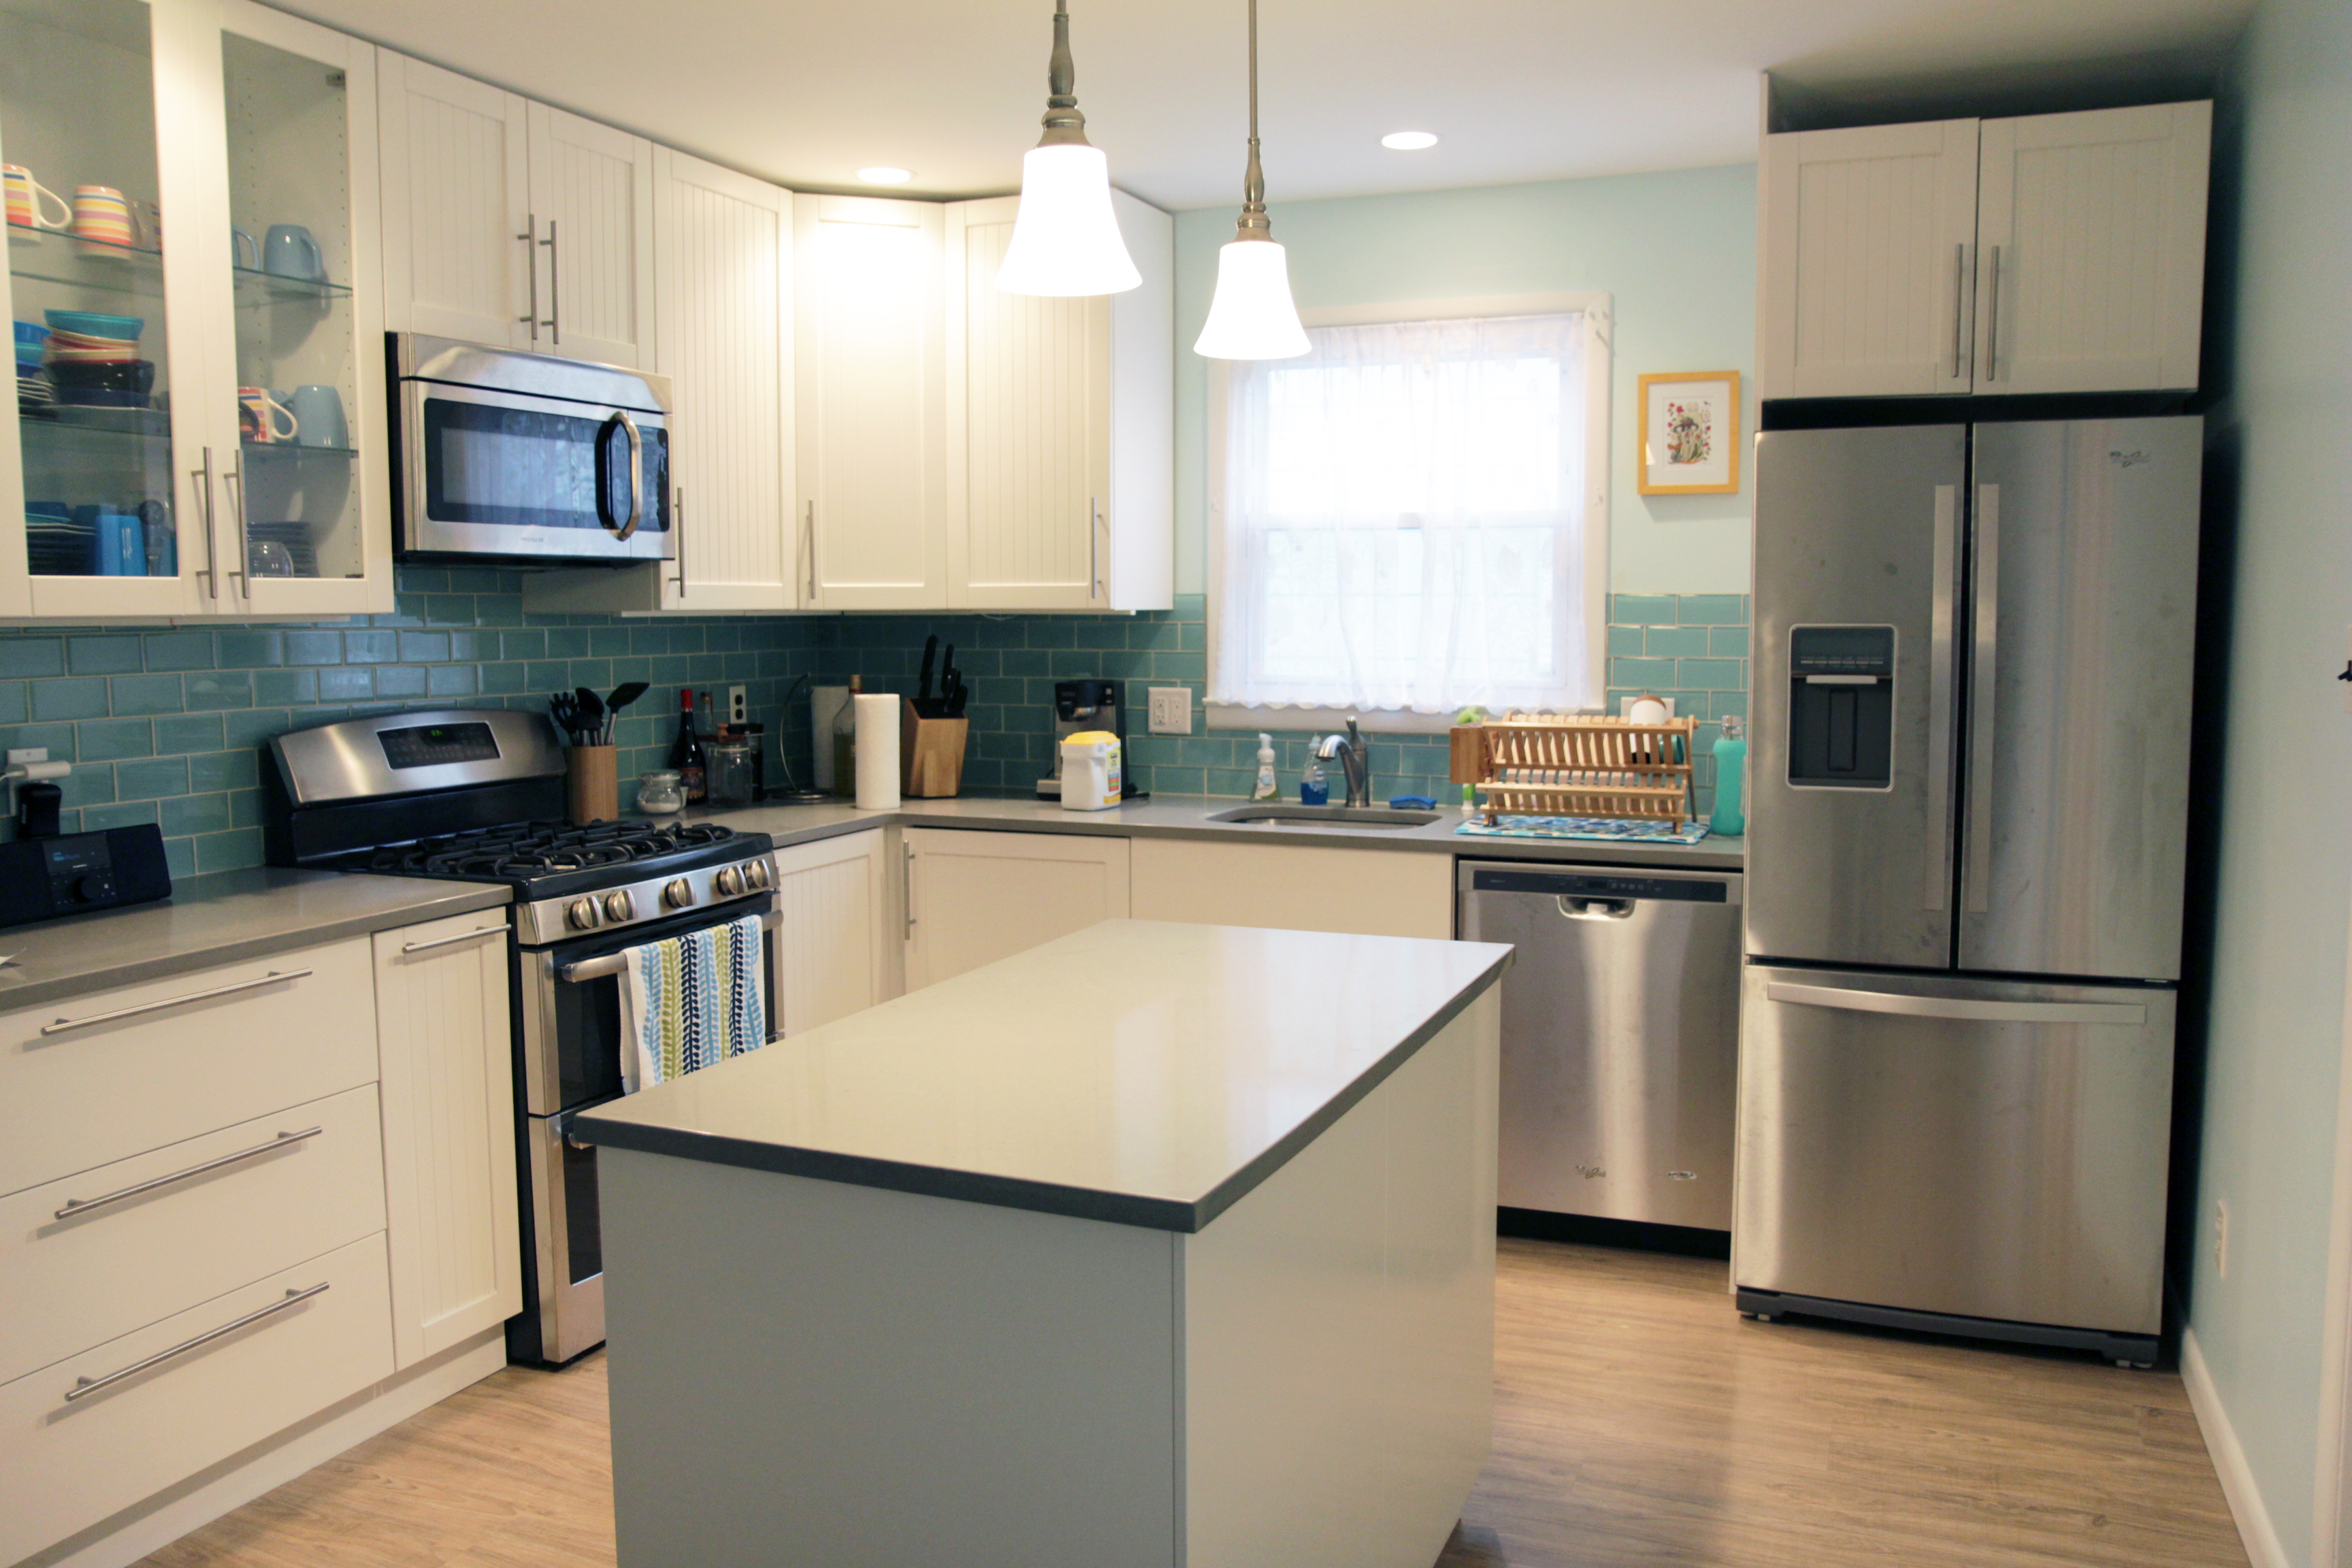
It’s been a year since our “kitchenwarming” down the shore, and it’s finally starting to feel like a functional place to cook and not just a showroom. It took a while to stock it; to collect all the spices we use regularly, to amass odds and ends like cupcake liners and cutting boards. We’ve gotten used to how it functions, and started agreeing on where we keep things. I’ve had some time to think about what I’d change if I were to do it all again (I’m not).
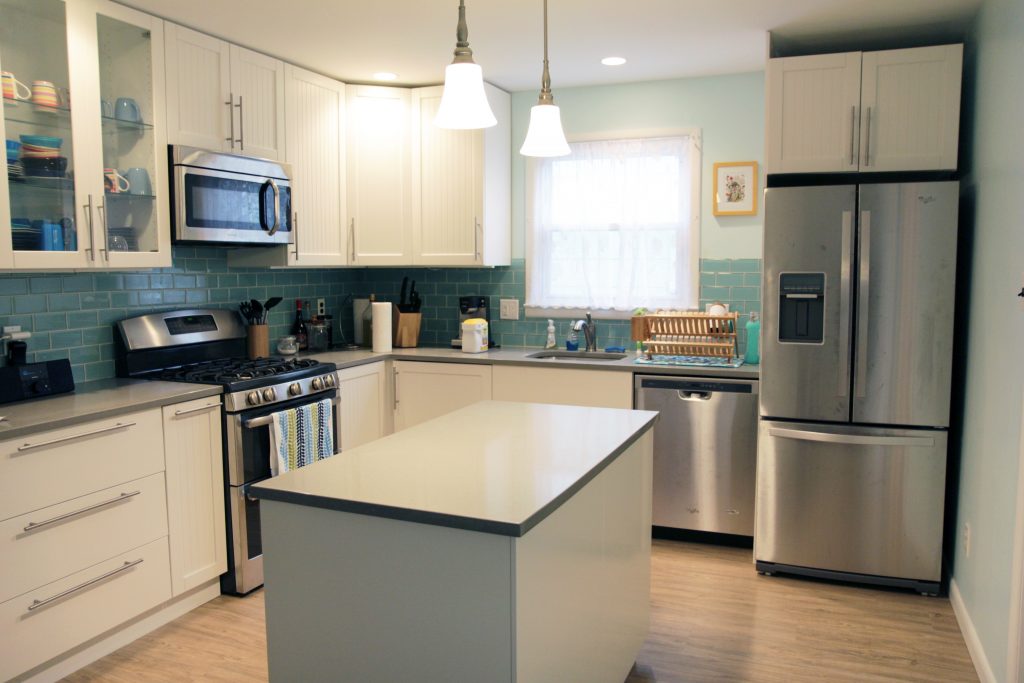
DIY Ikea Kitchen

The custom-made cabinet doors

I didn’t like the available Ikea doors so we got custom made doors and I painted them myself. They look great, and didn’t cost much more than the Ikea doors, but it was a ton of work and honestly not worth it for a kitchen I only see on weekends and the occasional vacation week. Even with a sprayer, priming and painting the doors was a pain. I still think the custom doors are a good way to get a high end look in an otherwise budget kitchen, but I think I could have skipped it for this particular project.

The only really frustrating thing about the custom doors is that you’ve got no room to change your mind later. On our sink cabinet I had originally planned for a pull out trash drawer. Once everything was in it was very obvious that wouldn’t fit under the garbage disposal. I needed to switch from a drawer front to hinged doors, and ended up going with some that don’t quite match (and I still haven’t gotten around to painting). Granted I could have ordered more doors from the cabinetry company, but that would have taken another few weeks and I wanted to be done.
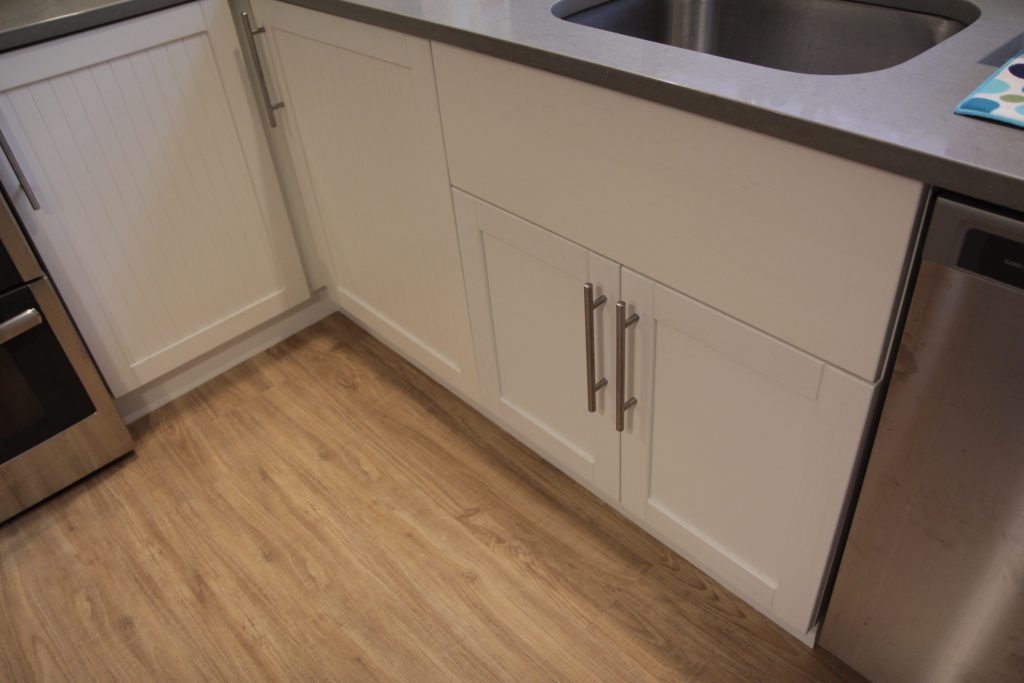
Custom doors on Ikea cabinet


The island

Our kitchen is about 10 foot square and I really didn’t think we had room for an island. I taped it out on the floor and took a while to pace around the room trying to get a feel for it. I’m really glad we put it in, the island makes it much easier for two people to work in the kitchen at once.

I think if I did it again though I’d get a freestanding island rather than a built in one. It would be nice to be able to move it out of the way for parties, and we really don’t need the massive amount of storage space it provides. Half the drawers in it are still empty.
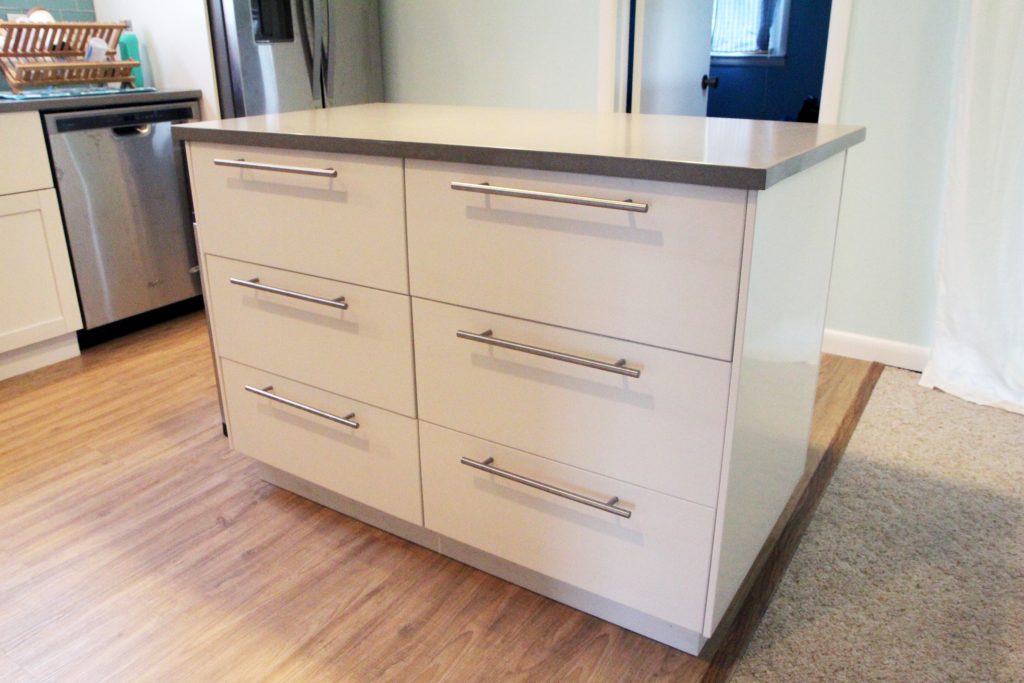
Ikea kitchen island

The flooring

We went with luxury vinyl tile and it looks great. It’s waterproof, durable, and most people haven’t noticed it isn’t wood. To be fair, most people are also not looking because they are busy being on vacation. We’ve gotten many compliments on it. The transition molding I picked up from Lowes isn’t a perfect match, but it’s enough to make the room feel finished and put together.
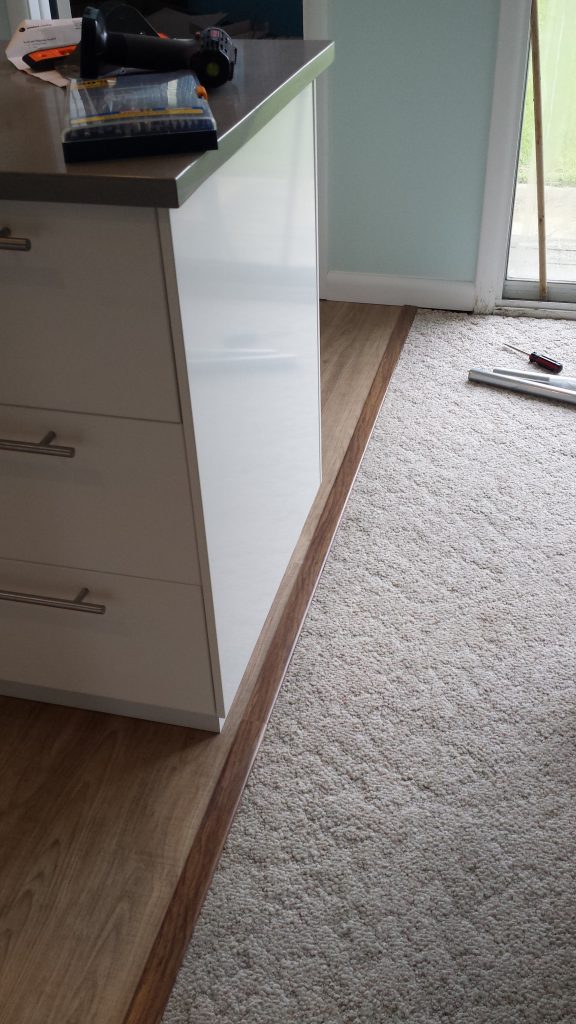
Carpet to Vinyl transition

The drawers within drawers

Ikea has this feature where you can put drawers inside of doors or other drawers. We actually have this in our non-Ikea kitchen at home, and inside cabinets with doors it’s pretty great. It functions kind of like a pull out shelf for your pot lids or other doodads.

Ikea cabinets function on the idea of elements being a certain number of “units” high. Drawers can take up 1, 2, or 3 units. Our configuration has 2-high exterior drawers with a smaller 1-high drawer inside it.
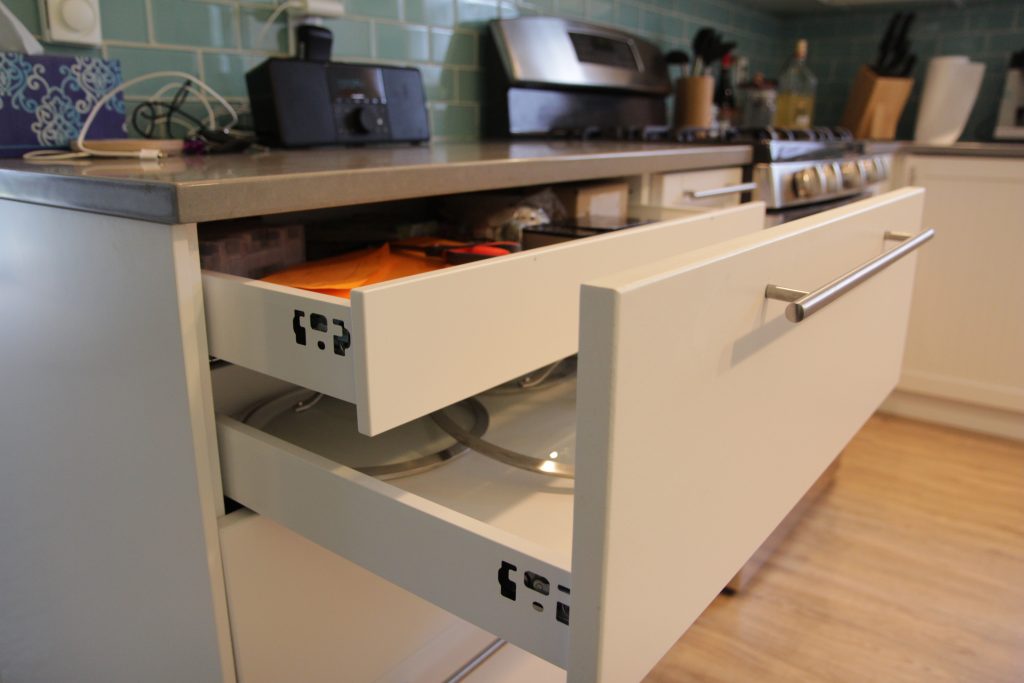
Ikea drawer-within-a-drawer

It sounds great in theory but in practice the smaller drawer is practically invisible if it’s closed. We’ve started calling them the ‘secret drawers’ because guests can’t find them.
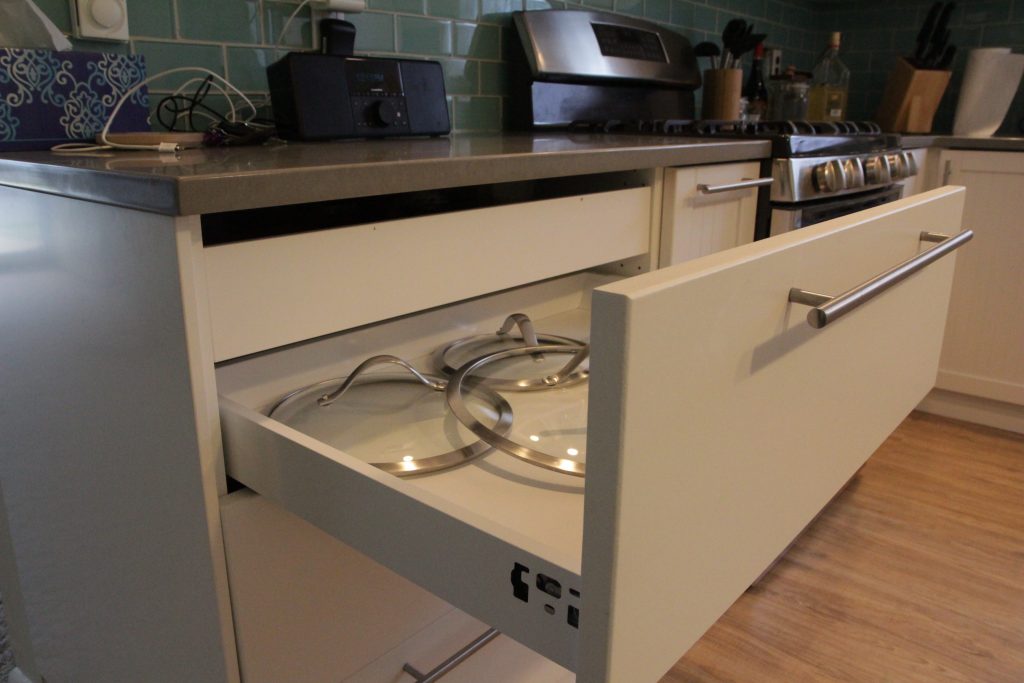
Hidden Ikea drawer

Additionally there are two small spots where the paint has worn away due to the hardware we used to mount the handles. I’m not sure if we were supposed to countersink the screw holes on the back, but we didn’t so they stick out a bit and rub against the smaller drawer.
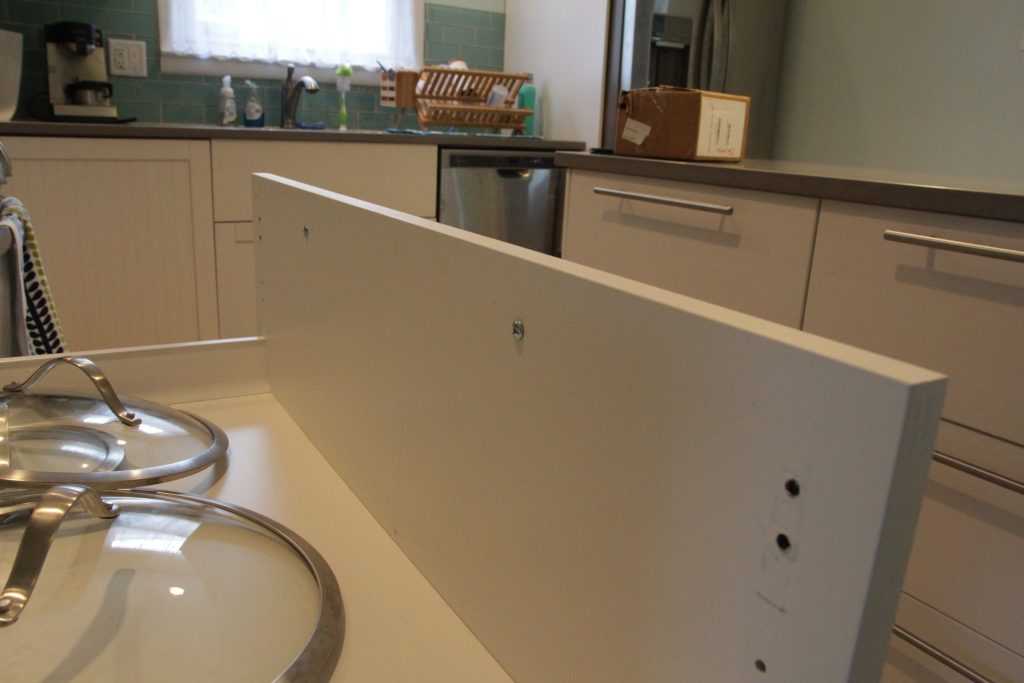
Screws sticking out back

The lighting

For the most part I am very happy with the lighting choices we made in the kitchen, especially having the recessed lighting put in over the counter area. Having a well lit work area is essential. The only thing I don’t love is the Ikea ANSULT undercabinet lighting, which is pretty poorly made. If I were to do it again I’d get my cabinet lighting from someone else.

Overall we’re still really happy with the kitchen, and I’d use Ikea again. In fact I am using Ikea again in our rental remodel.

The glass subway tile backsplash looks amazing, but it was a huge pain to install and they were expensive. I’m not sure whether I’d do it again, I’d have to really love the project.

I still absolutely love the quartz countertops and while they were out of budget for the rental, I would use them again in a heartbeat.
 

Bare original floor
1916 Row Home

Preparing the Kitchen

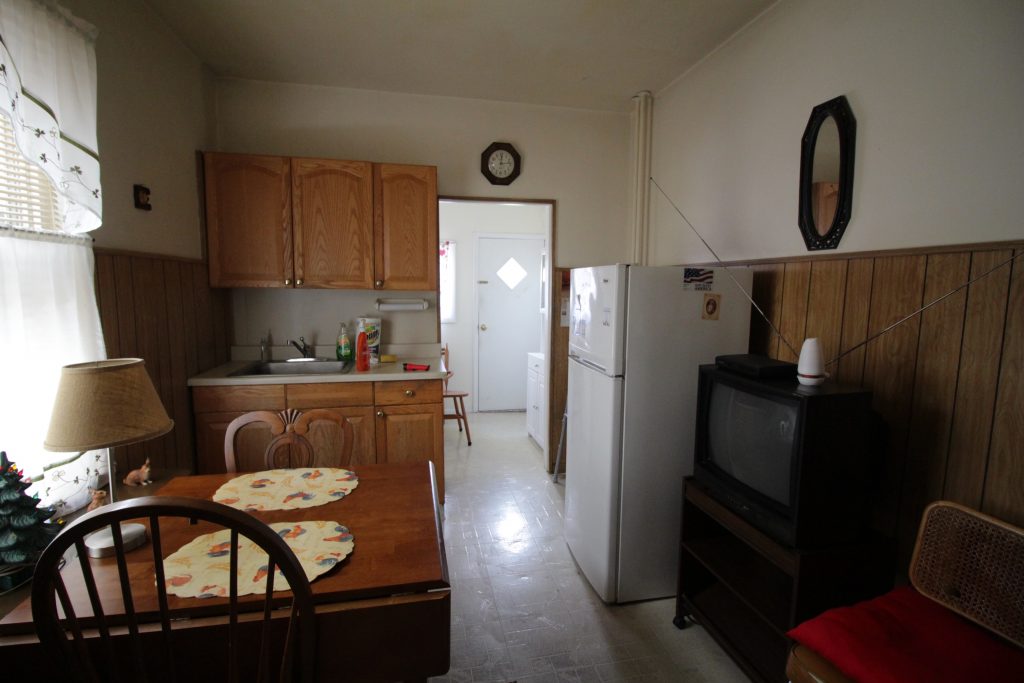
The photo below shows the old kitchen in the house I’m remodeling. It was taken from the doorway and shows pretty much the whole room. Notice anything missing?

Small, cramped kitchen

That’s right, this kitchen lacks a stove. There actually is a stove, it’s in the room behind the kitchen on the same wall as the sink. This means that if you have a pot of hot something on the stove you have to carry it around the corner into another room. There’s no counter space next to the stove, so you’ve got nowhere to set things besides the stove itself. The paneling, flooring, and cabinets are all things I could live with; having the stove another room was not.

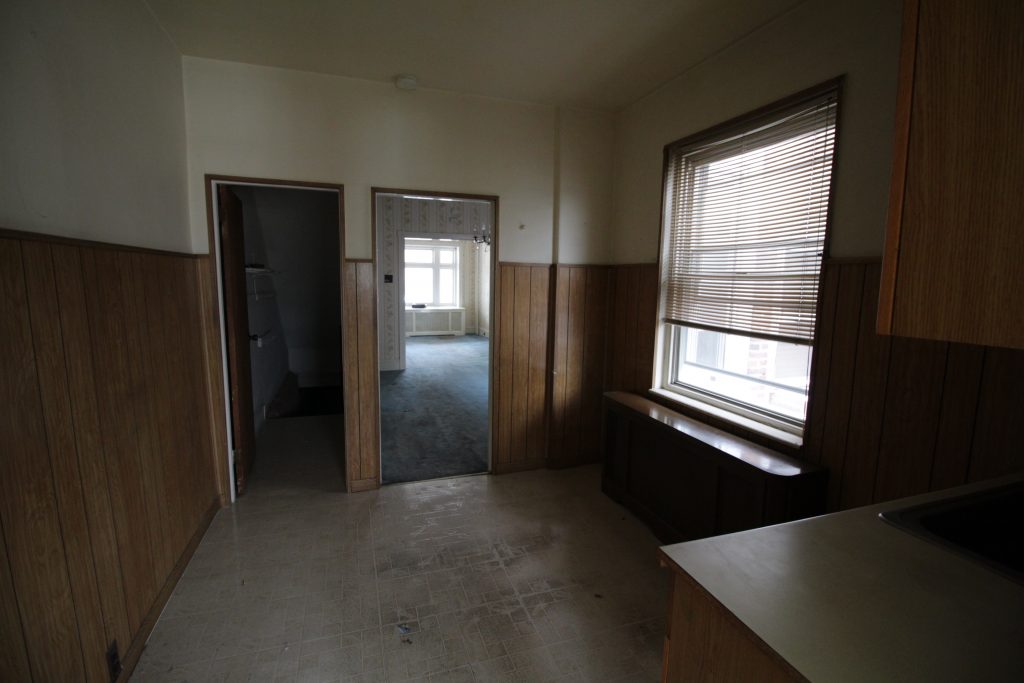
On one wall we’ve got a giant window and giant radiator taking up nearly all the space. On the other (next to where I’m standing taking the above photo) we’ve got a door to the basement, significantly cutting into where we can put things. The previous owners put the fridge in the middle of the room which I guess makes sort of a work triangle with the back room stove but… ugh.

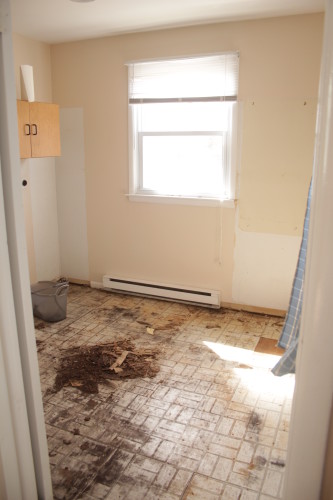
Empty kitchen

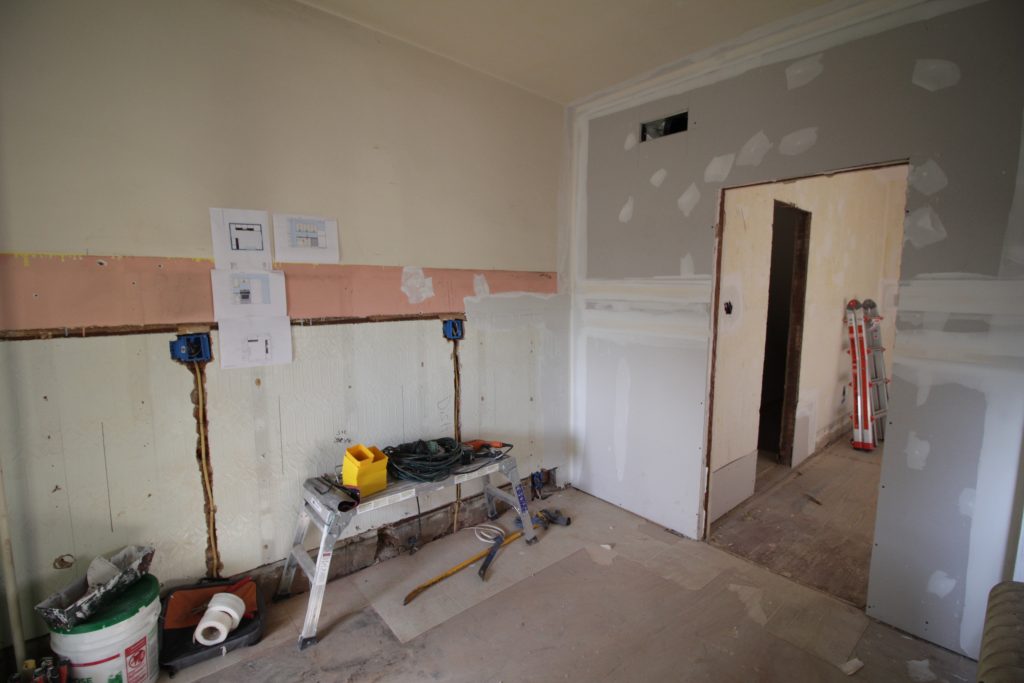
The first major step was to move that doorway. I put it around the corner, in the dining room. This gives us more space in the kitchen as well as a small storage area behind the door at the top of the basement stairs.

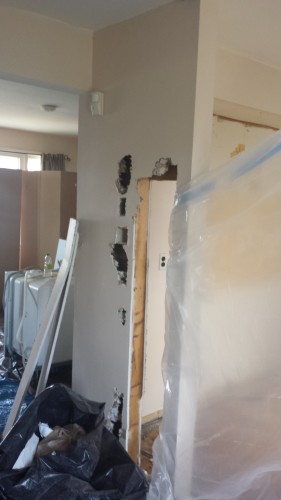
Doorway moved

That hole above the new drywall is for the central air! We ended up hanging new sheetrock over this wall. Underneath the wood paneling it was in pretty rough shape. Before the wood paneling, which tore up the plaster with a million nails, someone had glued a faux tin textured… thing… and it wanted to take the plaster with it when it came down. Sheet rock over plaster isn’t my favorite thing in the world, but in this instance it was our best option.

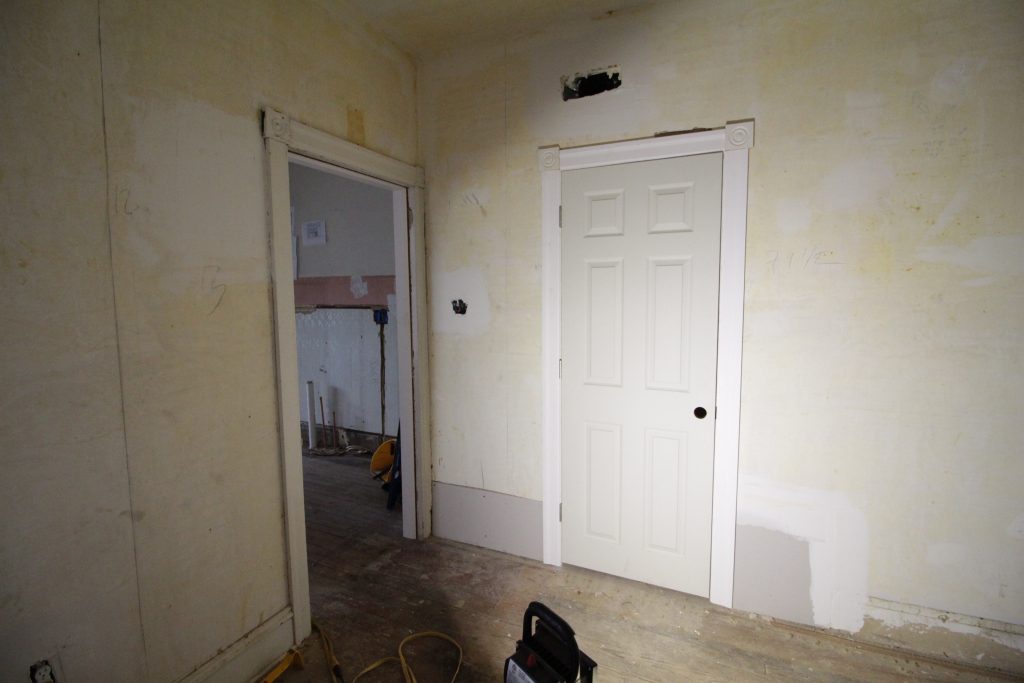
Old and new doorways

With the doorway moved we installed a new prehung door and fit it with trim to match the rest of the house. On the left is the existing doorway to the kitchen with original trim, and on the right is the new door with new trim. The wide angle camera lens I used is doing some funny things with the perspective, the door looks much wider than it really is. In reality the space between the door and doorway is wider than the door itself.

The contractors removed the cabinets and moved the utilities. I was all excited to start putting it back together. And then I started looking at the flooring, which I was going to just floor over with click-lock vinyl. Specifically I looked at the spot where the cabinets had been to figure out what I was going to do about it.

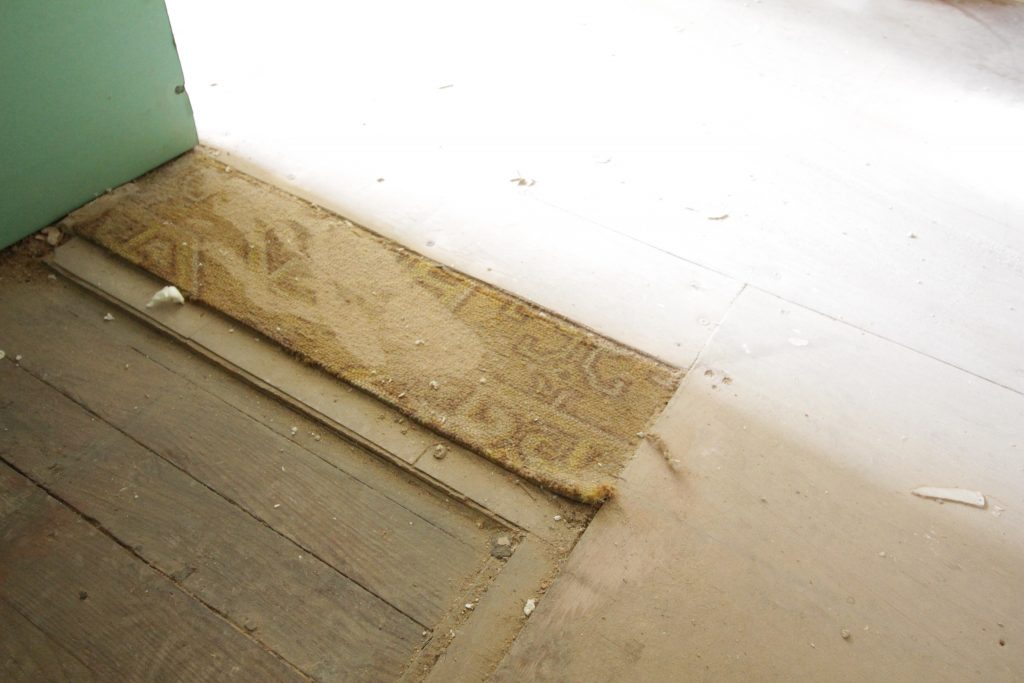
Old kitchen carpet

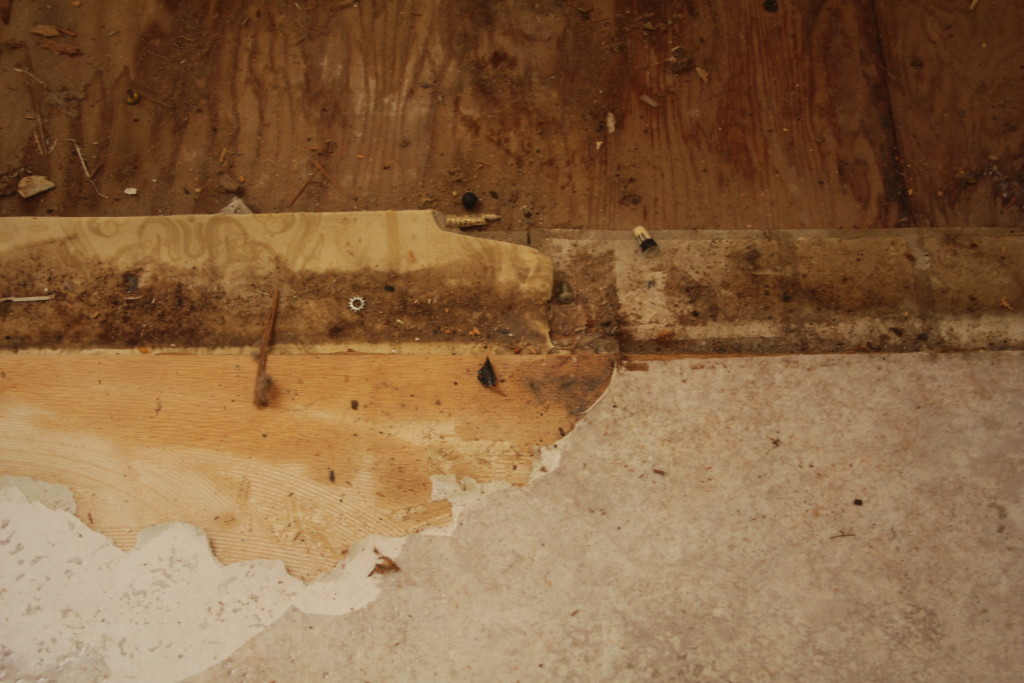
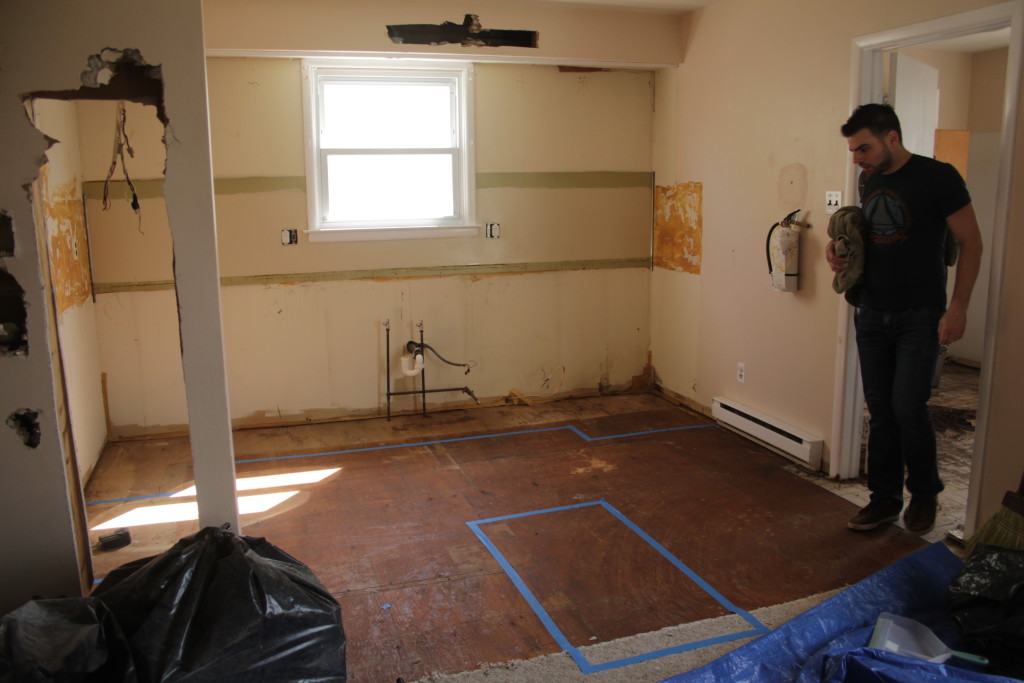
Why yes, that IS carpet. The flooring here is more than half an inch thick, and that’s after I’d peeled up the first layer. There are at least 3 layers of flooring here and they’re all rotted / falling apart. The thought of putting even more thick flooring on top of that made me a bit ill. I made a somewhat hasty decision to take it all out.

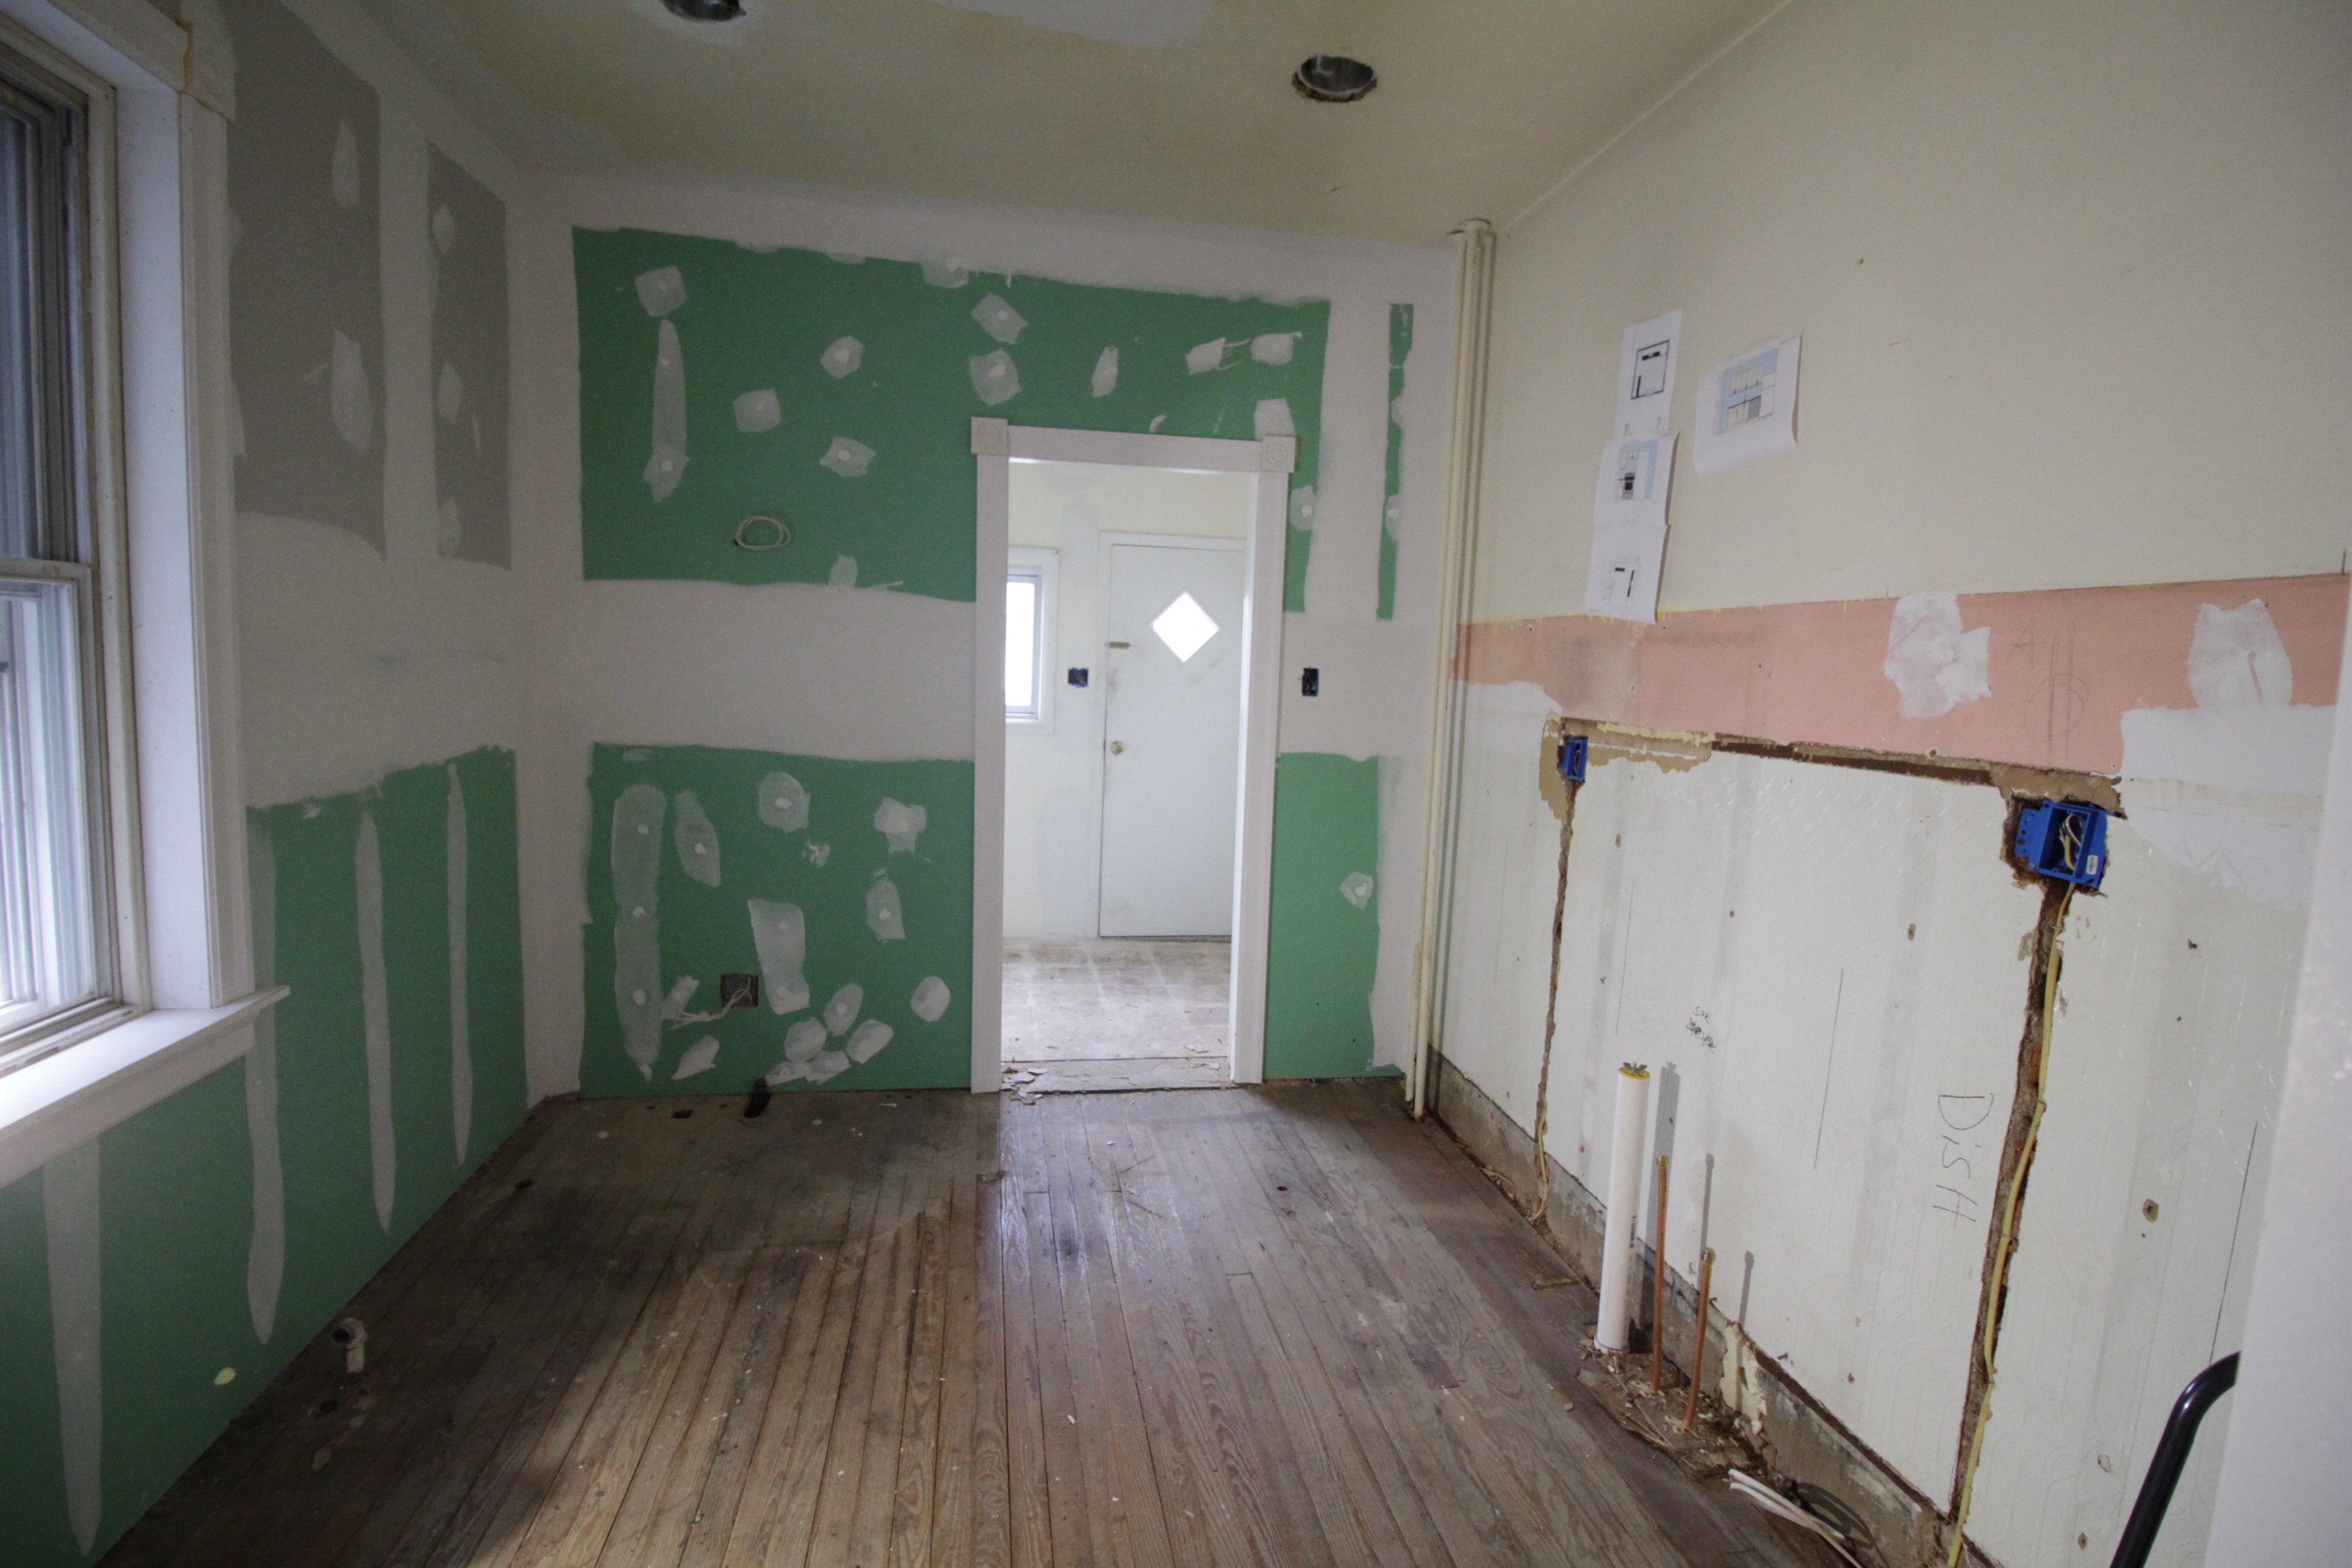
Bare original floor

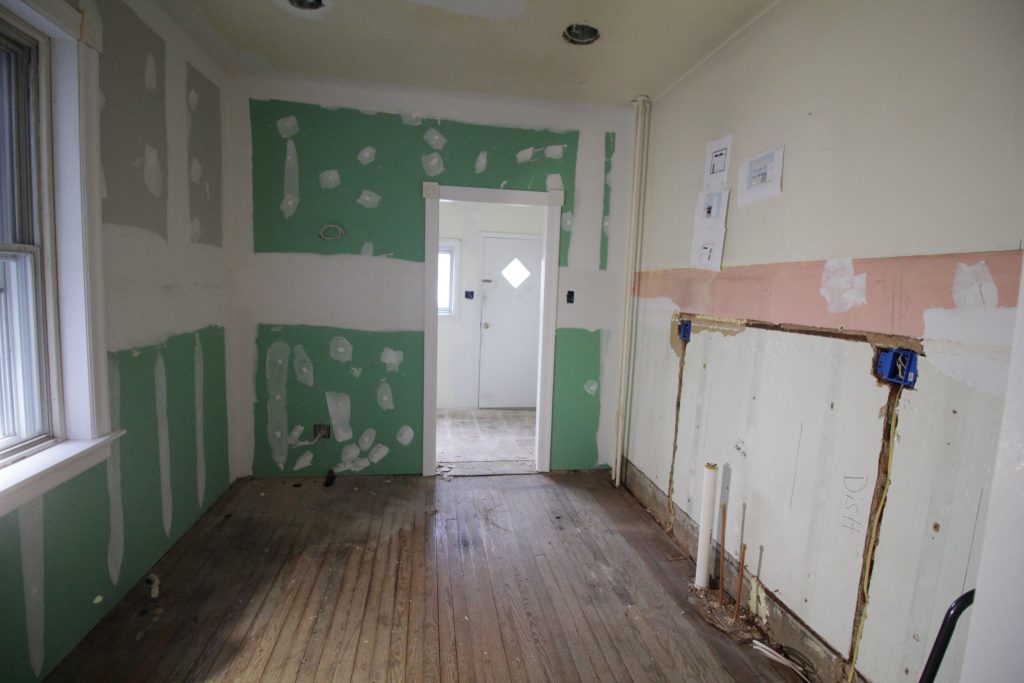
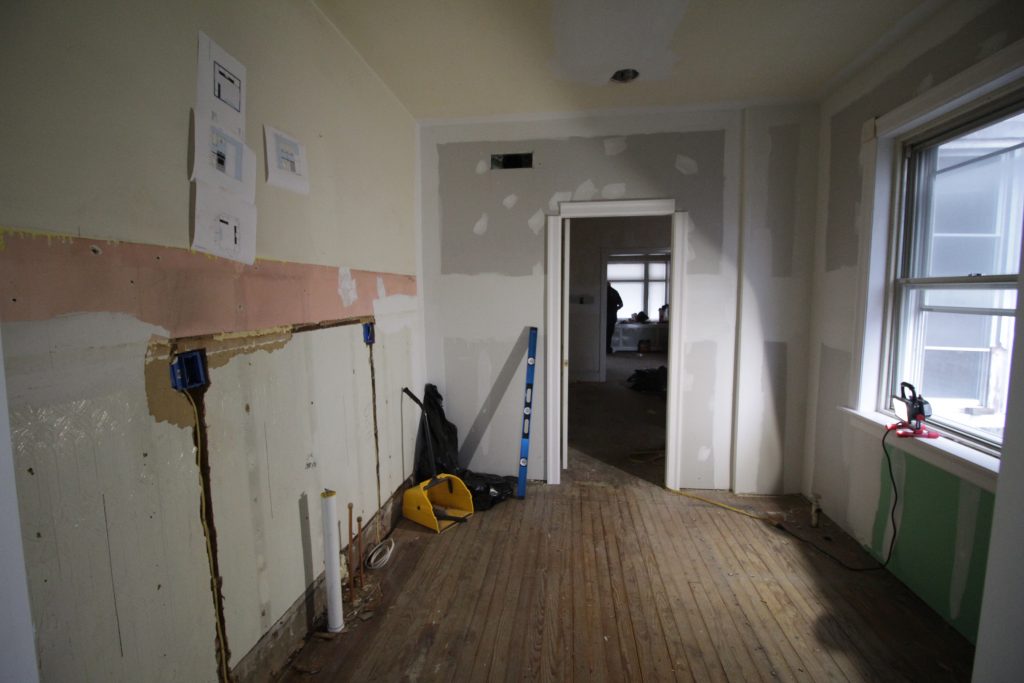
All things considered this part wasn’t too bad. It took my dad and I about 3 hours, the last of which was just removing all the *&@$# nails from the floor. The hardest part was that it’s just really dark in there. The recessed lighting isn’t working yet, and with all the rain we’ve had there wasn’t much natural light coming in. My dad brought a small work light (sitting on the window sill) which helped… unless one of us was standing in front of it. “Hey where’d the light go?” “I’m a human eclipse!”

Kitchen rear

With the flooring out I think we officially have a blank slate with this kitchen. The next step is to finish and sand the walls. Then we put in the flooring and replace all the trim. Once the trim is in we can paint. Of course by “we” I really mean my contractor. I’m also having my contractor hang the mounting rails for the cabinets because the wall they’re going on is masonry and I don’t have any of the equipment needed. Then I can build and hang the cabinets myself.

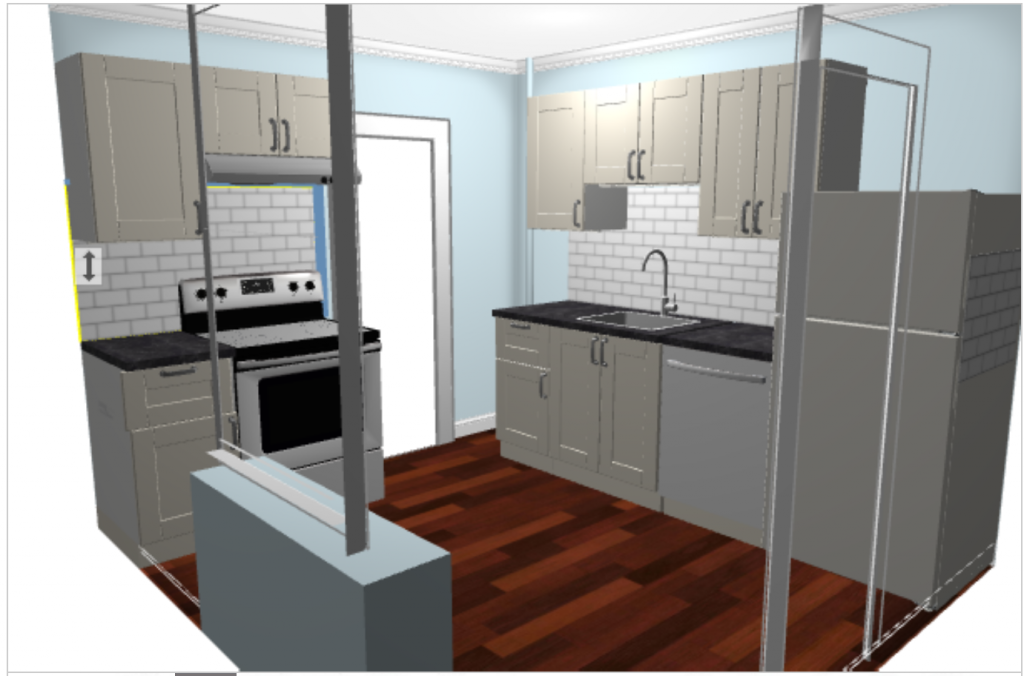
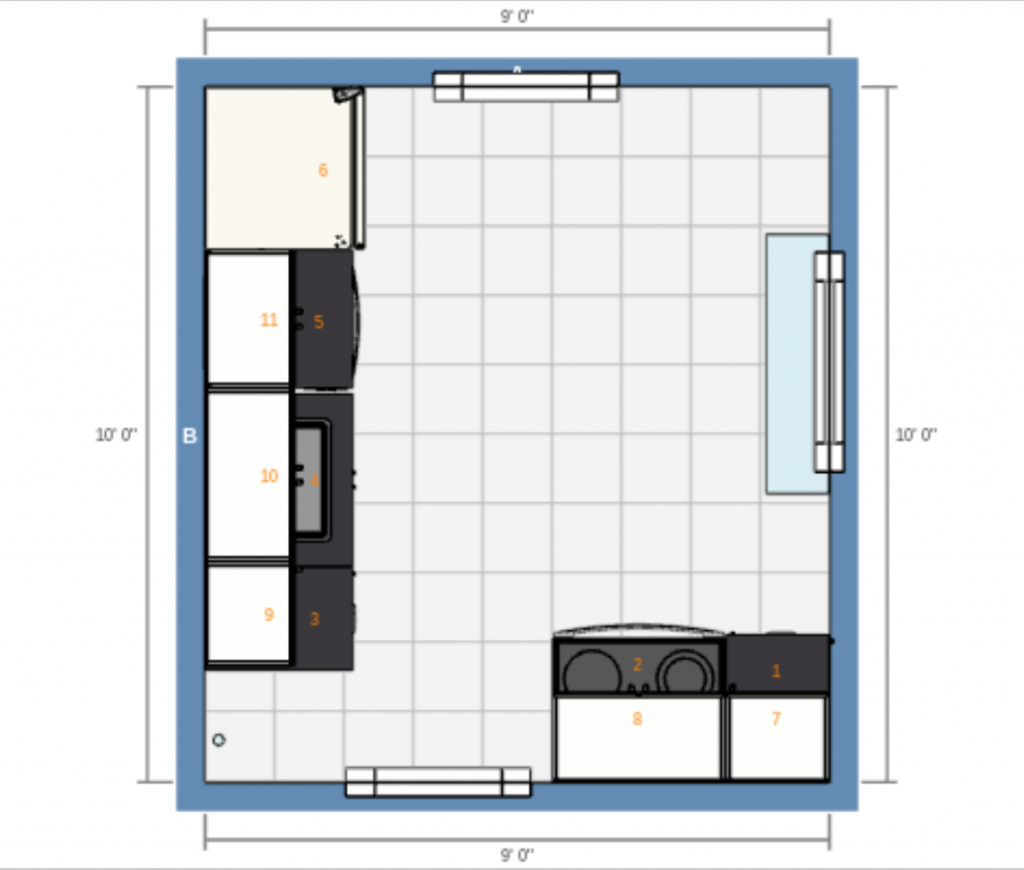
Ikea kitchen design

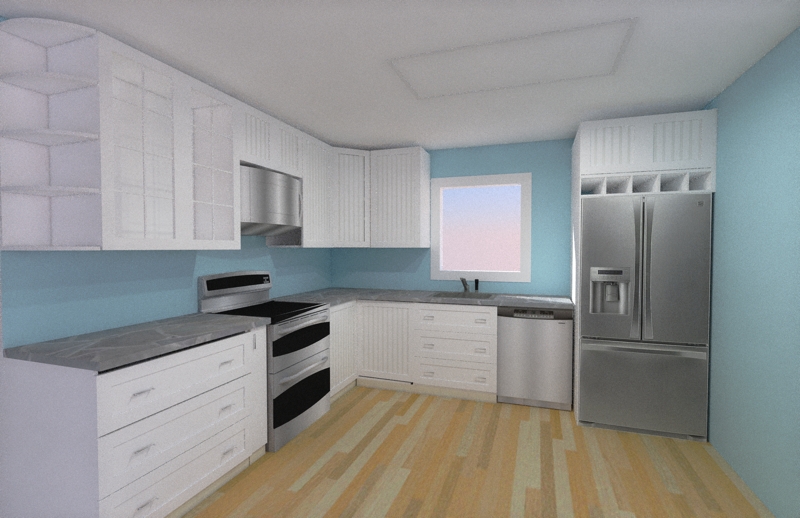
I’m using Ikea SEKTION again, because it’s affordable and since I’ve used it before it’s a known quantity. I also like that it’s modular, meaning if a tenant destroys one of the doors I can pick up a replacement locally and install it with minimal hassle.

kitchenoverhead

The layout isn’t perfect but I think it’s the best we’re going to do on the budget I have. Moving the radiator and resizing the window wasn’t an option for this project. The radiator pipes in the southwest corner keep me from taking the cabinets all the way into it. It’s a bit of an awkward space, but still not nearly as bad as having the range in a totally different room!

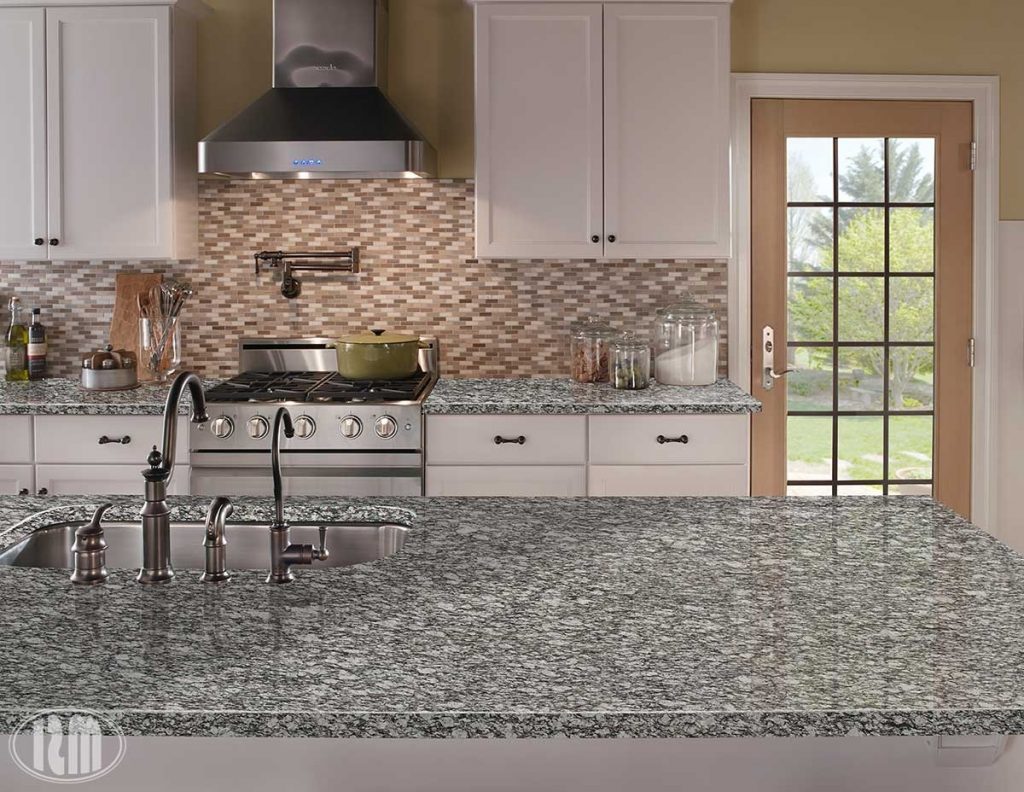
I still need to decide what I’m doing for the backsplash. The cabinets will be white and the counters I’m going with are a black and white textured granite called ‘white mist,’ which I’m hoping will be forgiving when it comes to hiding minor tenant damage. The floors will be a warm wood look vinyl plank.

White Mist Granite Slab

I’m trying to find an affordable tile backsplash with some color in it but I don’t want it to feel completely dated in a few years. If anyone has suggestions I’m all ears!

1970s Shore Home

Kitchen, Bathroom, Doom

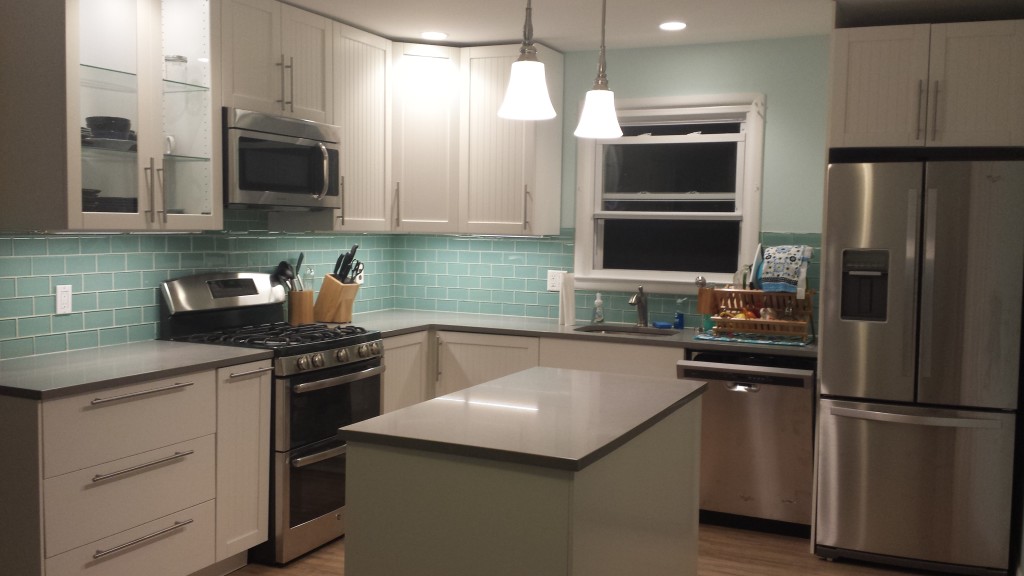
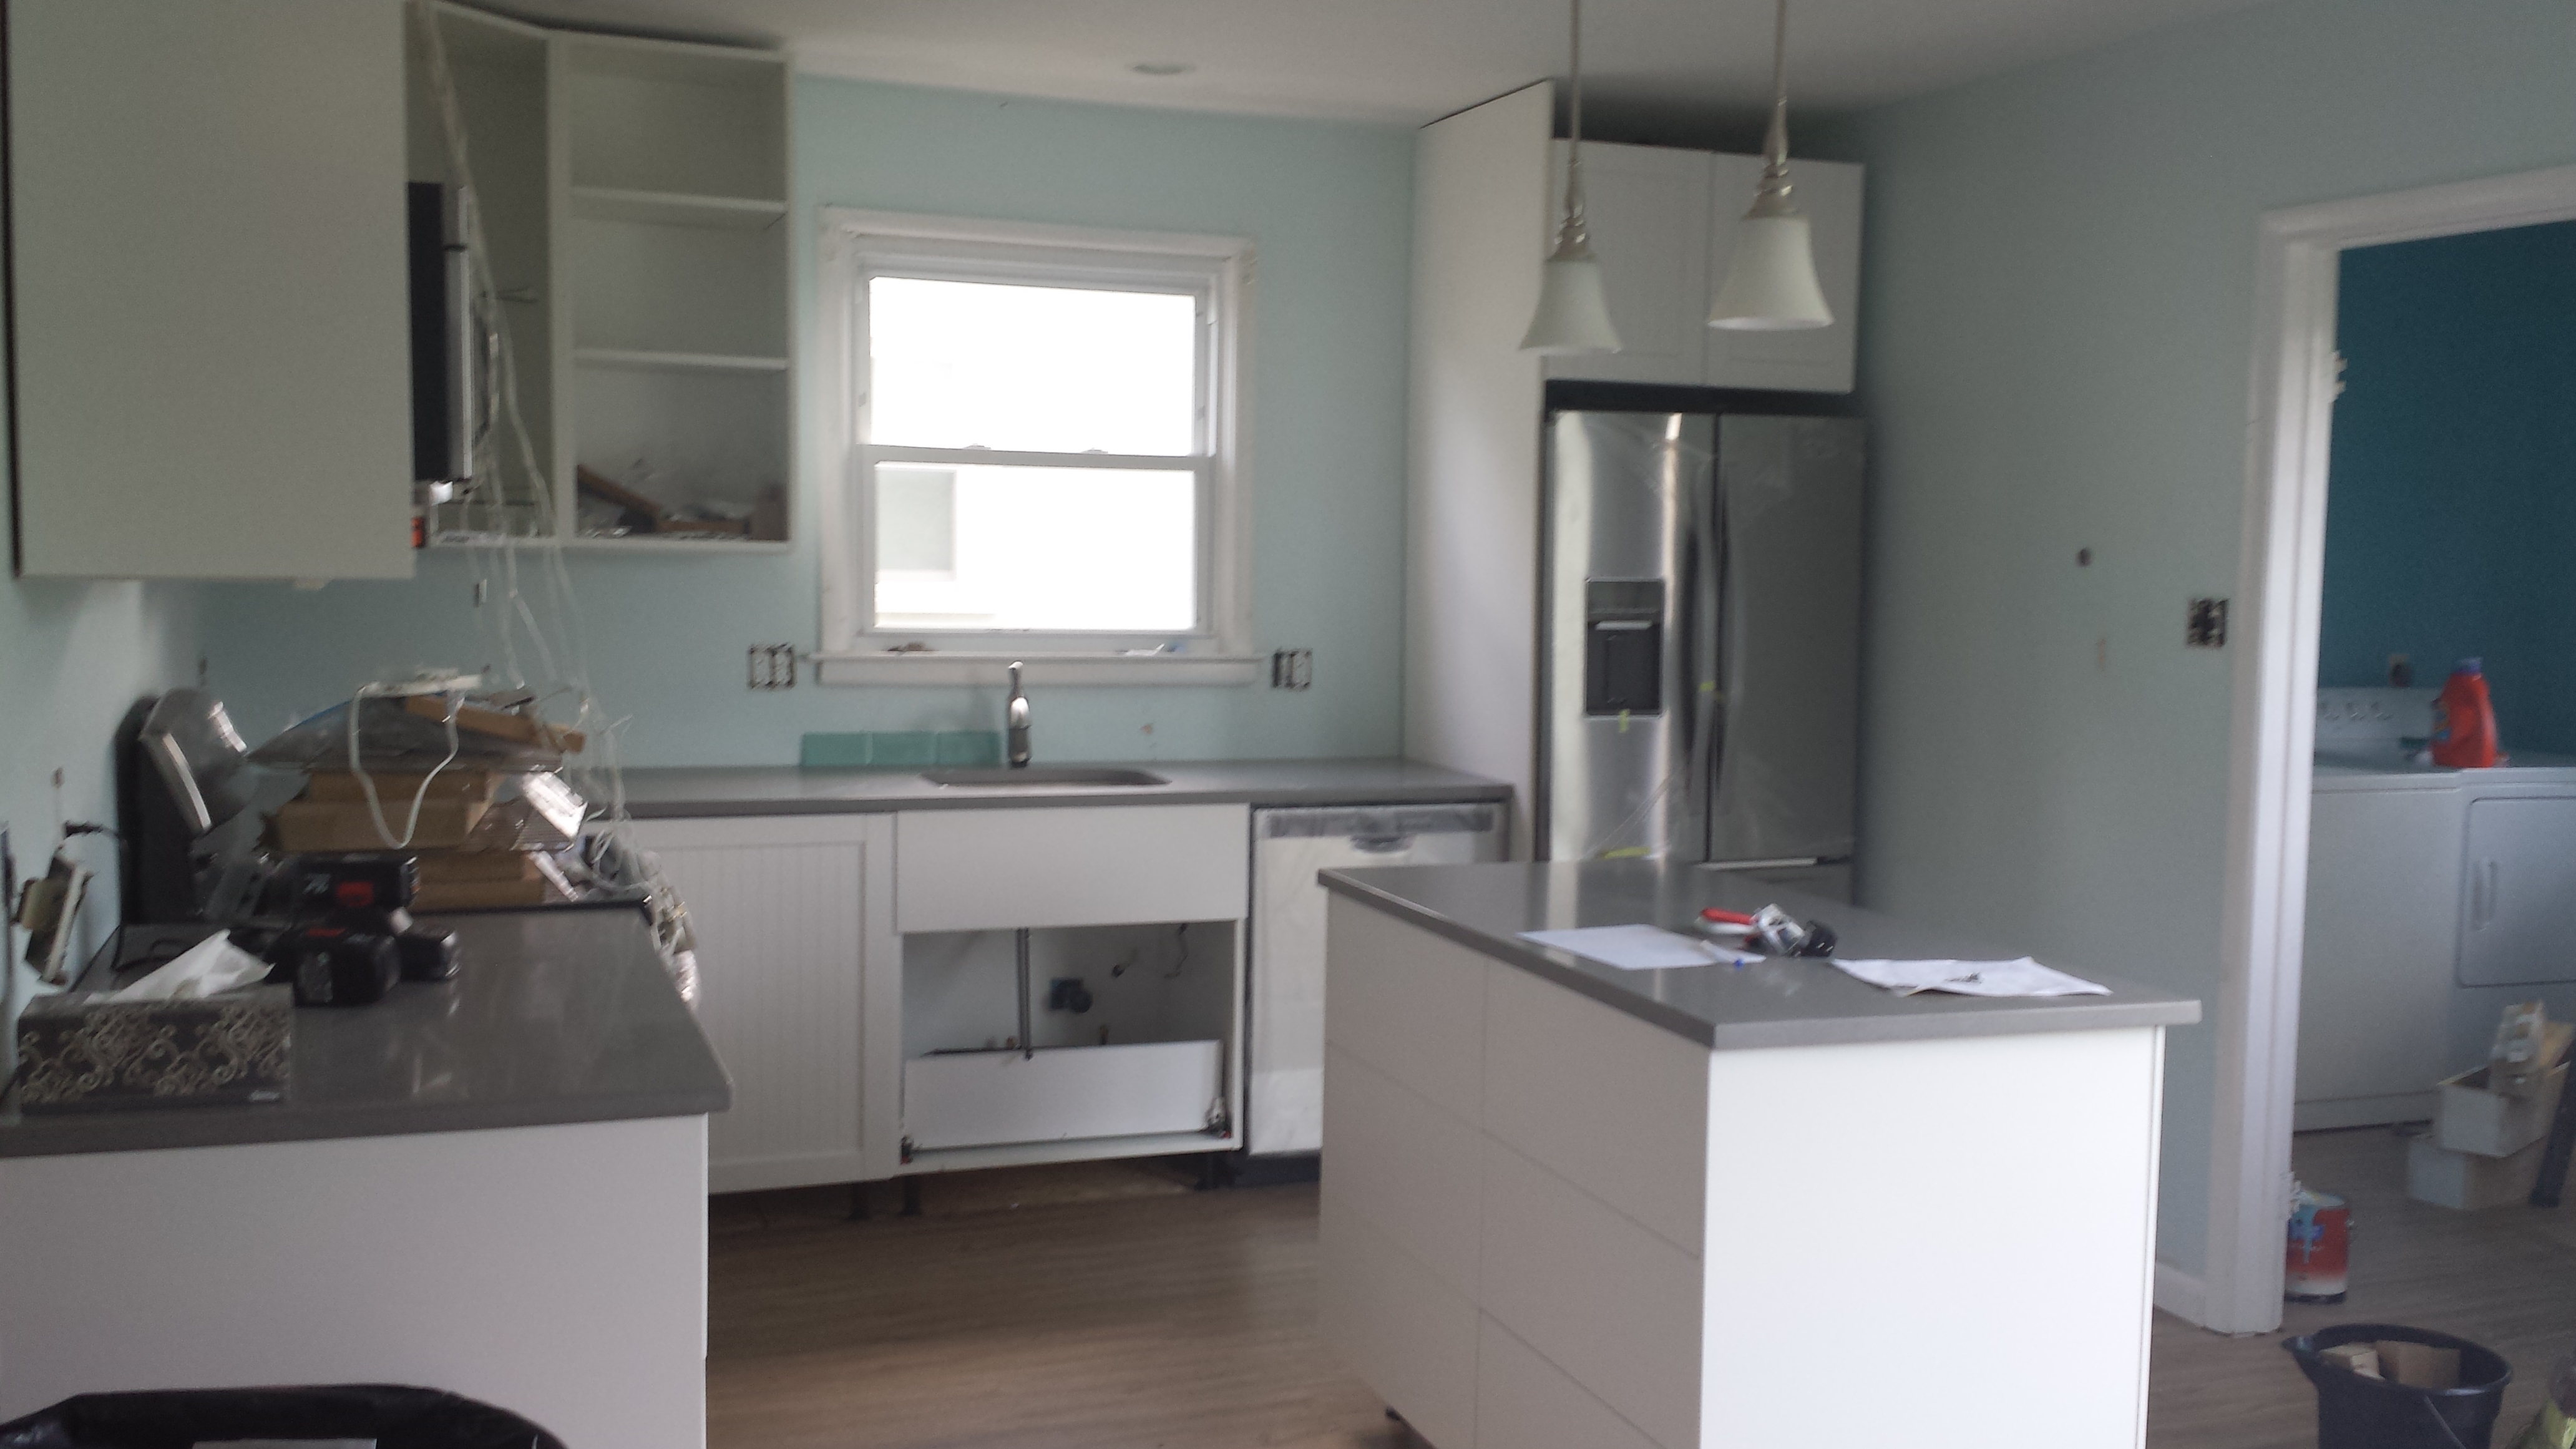
The kitchen is very near completion! I haven’t had a chance to take photos with a real camera, or write up a recap of the many things I learned in the process, but here’s a quick phone snapshot:

2015-09-24 20.39.27

There are still a bunch of finishing touches to do, but the hard stuff is all done! We had our first weekend of using the kitchen and it worked very well, with two people able to cook without driving each other insane.

When I stepped into the house earlier this week I had a bit of a panic moment: I was immediately greeted by a very musty smell. After all this work on the house, damp musty grossness is absolutely NOT what I want. We had a really dry summer so we haven’t had a chance to see how the house holds up in a storm. After some poking around I found a window that had been left open, and thankfully after a few days the house has returned to its usual neutral scent.

In boring-but-important news, we had our structural contractor install a new beam under the house. Now the bathroom no longer jiggles around when you step! The end of the house is no longer sinking into the sand! It’s still not level, but it’s been raised a few inches. The drywall cracked in a few spots around the door frames but other than that it was a pretty painless process.

Over Pope Weekend we had 10 people total staying in the house, and no one came to blows! So I consider that a ringing endorsement for the house. Unfortunately, over the course of the weekend we also discovered that the upstairs bathroom has sprung a leak. Wamp womp. It’s a really weird leak. There’s a water stain on the ceiling below the shower, but even if the shower is off there is fresh water trickling down the waste stack (which is behind the toilet). The toilet has a tendency to run because it’s an old toilet with an old flapper I haven’t gotten around to replacing.

My totally unscientific theory is that the toilet is leaking, and since the bathroom has a distinct slant towards the shower the shower drain is no longer appropriately sloped, letting water run from the toilet to the shower where it then drips onto the ceiling below.

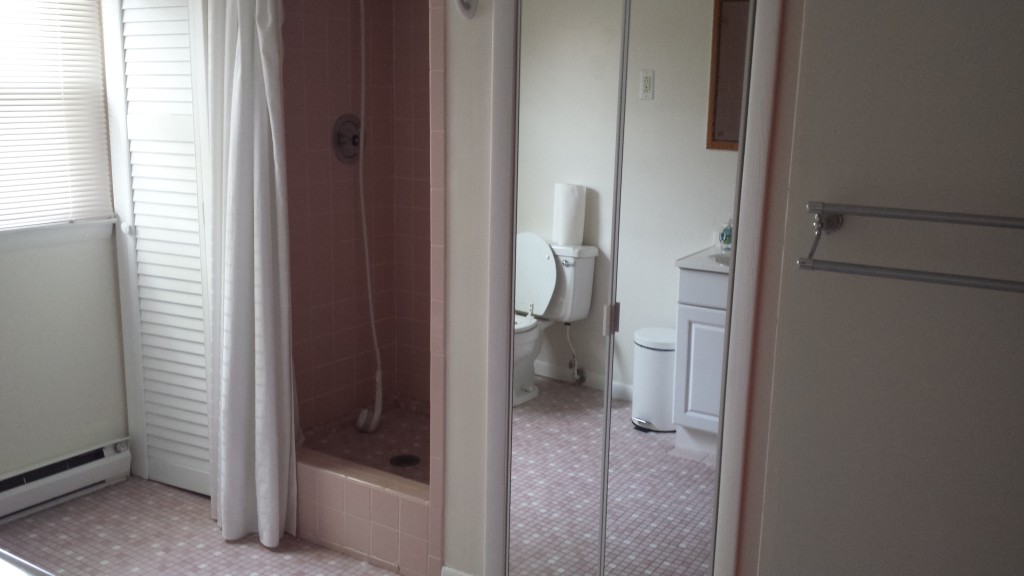
Please note the fact that the shower starts 6" off the ground.
Please note the fact that the shower starts 8″ off the ground.

There is no easy way to access any of the waste line to see what’s going on. At the very least it will require cutting into the (freshly painted!) bedroom ceiling below it. Due to the bizarre way the shower is built, there’s also a chance we’d have to open up the shower tile. This bathroom is kind of a nightmare and we knew going into it that a full remodel was on the short list of things we wanted to do. But I wasn’t intending to tackle that until next spring at the earliest.

Now I’m trying to decide whether I rip up the bathroom just to fix the drain line, or just pull the trigger on the remodel now. I’ve met with two contractors so far and am waiting on estimates.

If we end up doing the bathroom now it will be a total gut remodel, and I’m contracting out 100% of it. At 6 months pregnant I have neither the energy nor time to do another major renovation.

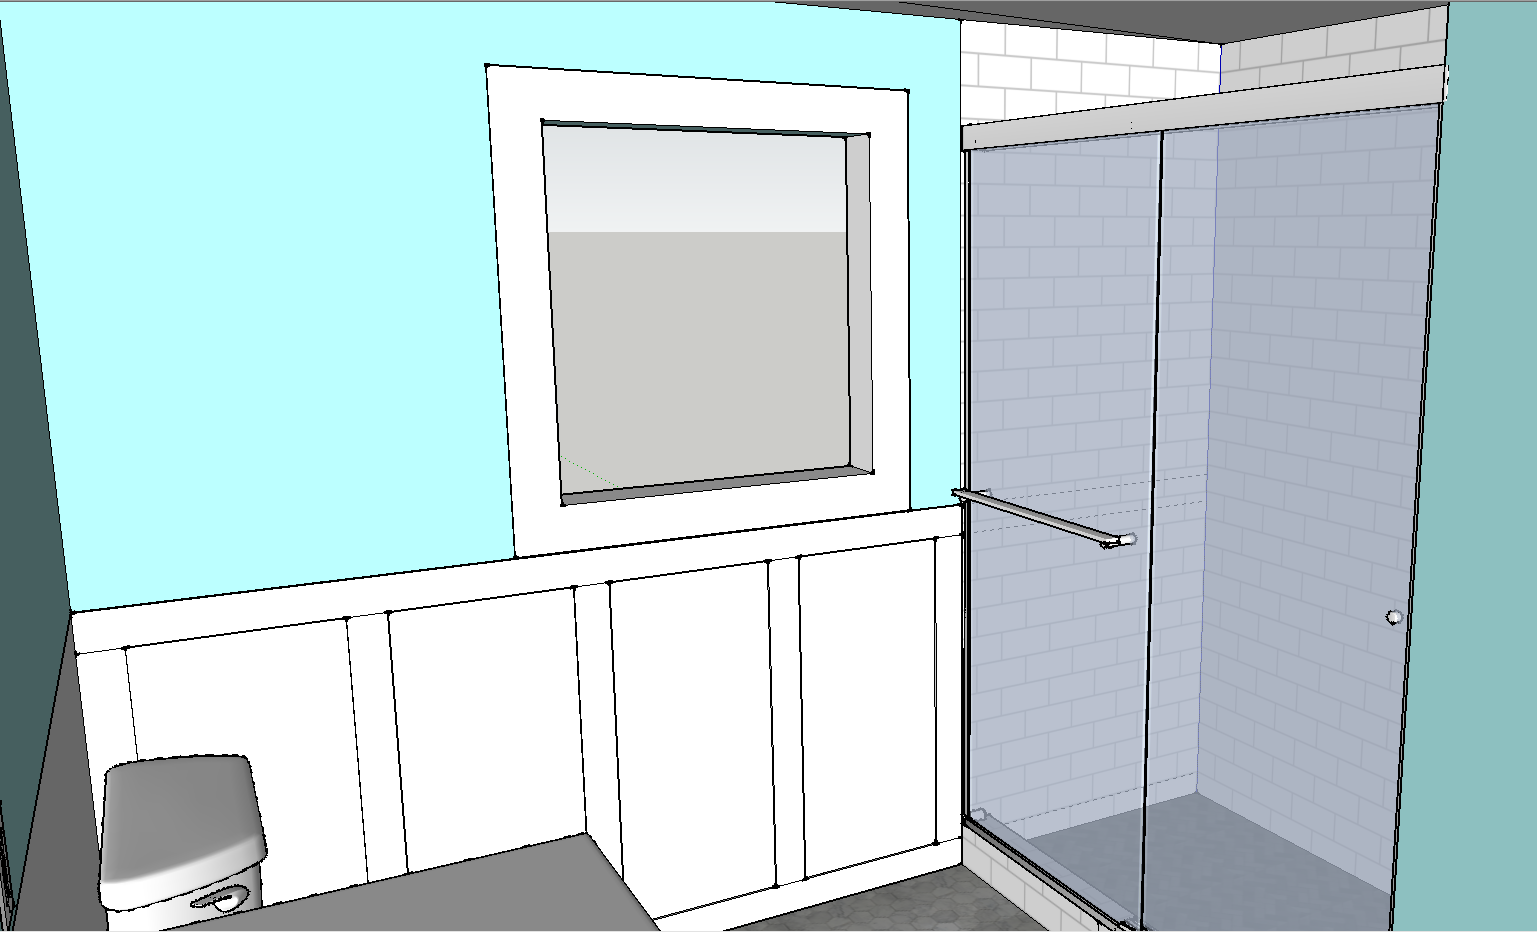
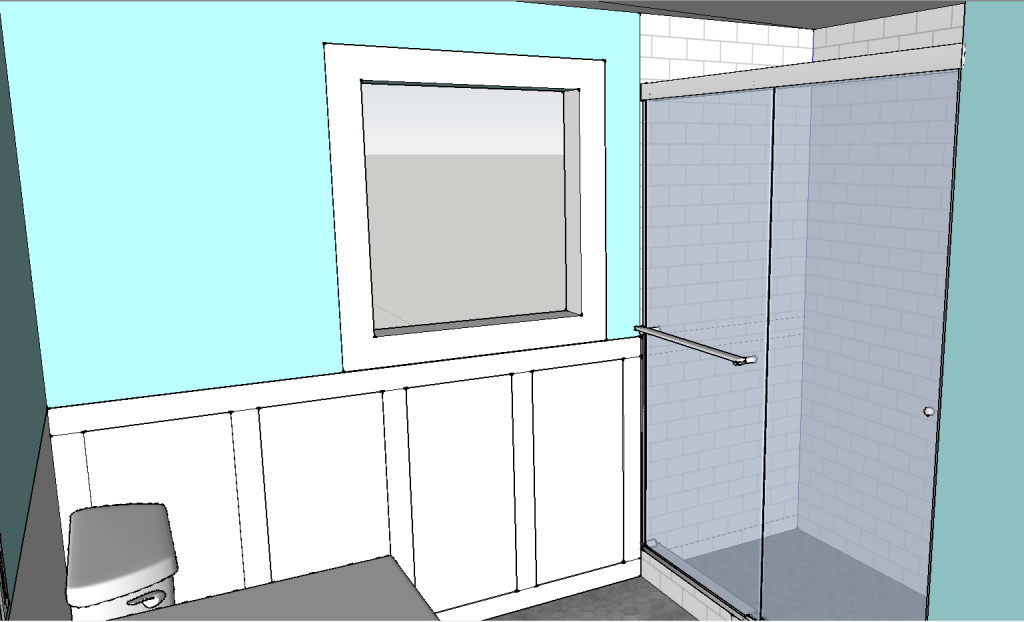
Layout for new shower
Potential layout for new shower

The last item on the agenda this week was preparing for the potential doom of Hurricane Joaquin. Thankfully the storm went out to sea, but we still had a really nasty nor’easter come through. My dad and I took care of some lingering to-dos, like removing the old HVAC condensation line (which was just sort of flapping around outside the house). Both of our storm doors don’t latch shut, so somewhat counter-intuitively we removed them before the storm so they didn’t fly open and rip off the door frame in the process. Getting replacement storm doors is on the short term to-do list once the storm passes.

So far almost every issue we’ve had with the house is something we’d budgeted to fix when we bought it. What we didn’t anticipate was cramming so much stuff into the first year. Many of the stuff on the “eventually” list became “now” either because they were more urgent than we thought, or because it didn’t make sense to do certain tasks separately. For example, the immediate project of “replace the broken heat pump” became “convert to gas heat” when we found out they cost about the same, and then that morphed into “convert and replace the hot water heater” since we were having gas lines run anyway. Silly me, I thought the electrical panel upgrade was gonna be next on the to-do list, but it’s actually the bathroom. Surprise!

1970s Shore Home

We have counter tops!!!

On Friday the stone company came and installed our counter tops. The kitchen looks 75% more like a real kitchen now!

New counter tops!!

The next steps for the kitchen are installing all the plumbing for the sink / dishwasher / fridge, and having the painter come paint the walls. There are a lot of detail items for us to finish (cabinet doors/handles, toekicks) and of course the big task is the tile backsplash. You can see a few of the tiles chilling behind the faucet. But we have counters and it’s starting to really feel like an honest to god kitchen.

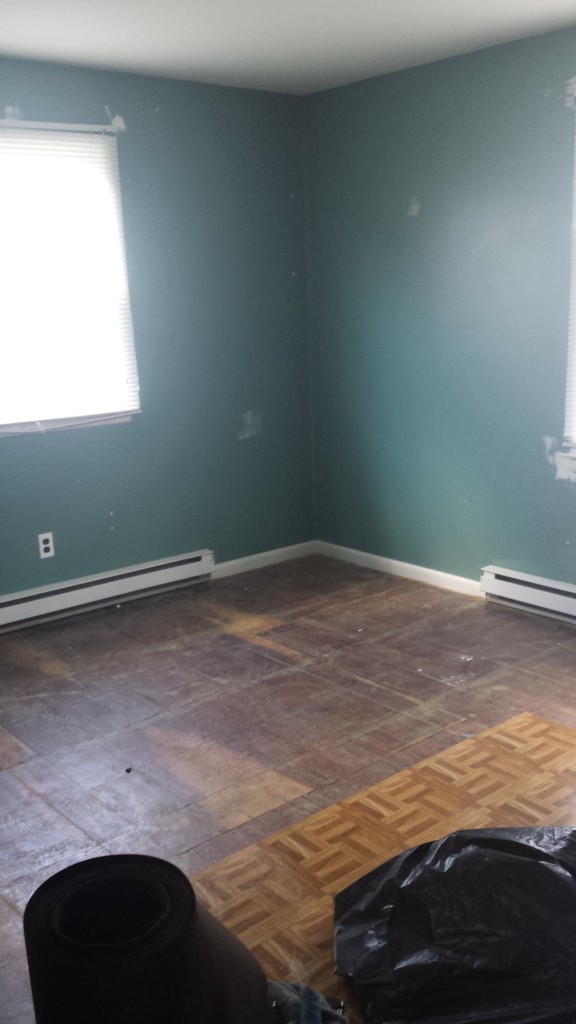
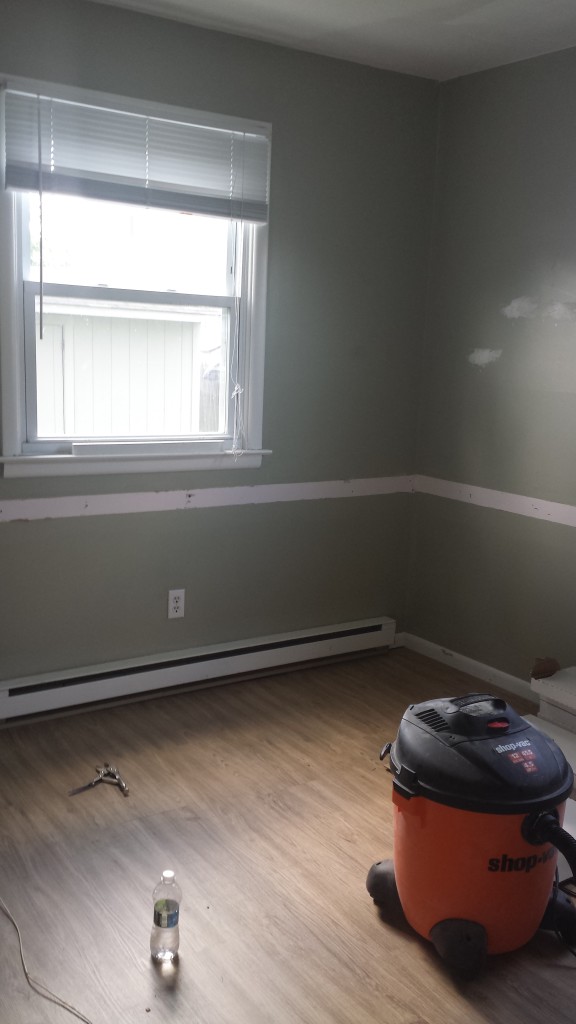
The living room is finally cleared out and we’ve started on the flooring in the downstairs bedrooms. My friends and parents came down this week / weekend to help.

Left: the larger bedroom with the subfloor showing under the old flooring. Right: The smaller bedroom with the new flooring in place, awaiting finishing trim.

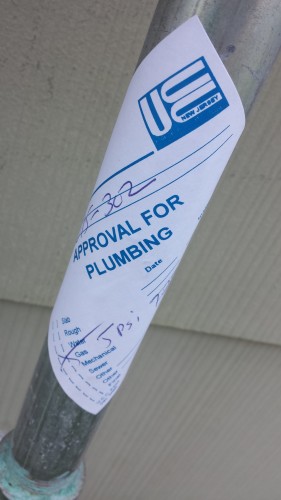
The last big exciting thing is that our gas lines were FINALLY approved by the inspector. The HVAC company is coming Tuesday to install… something. Honestly I’m not 100% sure what. Maybe the furnace, maybe the hot water heater, maybe the kitchen plumbing. They’re supposed to confirm on Monday. I’m really hoping it’s the hot water heater.
2015-07-30 12.48.04

The to-do list is still long… very long. But we’re inching closer and closer each week.

1970s Shore Home

Plumbing!

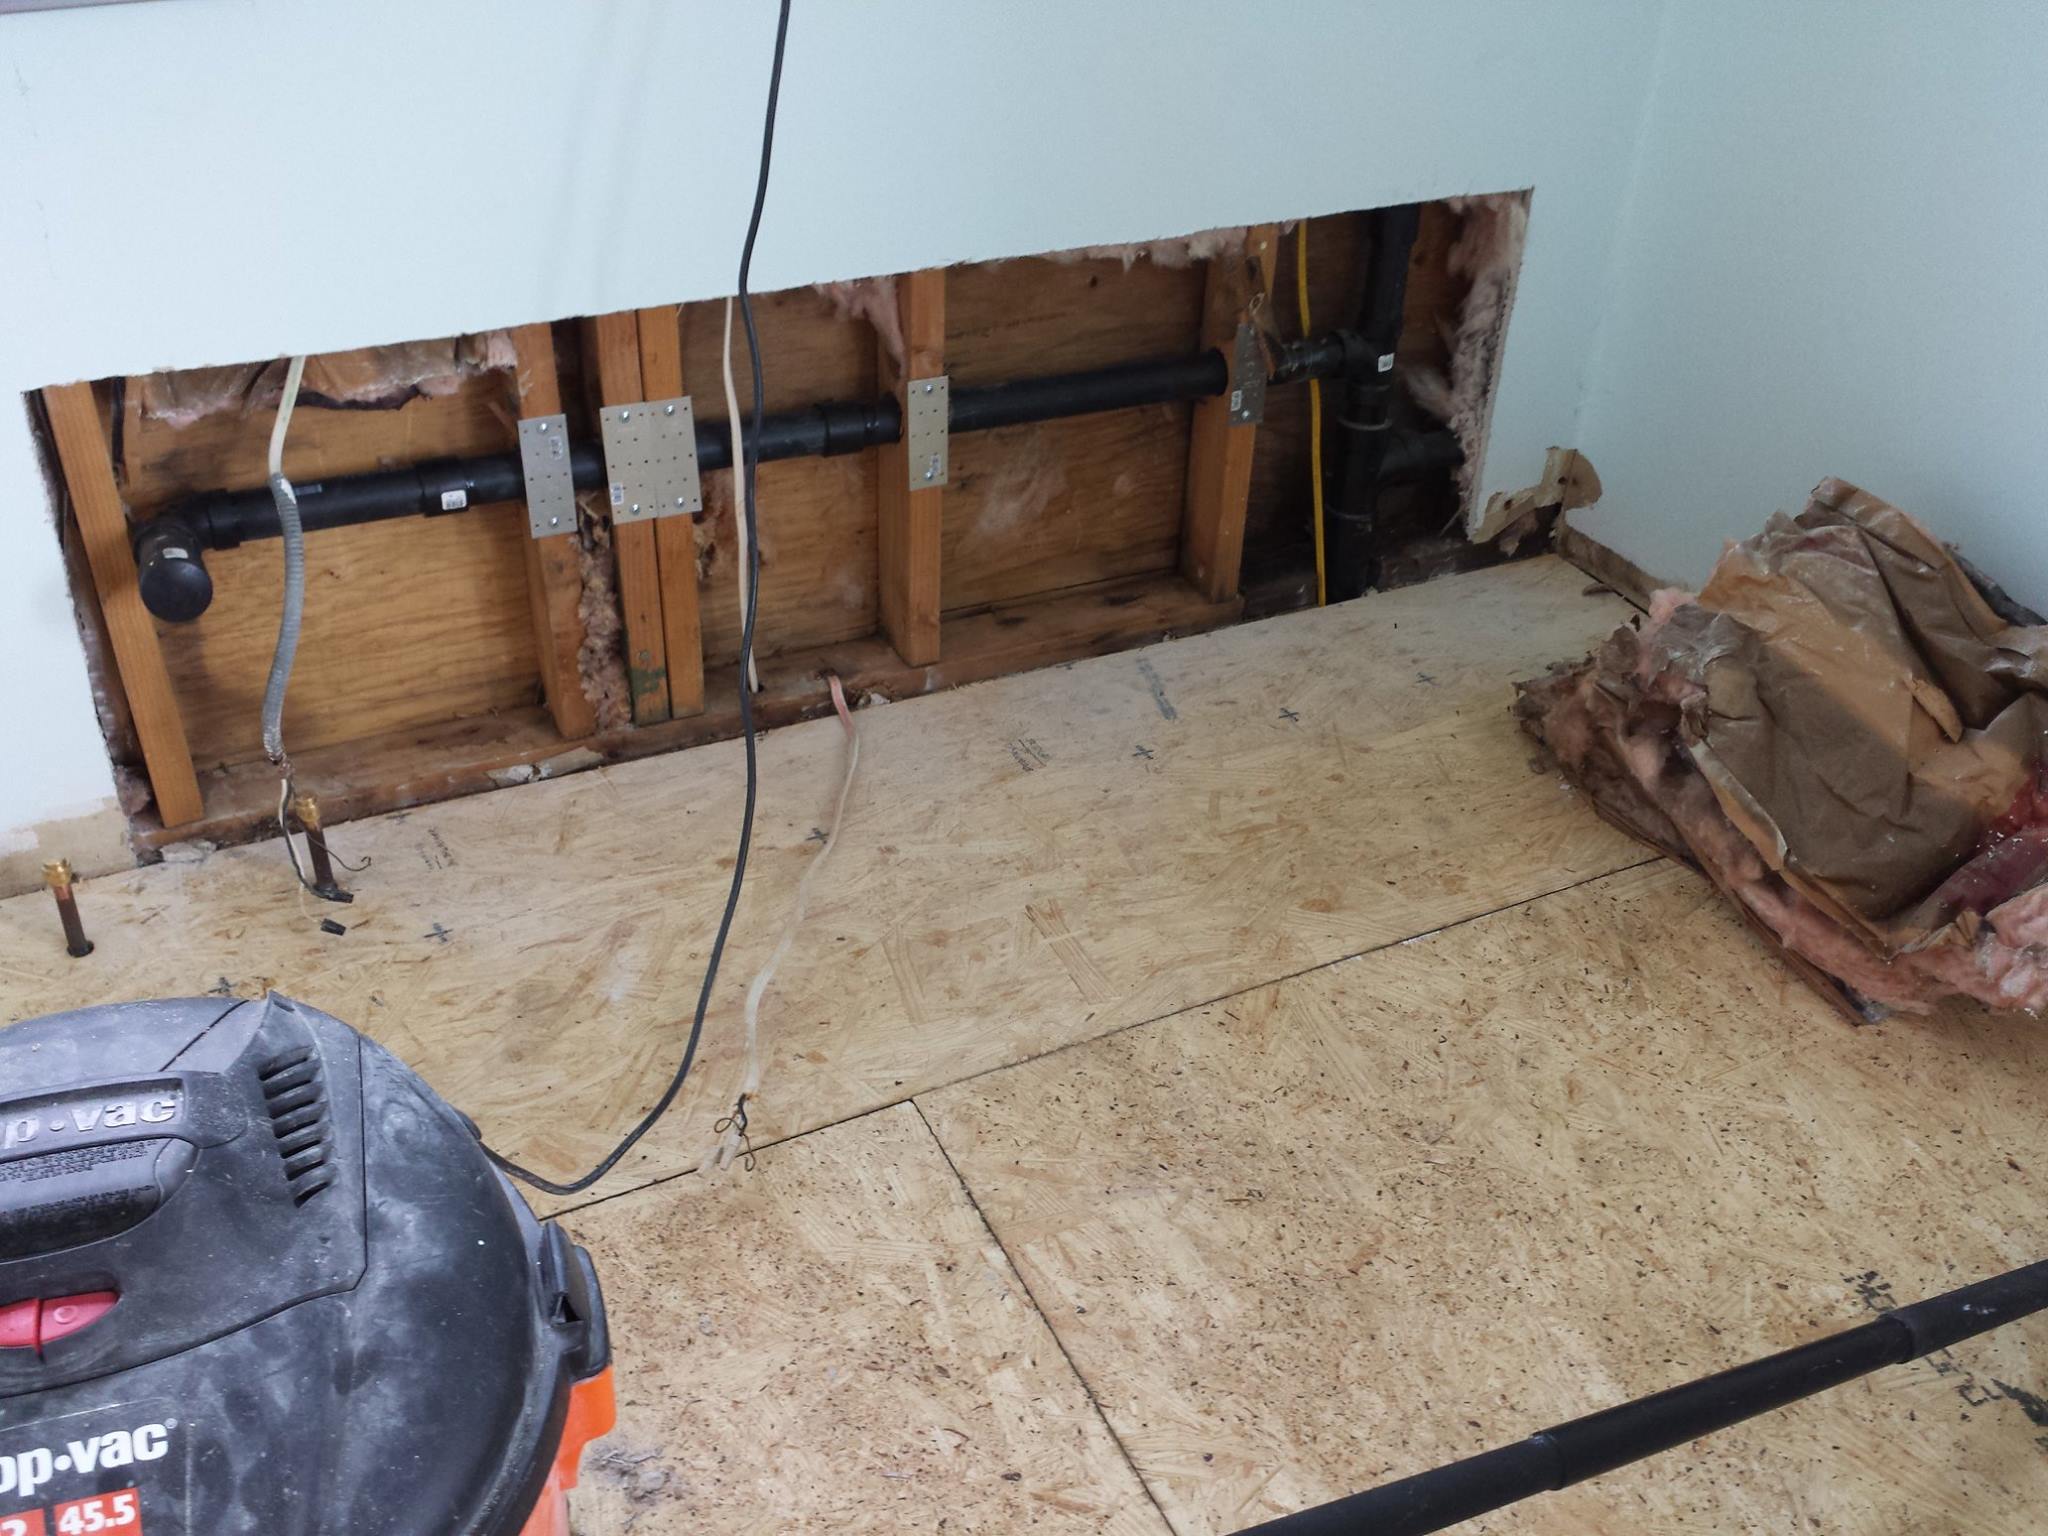
A brand new hole in my recently-patched walls

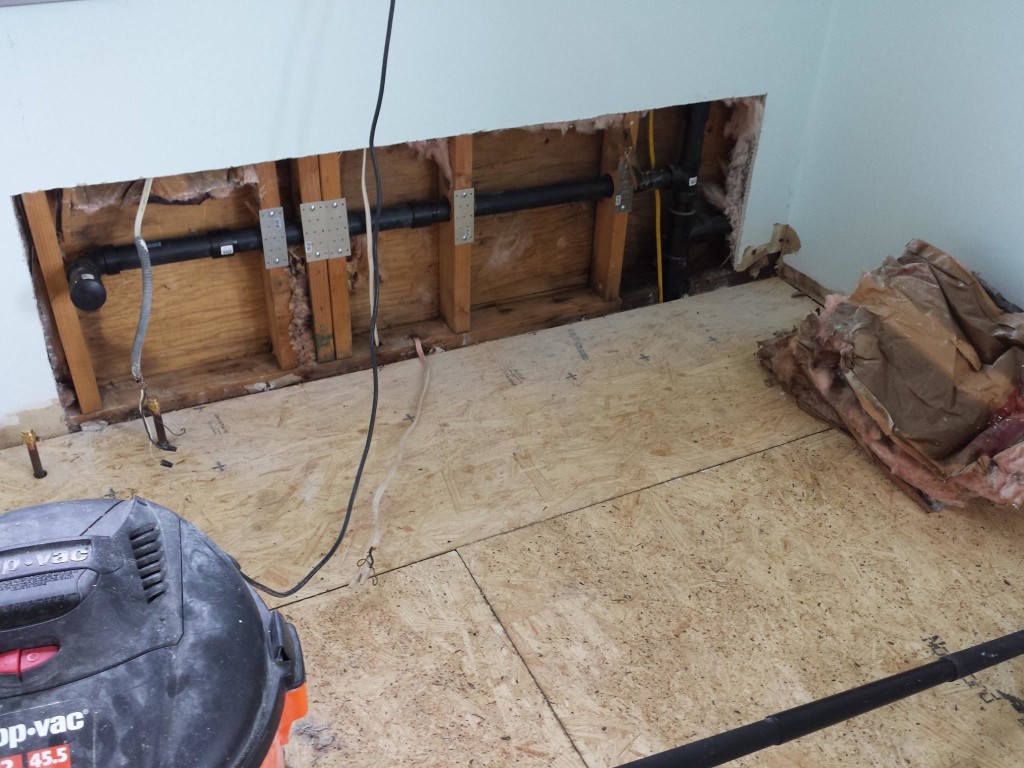
Last week we found out that the drain line for the sink would need to be moved down 3 inches in order to make room for the new, deeper undermount sink. This was a pretty big bummer because in order to to do it the wall would have to be opened up. The wall I just paid someone to patch and paint. Let this be a lesson to you all: do not touch any drywall until all your utilities are EXACTLY where they need to go.
In the end though it turned out to be a good thing. The old drain line was not run correctly (I am jack’s lack of surprise). It had an upward bow in the middle of it, and water does not like to flow uphill. The new line has the appropriate downward slope and some nice metal plates on the studs to keep you from accidentally cutting into them. We’ll put some new insulation in the wall before fixing the drywall, the old stuff is a little sad looking and my dad has half a roll leftover from something else.

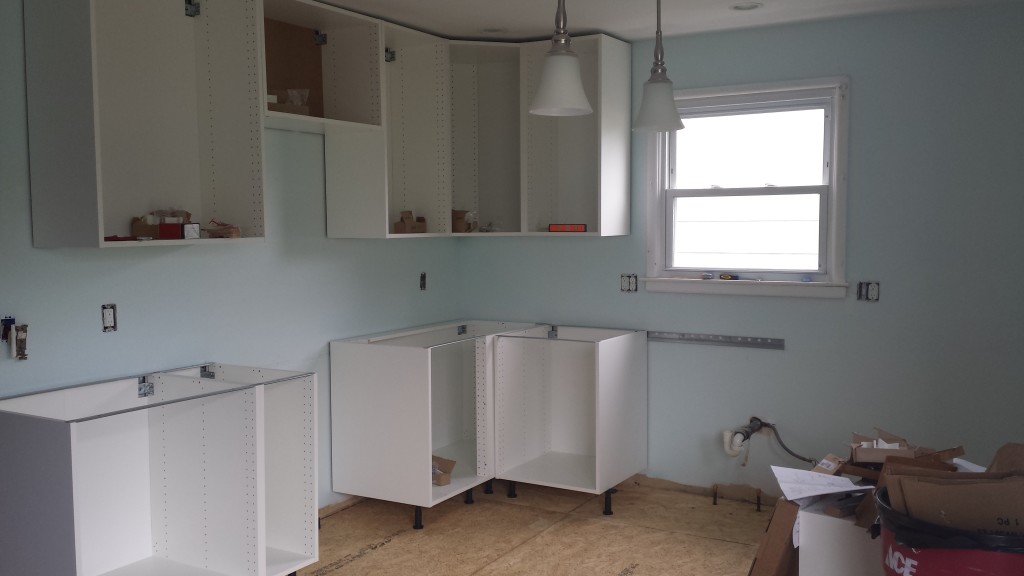
We also got the upper cabinets leveled and secured. I didn’t take a photo because it looks exactly the same as it did last week, the only difference is that the cabinets are all attached to each other now. For geometry reasons I don’t entirely understand we had a hell of a time getting the cabinet over the stove to line up right. It’s still not completely perfect but we got it close enough that I’m just gonna tell you not to look that hard at that particular bit of cabinet.

Still looks like this, but with a big hole in the wall on the right

The new AC system is working great, both upstairs and downstairs were comfortable despite it being 80 and sunny out. The cooling system will get a lot of help once we’re done with all the painting and can put some real window coverings up.

Next time we’re down there a trip to the recycling center is NON-OPTIONAL. We tried to go today but only remembered after they were closed. We have a mountain of cardboard in the living room that is starting to take over.

I finally feel like most of the hard stuff is out of the way. We’re still waiting for the HVAC company to install the gas lines (the gas company says the meter is all set). There’s also some more stuff under the house I’d like to have looked at (ughhhhhhhhh) but none of it is super pressing. I don’t think we’ll have counters in time for the 4th of July weekend, but we’ll at least have a couple of bedrooms people can sleep in!

1970s Shore Home, DIY and Decor

More Backsplash Colors

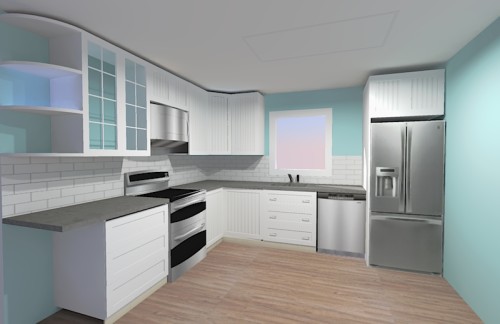
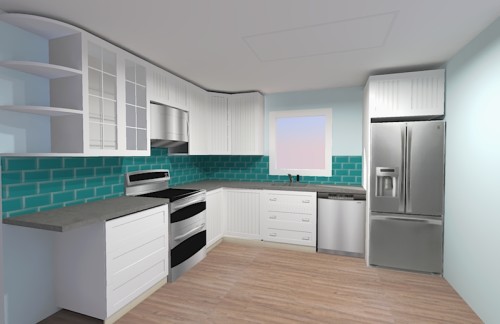
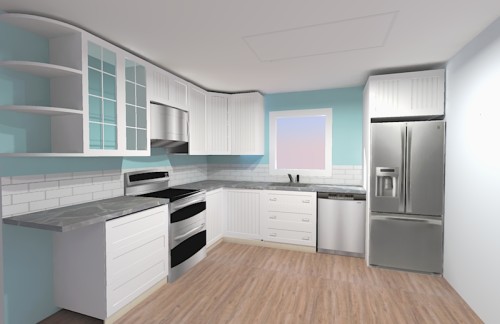
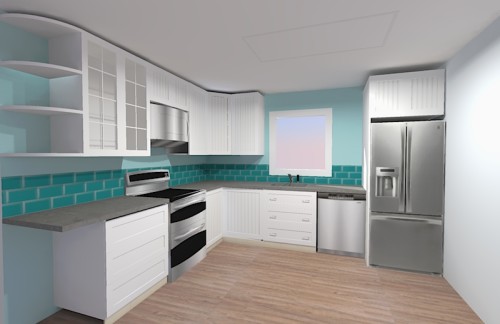
Following up on yesterday’s backsplash indecision: I found some more ideas I liked and mocked them up in SketchUp. SketchUp continues to be a rather poor way to visualize these things, but it’s all I’ve got so I make do.

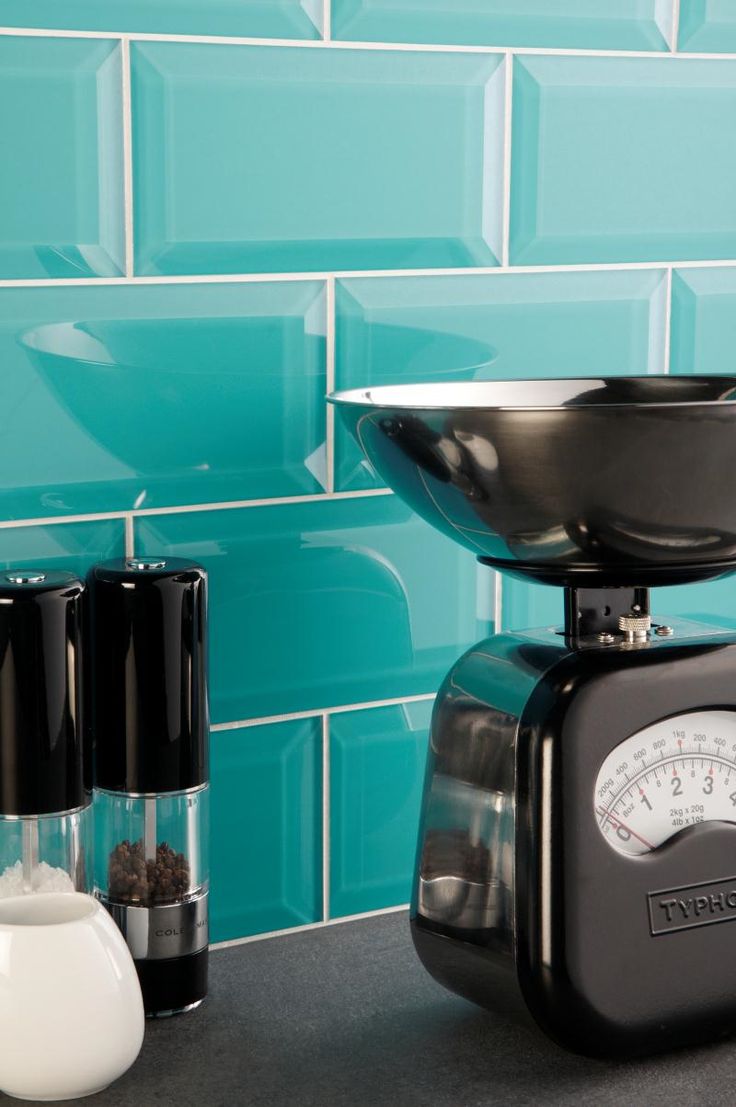
I found this tile on Pinterest and fell in love with it:

tealtile
oh hello, beveled glass tile

Once again the sketchup mockups were a bit underwhelming, but I played around with a few different tile / wall options. Never mind the missing lower cabinet, I accidentally deleted it and don’t feel like re-creating it right now.

I think ultimately I need to go lighter on the backsplash, even though I kind of want to cover the entire house in that teal tile.

Maybe something more like this?
bluetile

1970s Shore Home

Fear of Commitment (to a kitchen)

First thing’s first: I took my first trip to the dump last weekend! We dumped over 600 pounds of kitchen! It was an adventure, but not a very interesting one so you might have missed the blog post as I didn’t email it out.

It’s nearly time to order the cabinets for the kitchen and I’m having trouble getting everything finalized. We got the latest revision from the designer and I’m nitpicking about a lot of little stuff (and a few medium sized things).

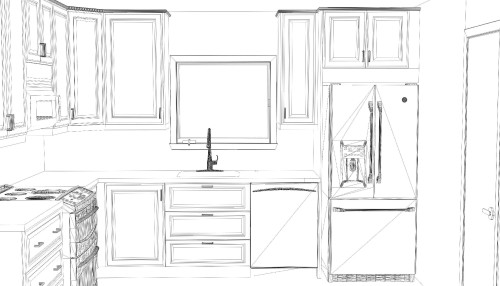
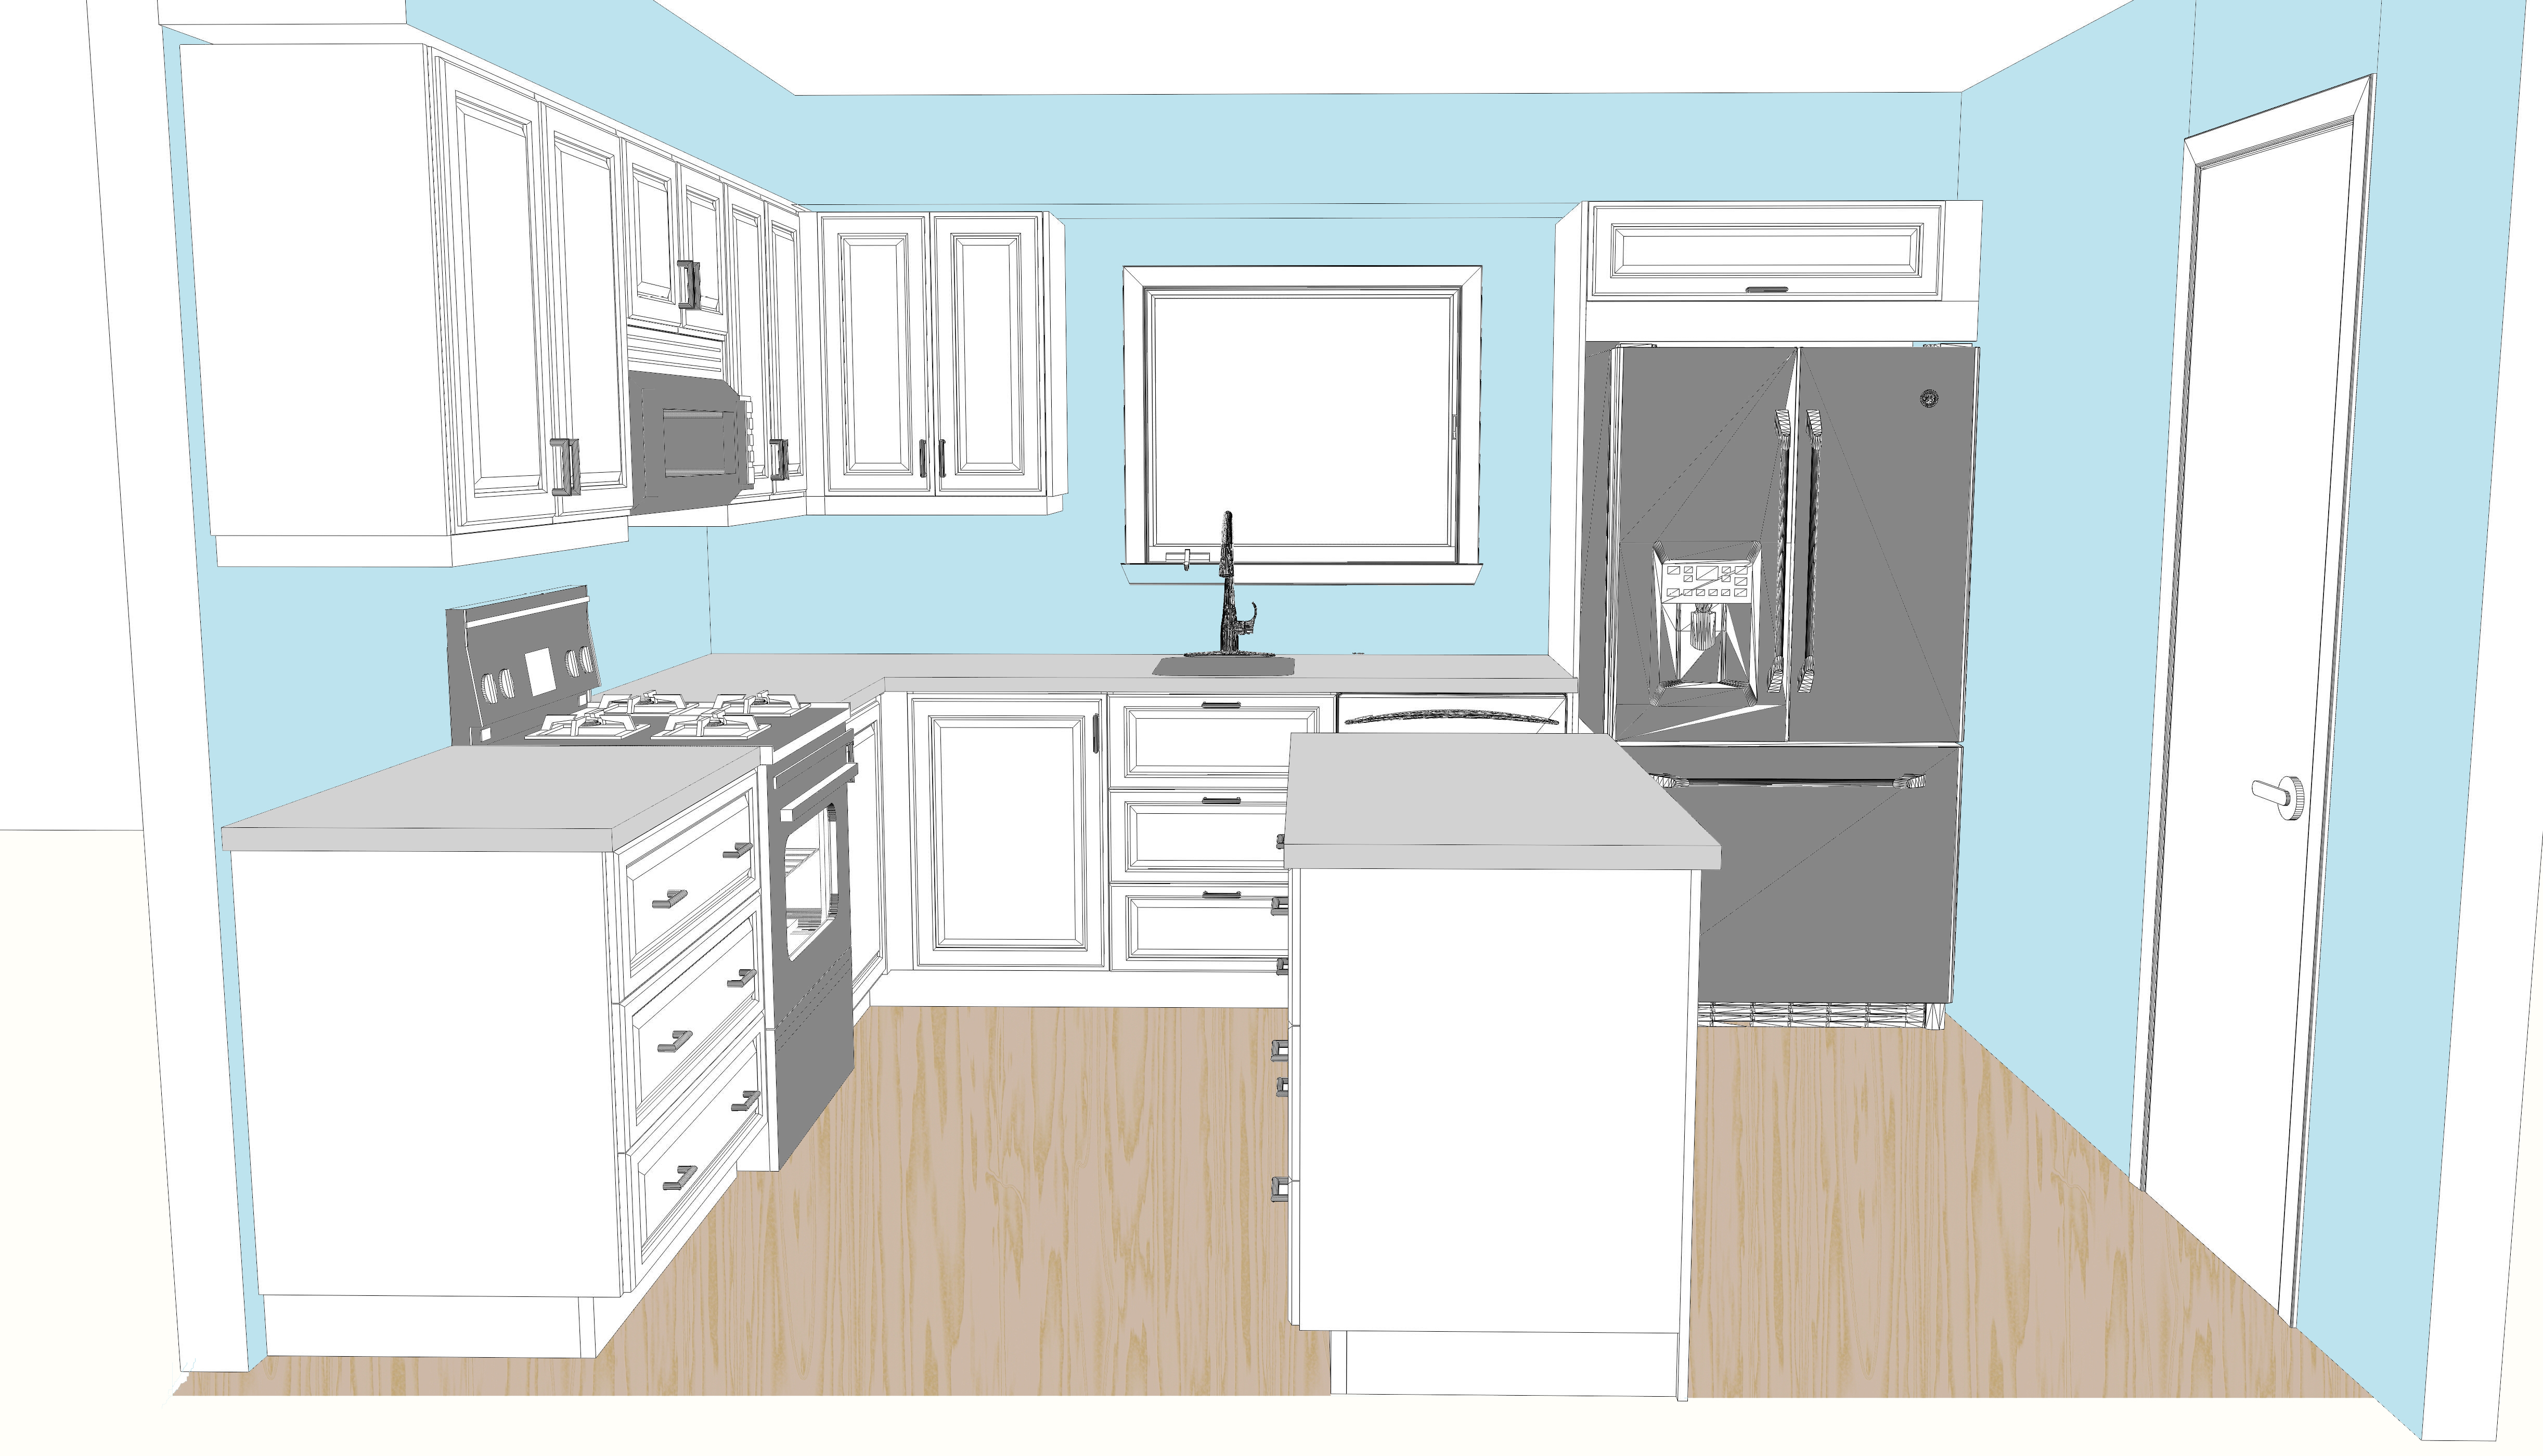
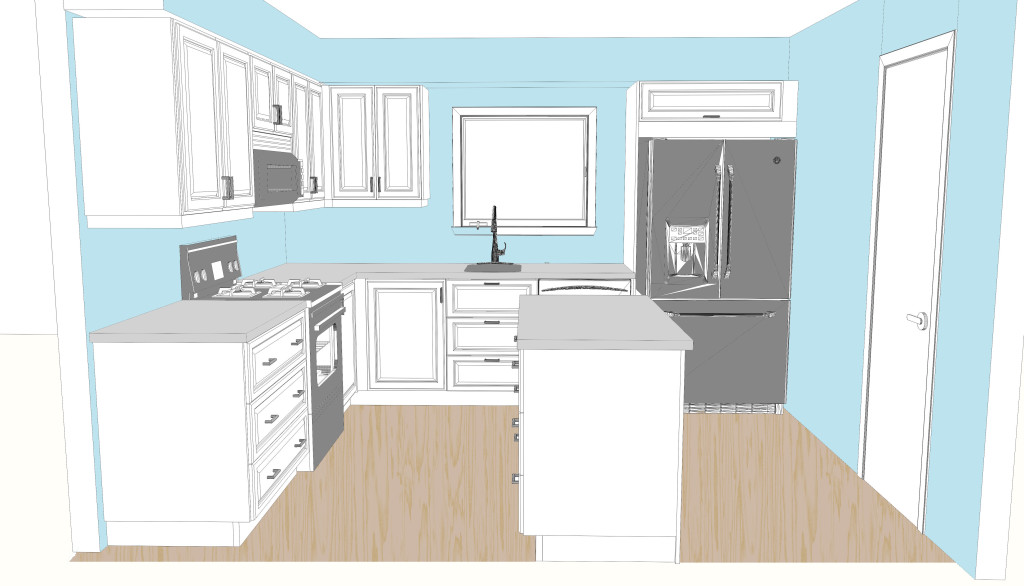
The space between the window and the fridge is kind of awkward and I don’t love the designer’s solution of putting a cabinet there. I think that whole area of their design looks weird:

Not feeling the cabinet to the right of the window

I think I’m going to leave that area empty and experiment with little open shelves once it’s all in. Or just leave it open. Or remove the cabinet to the left of the window and put open shelves there to balance things out. Or slowly go insane due to the available options.

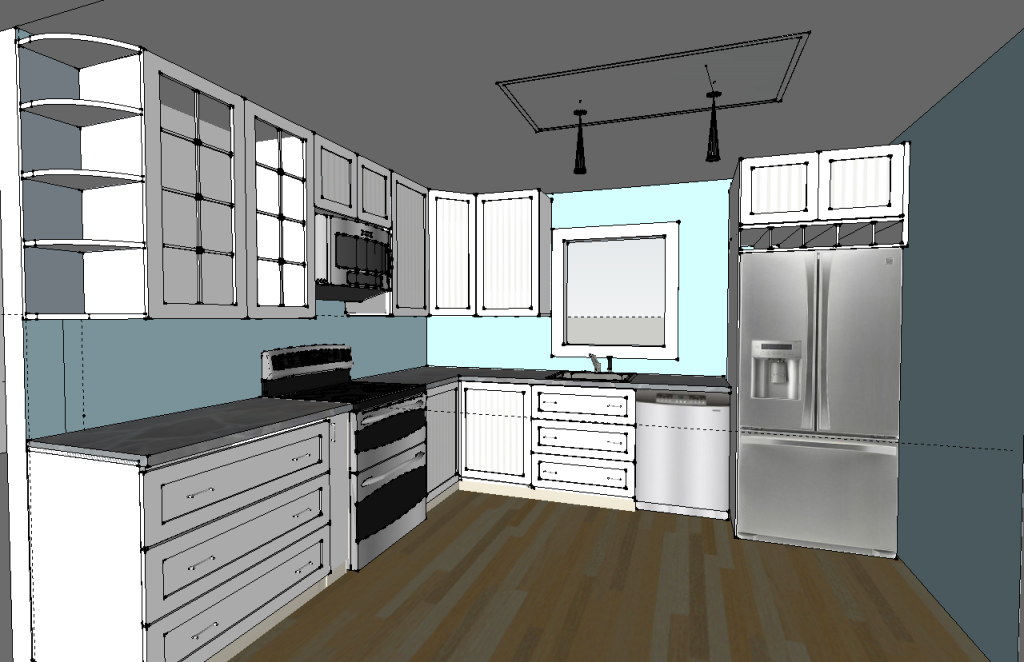
The other thing I don’t like about the designer’s design is that there’s 6″ of space between the end of the cabinets and the wall. This is just due to the limits of Ikea cabinet sizes, but I found a YouTube video detailing how to cut cabinets down so I think I might make a little custom cabinet next to the oven for storing baking sheets. Then I’ll make a little open end shelf for the top so everything lines up. I’m also going to build a custom wine rack for over the fridge.

A sketchup diagram of my mods
A sketchup diagram of my mods.

The island is missing from this diagram, partly because I didn’t feel like modeling it in SketchUp, but also because I’m afraid of committing to it. I suggested to Chris that we get a counter height table instead of building cabinets in. He pointed out that we probably would never actually need or want to move it and that I should just stop waffling about everything. I taped it out in the current kitchen and made sure there’s still room to get the washer/dryer back into the laundry room. There’s an exterior door in the laundry room but it would be super annoying to have to take everything out and then back in because the island is in the way.

I think it will be an awesome island?

I have a long while to think about things before we actually install the cabinets, because there are about 800 steps that come first, but they need to be ordered in the next couple of weeks in order to take advantage of the Ikea kitchen sale. 20% off of $4000 of cabinets (oh my god) is huge.

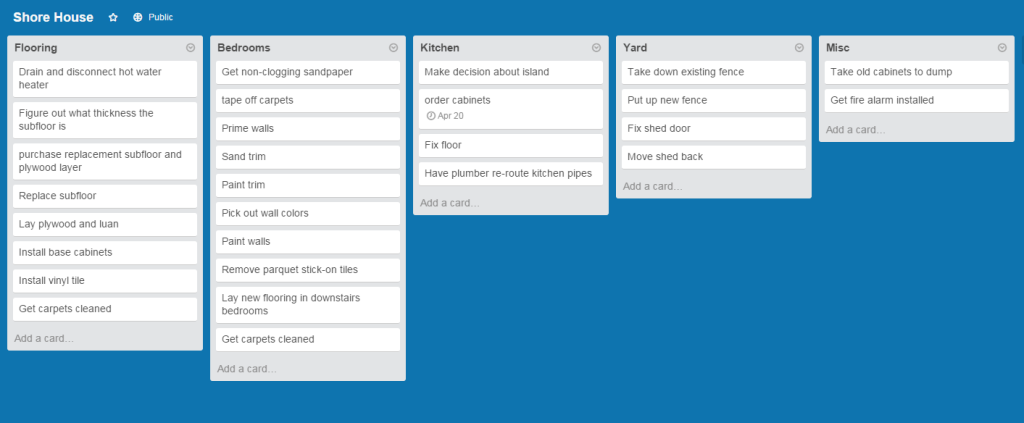
The list of to-dos for the house is kind of overwhelming. I put it all in Trello to try and make sense of it all but it honestly just seems more insane now. Everything in the kitchen is blocked by needing to remove the hot water heater and fix the rotted flooring under it. Family members have volunteered to help make this happen, but with a few family events the next few weekends I’m not sure when we’ll all be down there next. In the meantime I’ll work on painting the bedrooms, and removing the awful parquet flooring that I have discovered is just stick-on vinyl.

trello

The contractors are hard at work, at least. The electrician came down on Tuesday to do the wiring for the kitchen, and the structural guys are working in the crawlspace to get everything shored up and dried out. The gas company came and planted little flags in the yard marking where the gas line is going to go. In 6-8 weeks we should have gas service.

But yeah feeling kind of overwhelmed at the moment.

1970s Shore Home, DIY and Decor

Oh Fancy Custom Cabinet Doors

One of the things you can do to class up an Ikea kitchen is to spring for non-Ikea doors. There are a couple companies that do this, most notably SemiHandmade and Scherrs. I’ve had my eye on some beadboard panel doors:

Traditional Kitchen by Newport Beach Kitchen & Bath Designers BK Interiors

As far as default IKEA options go the only one I’m even vaguely into are the white BOBDYN doors.

I mean it's OK
I mean it’s OK

I don’t really have anything against the IKEA doors, except maybe the shade of “off-white” is a little too far “off” for my tastes. But really I’m splitting hairs. I just love the look of the beadboard doors.

Unfortunately the quote for my beloved custom doors came in at literally twice the price of the IKEA doors. Ouch. I understand why: it’s an apples to oranges comparison. BOBDYN is made of MDF (aka particleboard) with a white veneer. Scherrs doors are solid wood. Oh, yeah, that “twice as much” quote doesn’t include painting, I’d have to do that myself (or pay extra). It’s a much smaller jump from Ikea’s solid wood doors to Scherrs. But the price gap between MDF and solid wood is significant. If we go with IKEA we’re looking at $1000 worth of doors. Even with the money we’re saving by DIYing a lot of stuff I’m just not sure I can justify shelling out an extra grand on doors.

It’s not all lost yet; the Sherrs folks are looking to see if we can rework the quote to be a little more budget friendly by swapping out a few things, but at this point I’m not optimistic. At the end of the day I have to think about other things that money could go towards (like a nice stove).

Overall I’ve been dealing with a lot of sticker shock over just how much all this stuff costs. I’ve never redone a kitchen before – both the condo and our current place had nice kitchens when we moved in. This stuff is nuts. Right now we’re looking at spending almost $14k on a 10′ x 10′ kitchen, using mid-grade stuff (except those countertops; I will die for my quartz countertops) and DIYing all we can.

So yeah kitchens are insane.

Update 3/27: it turns out I can’t read. The new quote came in much lower, and then I realized I’d misread the original quote. I did not notice the 25% discount applied, which cut the price of the doors by $500. So the solid-wood doors are still 50% more than the ikea MDF but… maybe it’s worth it?

1970s Shore Home

Demolition Weekend

This weekend seven of us descended upon the shore house to rip out the kitchen and begin prepping the walls for paint.

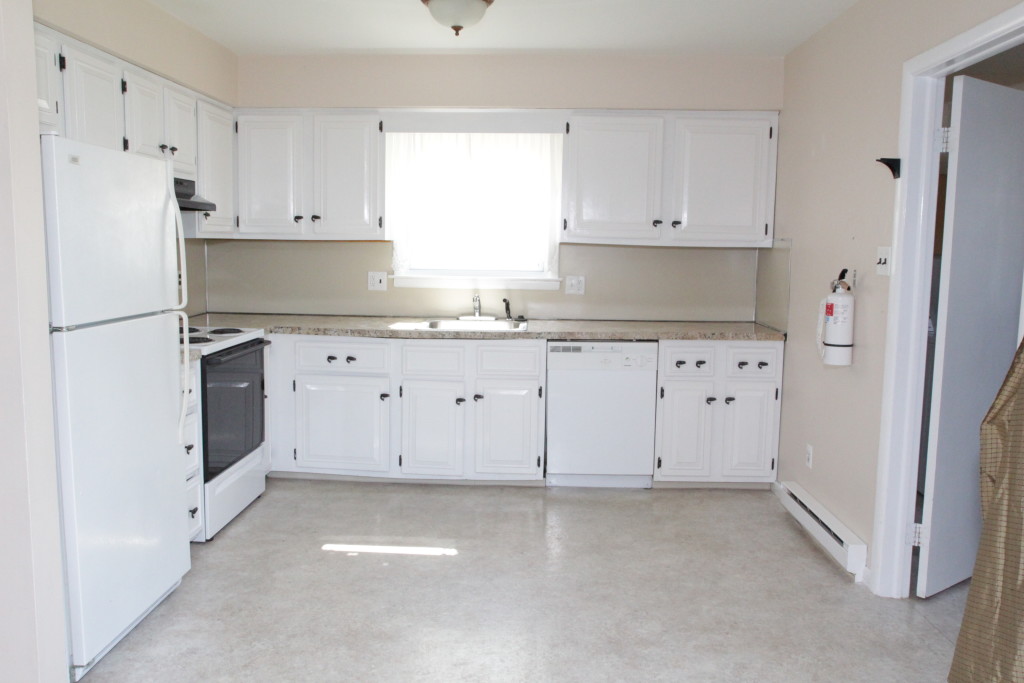
Take a good look at this picture of the kitchen, because it’s the last you’ll see of it!

IMG_2274

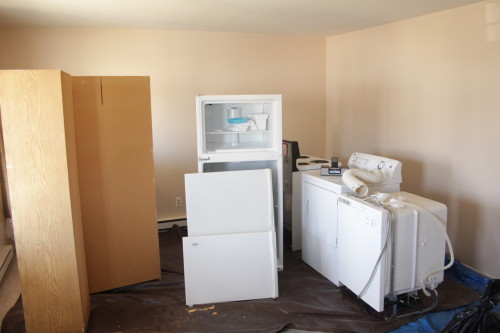
First we removed all the appliances and put them in the living room. I was really glad I had my dad and another handy friend with us, because I had no idea how to remove a dishwasher. Additionally, the shutoff valve for the dishwasher water supply failed, spraying water everywhere. Thankfully there is very easy access to the main water shutoff, and we could use my in-laws’ bathrooms next door.

Appliance Party!
Appliance Party!

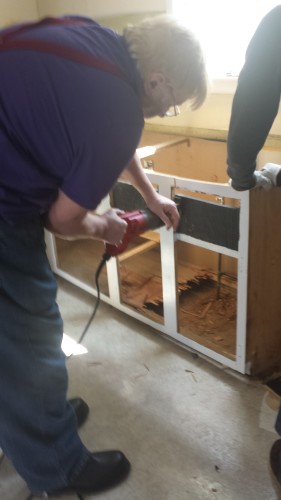
Next we took off the doors and started taking the cabinets apart. The sink came out and then we ripped off the countertops.

Some of the cabinets came out in one piece, and those will be donated to Habitat for Humanity’s ReStore along with the dishwasher, stove, sink, and garbage disposal. Other cabinets were not so lucky.

My dad using a sawzall on one of the cabinets

Removing the cabinets revealed that there were not two layers of vinyl flooring, as we’d thought, but actually three.

Top layer on the bottom, middle layer on left, original flooring on the right

I took samples of the layers of flooring and had them sent to a lab for asbestos testing. Thankfully they came back negative, but it’s still gross dirty work so we wore respirators. The plan was to take up the top two layers and leave the one beneath that. There are only so many surprises I can take in one day.

Between each layer of vinyl was a layer of plywood underlayment. The plywood was held down with approximately 1000 staples. It took four of us at least four hours to get all the goddamned staples out. Each staple was at least an inch long and had to be pried out with vice grips. Regular pliers were completely useless for the task.

311EJFHNP4L
We had one of these on Saturday. We went to the hardware store on Sunday and bought 4 more.


After pulling out staples forever we pulled up the middle layer. Because it was glued down (surprise!) the bottom layer started coming up with it. Thankfully the bottom layer came up mostly intact so it wasn’t too terrible. I don’t know what the moral of this story is, because I don’t think it’s “leave your floor covered in 40 years and 2 inches worth of vinyl.” My takeaway is that we should build a time machine and stop everyone from putting a million layers of flooring down.

Thanks to water damage on the floor, the plywood in the laundry room came up without taking much of the asbestos tile with it. The pile of debris in this photo is actually plywood that had decomposed into dirt. On the right side you can see a spot that jettisoned an old tile.

Laundry Room
Laundry Room

The last major items to demolish are the soffit above the cabinets and the wall next to the fridge. And electrician came in and removed the wires that were running through the wall so that we could safely remove it. He’ll be back in a few weeks to button it all up.

Goodbye Wall
Goodbye Wall

With the kitchen emptied out I taped off where the new cabinets are going to go. I wasn’t sure about the island before, but now I think it’ll fit comfortably.

IMG_2372

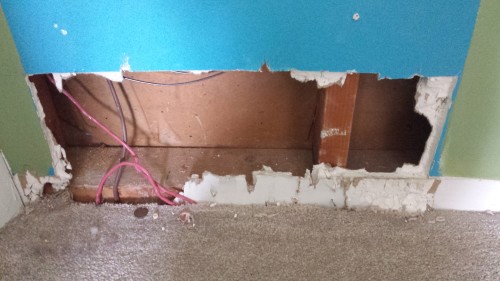
There is still some work to do but it’s coming along. In addition to the kitchen demo there was also a ton of spackling and sanding happening upstairs. I salvaged some of the drywall from the kitchen wall in order to make a patch which will go in this charming space where someone ran wires and didn’t close it back up. Or paint around it.

I don't even know what's happening here.
I don’t even know what’s happening here.

In the meantime I’ve got a million contractors scheduled. The crawlspace needs work (which we knew about before purchasing) and originally I was going to put it off because it’s not urgent. After spending 5 minutes under there I think we should do it sooner rather than later. It’s very damp all the time due to the fact that the soil has eroded below the bottom of the foundation and water has no way to escape.

Other big-ticket items are the heating system. I want to convert to gas, and then if we convert to gas the question is do we replace the aging hot water heater now. And if we do, do we get a tankless system. The tankless system is wayyyyyyy more expensive but in a house where we’ll regularly have 8+ people sleeping/showering a tankless system is very appealing. Even if we can only run one shower at a time (a complaint I’ve heard with tankless), 8 warm showers is better than 2 warm showers and 6 cold showers.

Right now I’m feeling a liiiiiittle bit overwhelmed by the scope of this project. We can talk about my sticker shock over the price of countertops another day.

1970s Shore Home

Kitchen Design First Draft

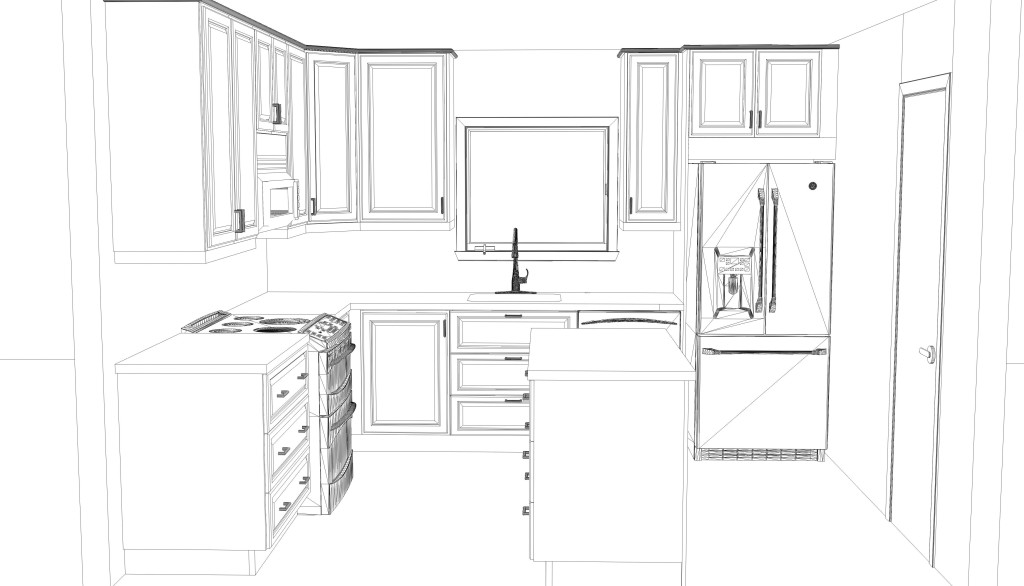
The first draft of the kitchen layout came in tonight. It’s a start, but there’s definitely some stuff I want to change (and a few things I realize I forgot to tell the designer). The coloring is all mine, it came to me black and white.

Perspective View
Perspective View

I totally forgot to tell them we plan to remove the soffit (i.e. the drywall box above the cabinets), which would make the space above the refrigerator way less awkward. I’m not sure if we’d raise the cabinets up higher, maybe just the ones above the oven? I’m short so I don’t want to put stuff too high, but it would be nice to have more clearance between the microwave and the range.

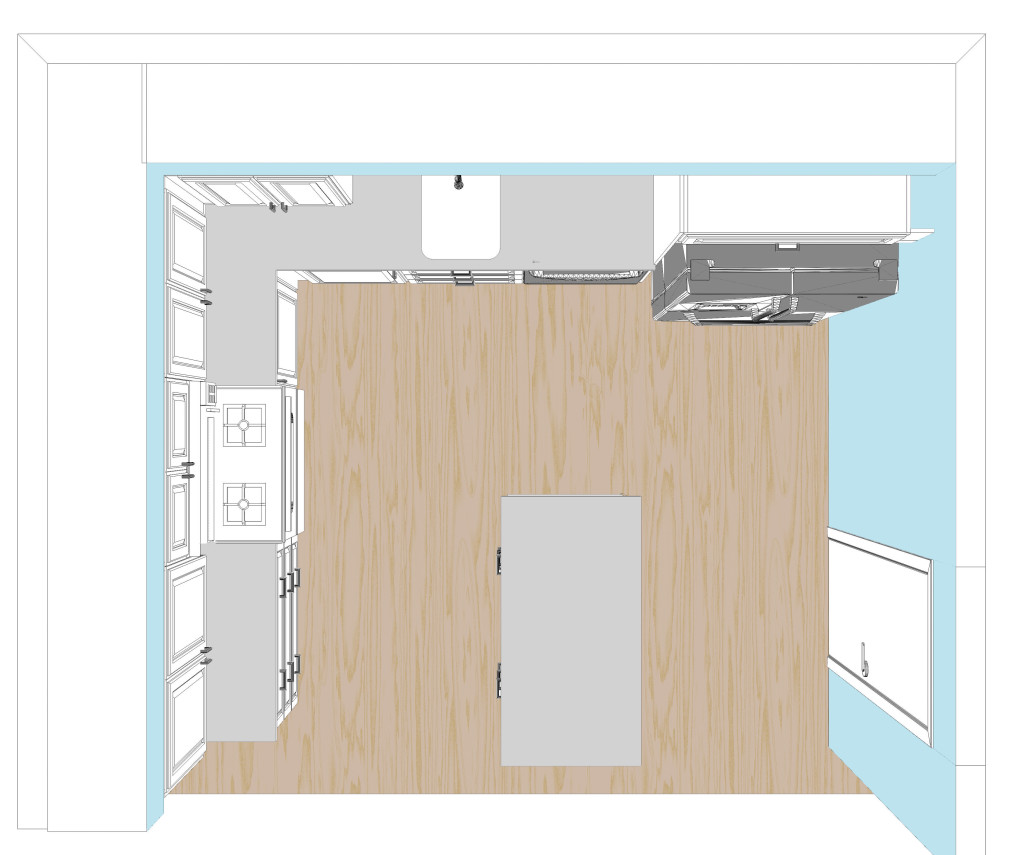
Top View
Top View

I’m really not sure how I feel about the island. I plan to tape it out this weekend to see how it feels in the space. It adds some much needed counter area but I’m worried it will feel awkward. I do like that one person could be cooking at the range, one person could be cutting veggies by the sink, and one person could be prepping on the island without anyone getting in each others’ way.

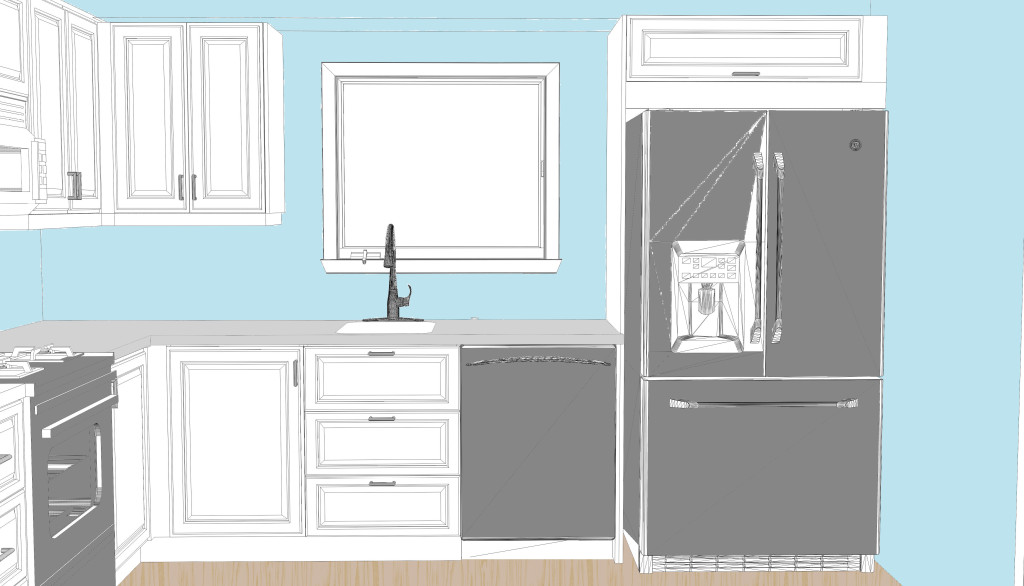
Back Wall
Back Wall

I forgot to tell them to put in a double sink, and I just generally don’t like the layout for the area by the window. One solution would be to move the dishwasher into the island (easy since the kitchen is above an open crawlspace). It would mean running extra water and electrical lines, but it might be worth it to get that space a little less awkward. Alternately I could just pick out a smaller refrigerator which would free up some space and give us more room for a bigger sink (but it would still be off center, which I might just have to live with). The off-center-ness of the sink would be a lot less irritating with a lower profile fixture as well.

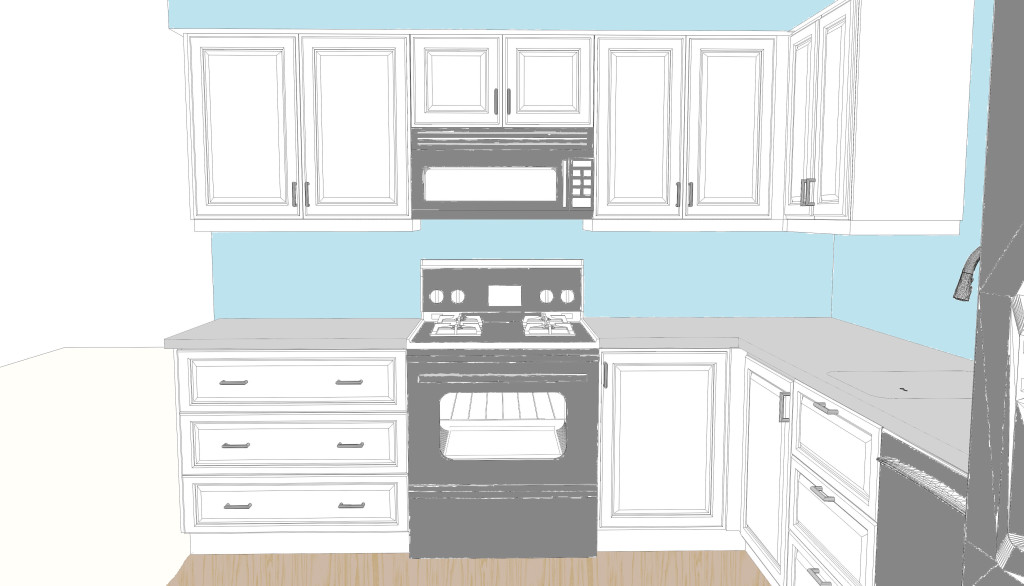
Left Wall
Left Wall

Seeing this drawing has me convinced we should remove the little partial wall that is currently next to the fridge (visible here). It makes no functional difference but it makes the room seem much more open without it. The wall does have some electrical in it so I’d have to have that moved. An electrician is coming down on Friday to quote everything.